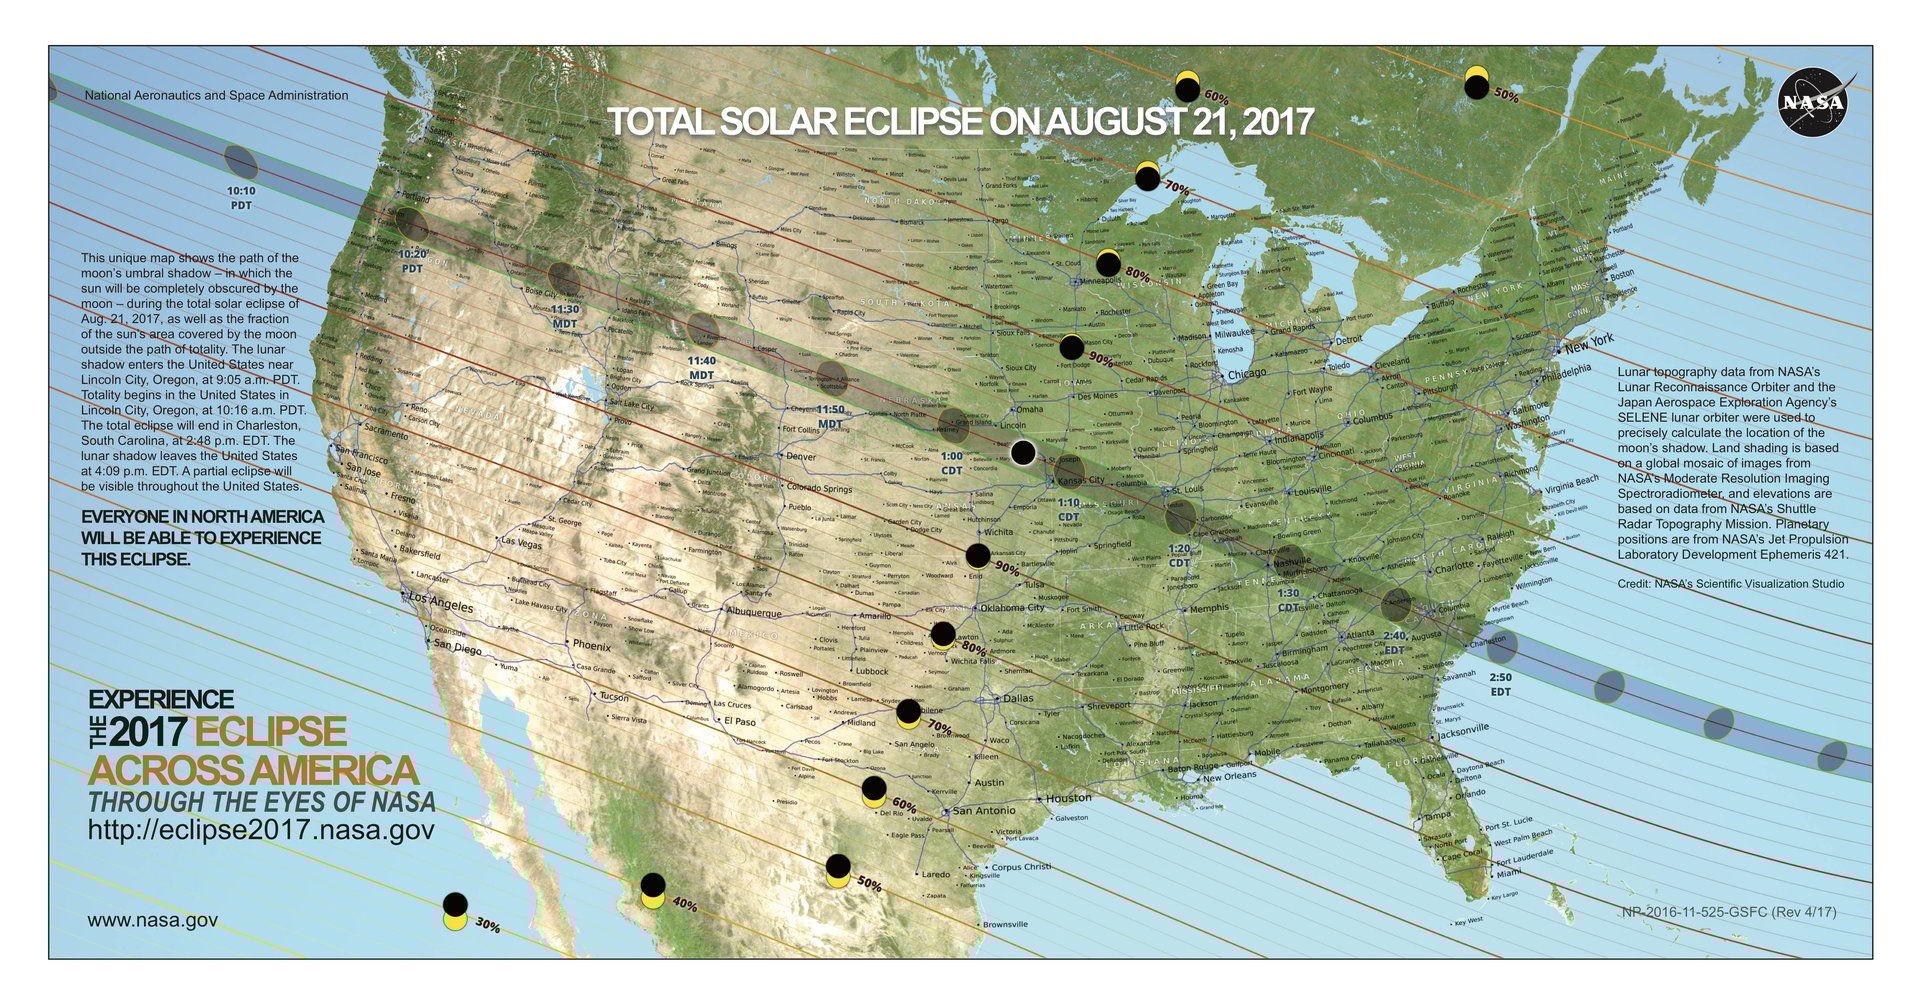
In case you haven’t heard, the sun and the moon will be starring in a celestial event on Monday, Aug. 21. If you’re in the US or Canada, you’ll likely be able to see at least a partial eclipse, and you might want to document the moment.
It is dangerous to view the eclipse with the naked eye. But can you take a photograph of the eclipse? On your phone, or with a camera? How does this whole eclipse-camera thing work?
It’s complicated. You can photograph the event, but you risk damaging your equipment and your eyes. And the answer is different depending on how much of the eclipse you can see.
If you are outside the path of totality, as most people will be, you should be using solar-eclipse glasses or viewers at all times to protect your eyes. The strength of the sun stays constant throughout and staring at the sun is very different from the occasional skyward glance on a sunny day. Also, it’s worth noting that eye damage from the sun can be delayed, and it may be a few hours before you realize what’s happened.
There is debate about whether or not it’s safe to take a photo of the sun with your phone. Apple $AAPL says yes; NASA says why risk it? Cameras will magnify the intensity and brightness of the sun, potentially causing harm to your equipment and your eyes if you look through a viewfinder.
If you’re using a DLSR or even a point-and-shoot, don’t point the lens straight at the sun. It’s just not a good idea. You risk damaging the lens, the sensor, and your eyes. Even Apple doesn’t want you to make this mistake.
However, if you are inside the path of totality, you will have a brief time in which your eyes and your camera will be safe, and you can take photos. NASA’s safety guidelines state:
If you are within the path of totality, remove your solar filter only when the moon completely covers the sun’s bright face and it suddenly gets quite dark. Experience totality, then, as soon as the bright sun begins to reappear, replace your solar viewer to look at the remaining partial phases.
The illustration below gives a visual guide to using a filter during the eclipse.
There are a few options for filters for point-and-shoot cameras, DSLRs, and phones. (Unfiltered photos aren’t going to turn out well because the sun will bloom.)
NASA offers a simple solution for phone photography: Put your eclipse glasses in front of the camera lens. Or buy an extra pair of glasses for your camera (they have a recommend list of approved glasses). NASA’s official photography guide also warns: “DO NOT USE SUNGLASSES!”
If you’ll be using a point-and-shoot camera or a DSLR, you can purchase a solar filter. However, proper solar filters can be pricey, so the other option is making your own. AstroSolar.com has a guide for that, by using a piece of solar film (about $45-50) and a few pieces of cardboard. This solution is temporary, but so are eclipses.
NASA wrote a guide to photographing the eclipse with your smartphone that gets pretty nerdy. Tips include: Practice at the location where you plan to watch, don’t use a digital zoom, use a timer so your camera will be steady, and use manual focus (by touching the screen).
If you’re using a DSLR, it’s more complicated:
If you’d like more details about exposure and setting, retired NASA astrophysicist Fred Espenak, known as MrEclipse.com, has written a Solar Eclipse Exposure Guide, with instructions for how to set your aperture, ISO, and shutter speed for each stage. B&H’s guide includes a similar chart with settings that assume an ISO of 200.
Finally, you should remember that lots of professional photographers will be taking photographs that you could probably buy or view later. The totality is going to be very brief and you don’t want to spend the whole time futzing with a camera. Consider just living in the moment.