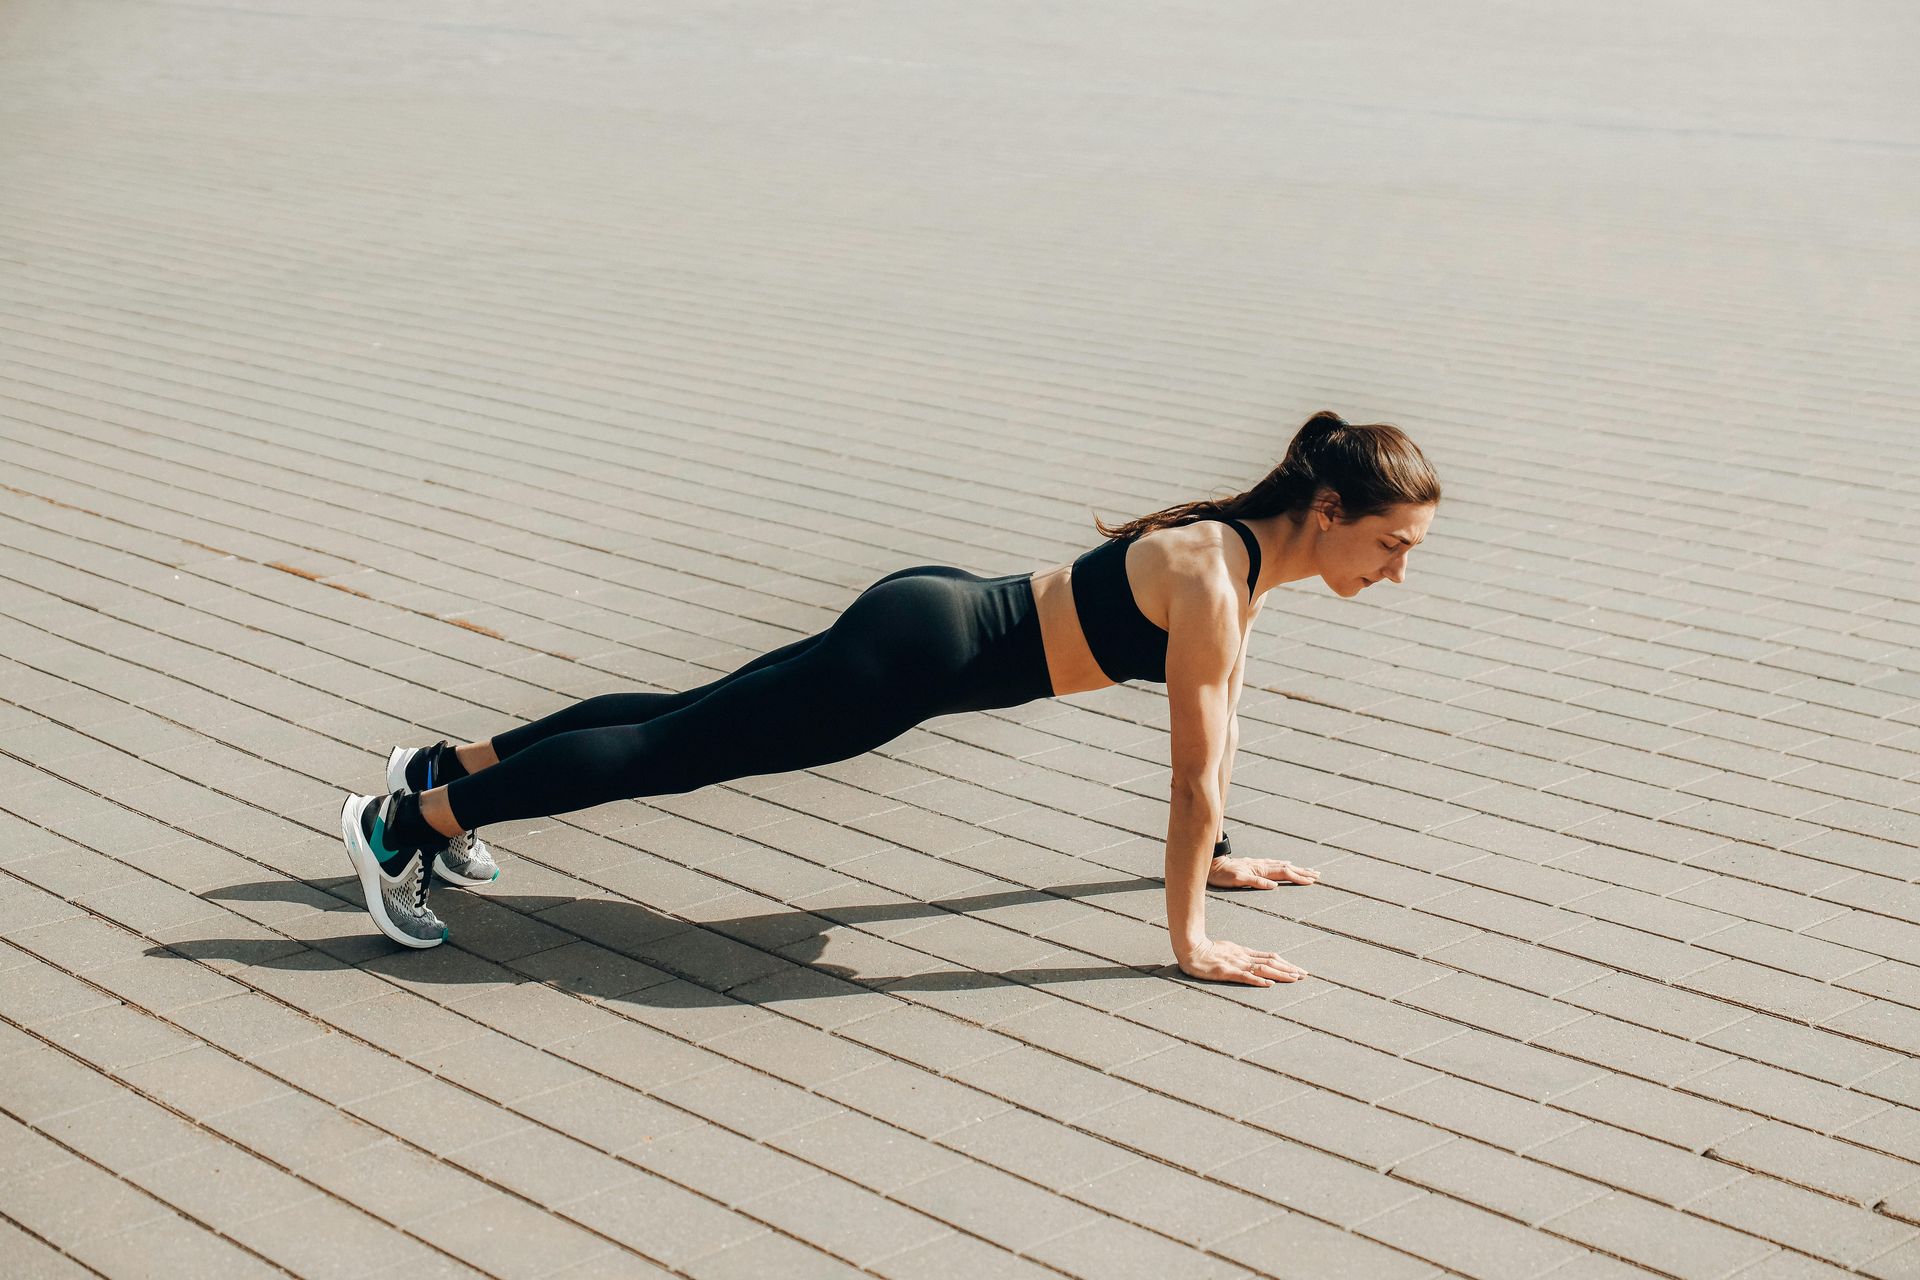
Maksim Goncharenok / Pexels
Gyms are useful. They are also expensive, time-consuming to get to, and closed at inconvenient hours. For the roughly 80% of American adults who do not meet federal physical activity guidelines, the friction of getting to a gym — finding the time, the money, the motivation to pack a bag and commute to a building — is often exactly the barrier that keeps them from exercising at all. The good news is that the barrier is largely invented. The human body is its own gym.
Bodyweight training — exercise that uses your own body as the primary source of resistance — is not a consolation prize for people who cannot afford a gym membership. It is a complete, evidence-backed approach to fitness that builds strength, endurance, flexibility, and cardiovascular capacity. The U.S. military has trained soldiers with calisthenics for over a century. Gymnasts develop extraordinary strength and body control without touching a barbell. Martial artists build explosive power through movement alone.
The 25 exercises on this list require no equipment, no membership, and no special space. Most can be done in a standard living room. Some require a bit more room to move. None require anything you do not already own. They are organized roughly from more accessible to more demanding, though "beginner" and "advanced" are relative — a push-up is a beginner exercise for some people and an aspirational goal for others, and that is entirely fine. Every exercise here was once new to everyone who now does it without thinking.
A few practical notes before the slides begin. Form matters more than repetition count. A well-executed push-up does more than a sloppy one and is far less likely to result in injury. Rest between sets is not laziness — it is how muscle repair and strength adaptation happen. And consistency beats intensity every time: three short sessions per week done reliably will produce more results over a year than occasional brutal workouts followed by long breaks.
This list covers pushing movements, pulling approximations, leg work, core training, explosive power, and full-body conditioning. It includes exercises that are appropriate for first-time movers and exercises that will challenge people who have been training for years. Whatever your starting point, there is something here that will make you stronger, more capable, and more comfortable in your own body.
1 / 25
The wall sit looks deceptively simple. You slide your back down a flat wall until your thighs are parallel to the floor, as if sitting in an invisible chair, and then you hold that position. What makes it effective — and genuinely difficult — is that the isometric contraction it demands of your quadriceps, glutes, and calves is sustained and unrelenting. There is no eccentric or concentric phase to give the muscles a break. You simply hold, and the burn arrives quickly.
For beginners, a wall sit is an excellent introduction to lower body strength training because the wall removes the balance challenge of a squat, allowing you to focus entirely on the muscular effort. Start with a target of 20 to 30 seconds and work toward 60 seconds as a meaningful milestone. Once you can hold 60 seconds comfortably, try extending to 90 seconds or two minutes — the latter is a goal that will challenge most people regardless of fitness level.
The muscles primarily worked are the quadriceps — the four muscles at the front of the thigh that are responsible for extending the knee. The gluteus maximus and the hamstrings work isometrically to maintain hip position, and the calves engage to keep the feet flat on the floor. Because the knee is under sustained load in a bent position, people with existing knee problems should approach this exercise cautiously or skip it in favor of a shallower angle.
The wall sit is also a useful mental training tool. Because the discomfort is predictable — it will increase steadily for as long as you hold — it teaches you to manage effort and discomfort in a controlled way. That capacity to stay with discomfort rather than immediately retreating from it transfers to other exercises and, arguably, to other areas of life.
Progressions to try once the standard wall sit feels manageable: single-leg wall sit, in which you extend one leg straight out and hold the position on the other leg alone; or weighted wall sit, in which you rest a heavy book or bag on your thighs. Both increase the demand significantly.
2 / 25
The jumping jack is one of the most recognizable exercises in existence and is sometimes dismissed as too simple to be worth including in a serious fitness routine. That dismissal is unwarranted. The jumping jack elevates the heart rate quickly, warms the body efficiently, develops shoulder mobility through the overhead arm movement, and requires nothing beyond a patch of floor and sufficient ceiling height — making it a genuinely useful exercise in a wide range of contexts.
Stand with feet together and arms at your sides. Jump both feet outward to a position wider than shoulder-width while simultaneously raising both arms overhead — they can meet above the head or just reach shoulder height, depending on your mobility. Then jump the feet back together and lower the arms. That is one repetition.
At low intensity, jumping jacks serve well as a warm-up or active recovery movement between harder exercises. At high intensity — performed as fast as possible for 30 to 60 seconds — they produce a meaningful cardiovascular stimulus. In circuit formats, they fill a useful role as a recovery movement between demanding strength exercises, keeping the heart rate elevated without accumulating the fatigue that more intense cardio intervals would produce.
The overhead arm raise benefits shoulder mobility over time, particularly for people who spend long periods with arms at their sides or working at a keyboard. The repeated overhead reach helps maintain the range of motion in the shoulder that desk work tends to reduce.
Progressions include star jumps — a larger version with wider leg spread and full arm extension — and cross jacks, in which the feet cross in front of each other alternately rather than jumping wide, adding a coordination challenge and a slightly different movement pattern.
3 / 25
The glute bridge is one of the most effective exercises for the posterior chain — the muscles along the back of the body, particularly the glutes and hamstrings — and it is accessible enough that almost anyone can perform it from day one. You lie on your back with your knees bent and your feet flat on the floor, roughly hip-width apart, close enough to your body that your fingertips can just touch your heels. From there, you press your feet into the floor and drive your hips upward until your body forms a straight line from shoulders to knees. Then you lower back down with control.
The glute bridge directly addresses one of the most common muscular imbalances in people who spend significant time sitting: underactive, weak glutes. When you sit for extended periods, the hip flexors at the front of the hips shorten and tighten, and the glutes at the back can become inhibited — less responsive and less strong than they should be. This imbalance contributes to lower back pain, poor posture, and reduced athletic performance. The glute bridge activates and strengthens the glutes directly, helping to correct that pattern.
To maximize glute engagement, focus on squeezing the glutes hard at the top of the movement and avoid letting the lower back arch excessively. The movement should come from the hips, not the spine. Driving through the heels rather than the balls of the feet tends to increase glute activation. Holding the top position for two to three seconds before lowering adds intensity without adding repetitions.
Common progressions include the single-leg glute bridge, in which you extend one leg straight and perform the movement on the other leg alone — significantly harder and a good test of unilateral hip strength. The hip thrust variation, performed with your upper back elevated on a sofa or bed, increases the range of motion and allows a stronger contraction at the top.
For people with lower back discomfort, the glute bridge is often recommended precisely because it strengthens the posterior chain without loading the spine — a major advantage over exercises like deadlifts and back extensions that require equipment and put more direct stress on the lumbar region.
4 / 25
The dead bug is an unusual name for an exercise that is quietly one of the most effective core stability movements available. You lie on your back with your arms extended straight toward the ceiling and your legs raised so that your knees are bent at 90 degrees directly above your hips — a position that, when you lower opposite limbs, vaguely resembles an upturned insect. The movement involves slowly lowering one arm overhead toward the floor while simultaneously extending the opposite leg until it nearly touches the floor, then returning both to the starting position and repeating on the other side.
What makes the dead bug particularly valuable is what it trains: the ability to move your limbs while keeping your spine neutral and your core stable. This is not the same as having strong abs in the sense of being able to crunch hard. It is the more functional quality of being able to resist spinal extension and rotation while your limbs apply force in various directions — the kind of core control that protects the lower back during lifting, running, and virtually every other physical activity.
The key technical point is that the lower back must remain in contact with the floor throughout the movement. As you lower your leg and opposite arm, there will be a strong pull toward lower back extension — a tendency to arch the back away from the floor. Resisting that pull is the entire point of the exercise. If your back lifts, the range of motion is too large for your current level of control. Shorten the movement until you can maintain contact throughout.
Breathing adds another layer of challenge. Exhale fully as you lower your limbs, which naturally engages the deeper core muscles and makes it easier to maintain spinal position. Inhale as you return to the starting position. The combination of coordinated movement, breath control, and spinal stability makes the dead bug more demanding than it initially appears.
Once you have mastered the basic version, progressions include adding a pause at the bottom of each repetition or straightening the working leg fully so it travels from directly above the hip to just above the floor in a long arc.
5 / 25
The squat is one of the most fundamental human movements — the act of lowering and raising the body by bending and extending at the hips and knees. Humans squat instinctively from infancy. Many cultures around the world use a deep squat as a resting position. The bodyweight squat, performed without any external load, is the foundation from which heavier loaded variations are built and a complete exercise in its own right for developing lower body strength, mobility, and movement quality.
Stand with your feet roughly shoulder-width apart, toes turned out slightly — the exact angle varies by individual anatomy, so experiment to find what feels natural. Keeping your chest up and your weight distributed across the whole foot, lower your hips back and down as if sitting into a chair that is just slightly too far behind you. Aim for thighs parallel to the floor or lower, depending on your mobility. Then drive through the floor to return to standing.
The cues "chest up" and "knees out" address the two most common breakdowns in squat form. When the chest drops, the torso folds forward and the lower back rounds under load. When the knees collapse inward — a pattern called valgus collapse — it places stress on the knee joint and reduces the glute engagement that makes squats effective. Both are addressable with attention and practice.
For beginners, squatting to a chair — hovering just above the seat and standing back up — provides a target for depth and removes the uncertainty about how far to descend. For people with limited ankle mobility, which often prevents the heels from staying flat on the floor in a deep squat, elevating the heels slightly on a folded towel or a low book can help while mobility work brings the ankles up to speed.
The bodyweight squat builds the quadriceps, glutes, and hamstrings. It also develops hip and ankle mobility over time. As a conditioning tool, high-repetition squat sets — 50 to 100 repetitions — build significant muscular endurance and cardiovascular demand without any weight at all.
6 / 25
Lunges are single-leg exercises, meaning each leg works independently rather than together, and that unilateral quality makes them more demanding and more functional than bilateral exercises like squats. The reverse lunge — stepping backward rather than forward — is generally easier on the knees than a forward lunge and is a good starting point for people new to lunge variations. It also trains balance, coordination, and the hip flexor strength needed for activities like walking, running, and climbing stairs.
Stand tall with your feet together. Step one foot directly backward, lowering your rear knee toward the floor while keeping your front shin as vertical as possible. The front thigh should approach parallel to the floor. Then push through the front foot to return to standing. Alternate legs or complete all reps on one side before switching.
The backward step changes the loading pattern compared to a forward lunge. In a forward lunge, the front shin often travels forward significantly over the toes as you step, which increases the knee extension force. In a reverse lunge, the rear leg provides the stepping motion and the front knee stays more stacked over the ankle, which many people find more comfortable and easier to control.
The primary muscles worked are the quadriceps of the front leg, the glutes of both legs, and the hamstrings. The hip flexors of the rear leg get a good stretch at the bottom of the movement — particularly useful for people who sit for long periods and have tight hip flexors. The core and stabilizing muscles of the standing leg work throughout to maintain balance.
Common progressions include the walking lunge — taking continuous steps forward in lunge position rather than returning to standing between reps — and the deficit reverse lunge, in which the front foot is elevated on a step, increasing the range of motion at the hip and making the movement significantly harder. Adding a knee drive — bringing the rear knee forward and up at the top of the movement — increases the balance challenge and engages the hip flexors more actively.
7 / 25
The push-up is arguably the most complete upper body exercise available without equipment. It trains the pectorals, the anterior deltoids, the triceps, and — because the body must remain in a rigid plank position throughout — the core. Done well, it builds meaningful upper body strength. Done in high volume, it builds endurance. Done as part of a circuit, it raises the heart rate substantially. Few exercises do as much with as little.
The standard push-up begins in a plank position — hands placed slightly wider than shoulder-width, fingers pointing forward or turned out slightly, feet together or hip-width apart, body forming a straight line from head to heels. You lower your chest toward the floor by bending the elbows — elbows should track at roughly 45 degrees from the body, not flared wide — until your chest is an inch or two from the ground, then press back up to the starting position.
The most common error is allowing the hips to sag or rise. Both indicate that the core is not maintaining the rigid connection between upper and lower body that makes a push-up effective. If the hips sag, the lower back takes on load it shouldn't. If the hips rise, the movement becomes easier but less useful. The body should move as a single unit, like a falling plank.
For beginners who cannot yet perform a standard push-up, the modification is to lower the knees to the floor rather than keeping the legs straight. This reduces the load significantly and allows the movement pattern to be learned. Work toward the full version by gradually straightening the body over sessions and weeks. Incline push-ups — hands elevated on a table or counter — are another modification that reduces difficulty while maintaining a full-body plank position.
Advanced progressions include close-grip push-ups, which shift more work to the triceps; wide-grip push-ups, which emphasize the chest; decline push-ups with feet elevated, which load the upper chest and shoulders more; and archer push-ups, in which one arm travels wide while the other bends, approximating a one-arm push-up.
8 / 25
The tricep dip targets the triceps — the muscles at the back of the upper arm — along with the anterior deltoids and lower pectorals. It is one of the few exercises in this list that technically uses a piece of furniture, but since virtually any low, stable surface works — a chair, a sofa, a step, a low wall — it qualifies as a no-equipment exercise in any realistic sense.
Sit on the edge of your surface with your hands gripping the edge beside your hips, fingers pointing forward. Slide your hips forward off the edge so your weight is supported by your arms. Your feet should be flat on the floor, knees bent at roughly 90 degrees for a more accessible version, or extended straight with heels on the floor for a harder version. Lower your body by bending the elbows, keeping them pointing directly behind you rather than flaring out to the sides. Lower until your upper arms are roughly parallel to the floor — or as far as comfortable — then press back up.
The key technical point is elbow direction. Elbows flaring out to the sides puts the shoulder joint in a compromised position and shifts the load away from the triceps. Keeping the elbows pointing straight back — as if they were on rails — maintains shoulder integrity and maximizes tricep engagement.
People with pre-existing shoulder issues, particularly anterior shoulder instability, should approach dips cautiously. The movement places the shoulder in internal rotation under load, which can be problematic for certain shoulder conditions. If there is any pain in the front of the shoulder during the exercise, stop and find a substitute.
Progressions include straightening the legs fully, which increases the load on the arms. Single-leg dips — extending one leg off the floor — add a balance and stability challenge. To make the exercise significantly harder without equipment, try performing dips between two chairs of similar height placed behind you and to each side, which removes the floor contact entirely and requires the arms to support full body weight.
9 / 25
The pike push-up is the best approximation of an overhead pressing movement available without equipment. It targets the deltoids — particularly the front and lateral heads — along with the upper trapezius and triceps, and it builds the shoulder strength needed to progress toward a handstand push-up, which is one of the most demanding bodyweight exercises in existence.
Begin in a standard push-up position, then walk your feet toward your hands and push your hips up until your body forms an inverted V — similar to a downward dog position in yoga. Your head should be between your arms, looking toward your feet. From this position, bend your elbows to lower the top of your head toward the floor in front of your hands, then press back up. The movement should be straight down and straight back up, not forward, which would convert it into a push-up.
The angle of your body relative to the floor determines how much shoulder work is involved. The more vertical your torso — achieved by walking your feet closer to your hands and raising your hips higher — the more the exercise resembles a vertical press and the harder your shoulders work. The more horizontal your torso, the more it resembles a regular push-up.
Common errors include letting the head shoot forward rather than tracking straight down, which changes the mechanics and reduces shoulder engagement. Another is allowing the hips to drop as fatigue sets in, which again converts the movement toward a push-up.
The pike push-up is the natural progression before wall-assisted handstand push-ups, in which you perform the movement with your feet on a wall and your body angled more steeply. That variation in turn leads to the freestanding handstand push-up — a movement that requires significant balance skill in addition to the strength the pike push-up builds.
10 / 25
The superman hold trains the posterior chain — specifically the spinal erectors, the glutes, and the upper back muscles including the rhomboids and rear deltoids — from a prone position. It is a low-impact exercise appropriate for beginners and a useful complement to the anterior core work done in exercises like the dead bug and plank, as it strengthens the muscles on the opposite side of the body.
Lie face down on the floor with your arms extended straight overhead, like the beginning of a dive, and your legs straight behind you. From this position, simultaneously lift your arms, chest, and legs off the floor as high as comfortable, squeezing the glutes and upper back muscles. Hold the top position for two to three seconds, then lower back down with control. That is one repetition.
The height you can lift is limited by your flexibility and strength, and it varies considerably between individuals. The goal is not maximum height but maximum muscle engagement — squeezing hard at the top and controlling the return. People with limited thoracic mobility may find the chest elevation modest, and that is fine. The muscular engagement matters more than the visual appearance of the movement.
The superman hold is particularly useful for people who spend long periods sitting at a desk, as it directly counteracts the forward-rounded posture that prolonged sitting encourages. The spinal erectors, when weak, allow the lumbar spine to flatten or round under load. The upper back muscles, when weak, allow the shoulders to round forward. Regular superman holds build resistance to both tendencies.
A progression is the alternating superman, in which you lift one arm and the opposite leg rather than both sides simultaneously. This adds a rotational stability challenge, as the body must resist twisting when one side is raised and the other is not. It is harder than it sounds.
11 / 25
The plank is a foundational core exercise and one of the most broadly applicable movements in this list. Unlike crunches or sit-ups, which train the rectus abdominis through a flexion movement, the plank trains the entire anterior core — including the transverse abdominis, the obliques, and the stabilizers of the spine — to resist extension and maintain a neutral position under sustained load. That quality of resisting movement, rather than producing it, is precisely what the core is called upon to do in most real-world physical situations.
The standard forearm plank is performed face down, supported on the forearms and toes, with the elbows directly below the shoulders. The body forms a straight line from head to heels. The hips should be level — neither sagging toward the floor nor raised toward the ceiling. The head stays neutral, neither craning up nor dropping down. You hold this position.
The temptation during a plank is to let the hips drift upward as fatigue sets in, which unloads the core and allows you to hold longer without actually training. Resist this. If the hips are rising, the set is over. Quality of position matters more than duration.
For beginners, 20 to 30 seconds is a reasonable starting target. A well-executed one-minute plank represents a solid level of core endurance for most people. Beyond 60 to 90 seconds, the additional benefit of simply holding longer diminishes — at that point, progressions to harder variations are more productive than extending duration.
Progressions include the straight-arm plank (hands rather than forearms on the floor, which adds shoulder stability demand), the side plank (which isolates the obliques), plank shoulder taps (tapping each shoulder with the opposite hand while maintaining hip stability), and plank reaches (extending one arm forward while maintaining position). Each variation adds a new demand while retaining the core stability foundation.
12 / 25
The mountain climber bridges the gap between strength training and cardiovascular conditioning. It is performed from a straight-arm plank position — hands directly below the shoulders, body in a rigid line — and involves driving one knee toward the chest while keeping the other leg extended, then switching in a running motion. The faster the switches, the more it functions as a cardiovascular exercise. Slower, more controlled repetitions emphasize core stability and hip flexor strength.
The core challenge of mountain climbers is maintaining plank position while the legs move at speed. As one knee drives forward, there is a tendency for the hips to rise and the lower back to round — both of which indicate that the core has lost its bracing position. The hips should stay level and the spine neutral throughout, regardless of how quickly the legs are moving.
Begin with slow, deliberate reps — driving one knee fully toward the chest, returning it fully, then switching. When you can maintain perfect position through 20 slow reps per side, begin increasing the pace. At full speed, mountain climbers produce a significant heart rate elevation within 30 to 40 seconds and are a legitimate high-intensity cardiovascular stimulus.
The primary muscles worked are the hip flexors, the core (particularly the obliques as the knee drives across the body in some variations), the shoulders (which work isometrically to maintain the plank), and the quadriceps and glutes of the working leg. As a full-body exercise, mountain climbers sit in a category of their own — they train strength, stability, and cardiovascular endurance in a single movement.
Variations include the cross-body mountain climber, in which the knee drives toward the opposite elbow rather than straight to the chest. This adds a rotational core challenge and increases oblique engagement. Slow mountain climbers performed with a three-second hold at the chest position become a highly effective hip flexor strengthening exercise with a core stability overlay.
13 / 25
The sit-up is one of the most recognized exercises in existence and has been a staple of military fitness tests, school PE classes, and home workouts for generations. It trains the rectus abdominis — the muscle responsible for the visible "six-pack" — along with the hip flexors, through a full range of spinal flexion. It is more demanding than a crunch because the range of motion is larger, and it has the advantage of requiring absolutely nothing beyond a floor.
Lie on your back with your knees bent, feet flat on the floor, and hands behind your head or crossed over your chest. From this position, curl your torso up until you are sitting upright — or close to it — then lower back down with control. The lowering phase matters as much as the rising phase. Dropping back down quickly bypasses the eccentric contraction that makes the exercise effective.
The sit-up has attracted criticism in some fitness communities because, done with poor form or in very high volume, it places repeated flexion load on the lumbar spine, which can be problematic for people with existing lower back issues. For healthy individuals without back problems, the sit-up is a straightforward and effective core exercise. If lower back discomfort is a concern, the crunch — which involves a smaller range of motion and keeps the lower back in contact with the floor — is a reasonable alternative.
Anchoring the feet under a heavy piece of furniture increases the hip flexor contribution to the movement and reduces the pure abdominal load. Performing sit-ups with feet unanchored increases the demand on the abdominals, as they must work harder to initiate the movement without the mechanical advantage of foot fixation.
Progressions include decline sit-ups (performed on an angled surface with the head lower than the feet), adding a twist at the top of the movement to engage the obliques, and adding a straight-leg raise at the bottom to extend the core challenge.
14 / 25
The bicycle crunch is consistently rated among the most effective exercises for the rectus abdominis and the obliques — the muscles that run diagonally along the sides of the core — and it achieves that effectiveness through a combination of spinal flexion and rotation. It requires no equipment and minimal space, making it one of the most accessible and productive core exercises available.
Lie on your back with your hands loosely behind your head — not interlaced, and not pulling on the neck — and your knees bent at 90 degrees with your feet off the floor. From this position, simultaneously extend one leg straight out and rotate your torso to bring the opposite elbow toward the bent knee. Then switch — extend the other leg, rotate the other direction, and bring the other elbow toward the other knee. The movement should be fluid and controlled, like the pedaling of a bicycle, which is where the name comes from.
The most common error is pulling on the neck with the hands. The hands are there to support the weight of the head only — the rotation should come entirely from the torso, not from yanking the head toward the knee. If the neck is sore after bicycle crunches, the hands are almost certainly doing too much of the work.
Speed matters in a specific way. Performed slowly and with full rotation, bicycle crunches are a high-quality strength and control exercise for the obliques and rectus abdominis. Performed very quickly and without full rotation, they become easier and less effective. Aim for a tempo at which you can feel a genuine contraction at each rotation rather than just moving your arms and legs in a rapid pattern.
A good target for beginners is three sets of 15 to 20 repetitions per side. As strength develops, extending to 30 repetitions per side or adding a pause at the point of maximum rotation increases the challenge without requiring any progression in equipment or space.
15 / 25
The leg raise targets the lower portion of the rectus abdominis and the hip flexors through a movement that challenges people who have otherwise developed reasonable core strength through planks and sit-ups. Many people find that their lower abs are a relative weak point — exercises that involve spinal flexion tend to bias the upper abdominal region, and the leg raise addresses the gap.
Lie flat on your back with your legs straight and your arms at your sides, palms pressing into the floor. Keeping your legs as straight as possible, raise them from the floor until they are pointing toward the ceiling — or as close to that as your hamstring flexibility allows. Then lower them back toward the floor slowly and with control, stopping just before the heels touch the ground. Hold briefly, then raise again.
The lower back is the critical variable. As the legs lower, the pelvis will tend to tilt anteriorly — tipping the front of the hip down — which causes the lower back to arch away from the floor. That arch represents a loss of spinal control and a shift of load from the abdominals to the lumbar spine. To prevent it, consciously press the lower back into the floor as the legs descend, and stop the descent before the back lifts. Over time, as the core strengthens, you will be able to lower the legs further before the back lifts.
For beginners, bent-knee leg raises — where the knees are bent rather than straight — reduce the lever length and make the exercise more manageable. As strength develops, gradually straightening the legs increases the difficulty. Adding a small hip lift at the top of the movement — raising the hips off the floor once the legs are vertical — increases the challenge further and begins to approximate a hanging leg raise without the need for a bar.
16 / 25
High knees are a running-in-place variation that emphasizes hip flexor strength and cardiovascular conditioning while requiring nothing beyond a small patch of floor. They serve as a warm-up exercise in their most accessible form and as a genuine conditioning tool in their more demanding application.
Stand tall and begin jogging in place, but drive each knee upward until the thigh is parallel to the floor — or as close to it as possible — with each step. The arms pump in opposition to the legs, as they would in running. The core stays engaged to prevent the torso from leaning back as the knees rise. The landing should be on the ball of the foot rather than the heel.
The distinction between high knees done well and high knees done poorly is mostly in the height of the knee drive. Jogging in place with low knees is aerobic but does not significantly develop hip flexor strength or running mechanics. Genuinely driving the knee to hip height or above on each step is substantially harder and provides a meaningful hip flexor training stimulus.
High knees are typically done for time rather than repetitions: 30 to 60 seconds of sustained effort at a pace that elevates the heart rate significantly. They fit naturally into circuit training, serving as a cardiovascular interval between strength exercises. Three 30-second intervals with 30 seconds of rest in between is a useful introductory format.
As a running drill, high knees have direct transfer to running mechanics — the hip flexor strength and knee drive pattern they develop are exactly the qualities that improve running stride length and cadence.
17 / 25
The lateral bound, also called a skater jump, is a plyometric exercise that develops single-leg power and the lateral stability that most traditional exercises — which operate in the forward-backward plane — do not address. It mimics the movement pattern of a speed skater: a lateral jump from one leg, landing on the other, with a brief hold to establish balance before jumping back.
Stand on one foot. Push off laterally — sideways — as explosively as you can, covering as much horizontal distance as possible. Land on the opposite foot, bending the knee to absorb impact, and hold the landing position for one to two seconds before pushing back the other way. The landing hold is important: the balance requirement forces the stabilizing muscles of the ankle, knee, and hip to work in ways that continuous rapid lateral bounds would bypass.
The lateral bound primarily trains the gluteus medius — the side-lying muscle of the hip that controls frontal-plane stability — along with the quadriceps, hamstrings, and calves. The gluteus medius is frequently undertrained in people who do primarily forward-backward exercises, and weakness in this muscle is associated with knee pain and iliotibial band problems. Lateral bounds address this gap directly.
Coverage of distance is the progression metric. As single-leg power and balance improve, the distance covered in each bound increases. A useful benchmark is being able to bound three to four feet in each direction while landing with a controlled, stable single-leg position. Beyond that, increasing the pace of bounds and reducing the hold time builds more cardiovascular demand.
This exercise requires slightly more space than most on this list — a clear path of about ten feet is ideal. It is well-suited to a hallway, a yard, or any open indoor or outdoor space.
18 / 25
The bear crawl is a full-body locomotion exercise that develops shoulder stability, core strength, and coordination in a way that stationary exercises cannot replicate. It involves moving on all fours — hands and feet on the floor, knees hovering just above the ground — and traveling forward, backward, or laterally. The hovering knee position is what makes it challenging: maintaining that hover while moving requires sustained engagement of the core and shoulder girdle.
Begin on all fours with your hands directly below your shoulders and your knees below your hips. Lift your knees about an inch off the floor. From this position, move forward by stepping the right hand and left foot simultaneously, then the left hand and right foot — a contralateral movement pattern that mirrors natural walking mechanics. Keep the hips low and level throughout. The tendency is for the hips to rock from side to side as you move; minimizing that rocking is the core challenge.
The bear crawl can be performed for distance — crawling a set number of feet or across a room — or for time. Crawling 20 feet and back, five times, with brief rest between rounds is a deceptively demanding full-body conditioning challenge. The shoulder stabilizers work continuously to manage the impact of each hand placement, and the core works to prevent the spine from sagging or rotating as the limbs move.
Backward bear crawls, in which you move in reverse, change the mechanical demand and are generally harder than forward crawls. Lateral bear crawls develop a different aspect of shoulder and hip stability. Loaded bear crawls — with a weight plate or heavy bag on the back — are significantly more demanding, though that moves beyond the no-equipment category.
19 / 25
The jump squat takes the standard bodyweight squat and adds a plyometric component — an explosive jump from the bottom of the movement — that transforms it from a strength exercise into a power and conditioning exercise simultaneously. Plyometric training, which involves rapid stretch-shortening cycles of muscle action, develops the capacity to generate force quickly, which is relevant to athletic performance, and elevates heart rate rapidly, which is relevant to cardiovascular conditioning.
From a standing position with feet shoulder-width apart, lower into a squat position — thighs approximately parallel to the floor. From the bottom of the squat, drive explosively through the legs to jump as high as possible, extending fully through the ankles, knees, and hips. Land softly — through the toes first, then the heels, with the knees slightly bent to absorb impact — and immediately lower into the next squat. The landing and the descent into the next squat should be fluid rather than a hard stop followed by a pause.
Landing mechanics matter significantly. Landing stiff-legged — with the knees nearly straight — sends a large shock through the knee joint and lower limb. Soft landings that immediately transition into knee flexion distribute that force across the muscles rather than the joints. If you hear a loud thud when landing, the landing is probably too stiff.
Jump squats are not appropriate for people with knee pain or acute lower limb injuries. The impact forces, while manageable for healthy joints, can aggravate existing conditions. For people in that situation, a fast bodyweight squat without leaving the ground produces similar cardiovascular demand with less impact.
The exercise is highly effective in interval formats: 20 seconds of maximum-effort jump squats followed by 40 seconds of rest, repeated for five to eight rounds, produces a significant cardiovascular and metabolic response in a short period of time.
20 / 25
The single-leg Romanian deadlift is one of the most effective exercises for developing posterior chain strength, single-leg stability, and the balance and proprioception needed for athletic movement. Without weights, the challenge comes entirely from balance and control — and for most beginners and intermediate exercisers, that challenge is significant enough to make the exercise productive without any added load.
Stand on one foot. With a slight bend in the standing knee, hinge forward at the hip — keeping the back flat and the spine neutral — while simultaneously raising the non-standing leg behind you. Continue until your torso is roughly parallel to the floor and the raised leg forms a straight line with the spine, like a capital T. Then drive through the standing heel to return to upright. Perform all reps on one side before switching.
The hinge movement — rotating around the hip rather than bending at the spine — is the technical key. Many people, when they first attempt this exercise, round the lower back and tip forward at the waist rather than hinging cleanly at the hip. To find the hip hinge pattern, try it with your back against a wall: reach your hips backward to touch the wall without rounding your spine, and that is the motion you are looking for.
The hamstrings of the standing leg stretch under load as the torso lowers — this is the eccentric component that makes Romanian deadlifts so effective for hamstring development. The glutes of the standing leg work hard to control the descent and drive the return to upright. The deep stabilizers of the ankle and knee — muscles that rarely get targeted in bilateral exercises — work continuously to maintain balance.
Balance will improve significantly with practice. If the exercise is initially too difficult to perform in a controlled way, holding lightly onto a wall or chair for balance while working on the hinge mechanics is a reasonable starting point.
21 / 25
The tuck jump is a plyometric exercise that develops explosive lower body power and is one of the more demanding exercises on this list. It involves jumping as high as possible and driving the knees toward the chest at the peak of the jump — the tuck — before landing and immediately jumping again. The combination of maximum jump height and knee drive makes it harder than a standard jump squat and a useful measure of lower body power and coordination.
Stand with feet shoulder-width apart and a slight bend in the knees. Swing your arms back and then forward explosively as you jump, using the arm swing to increase jump height. At the peak of the jump, drive both knees toward your chest as quickly as possible, briefly tucking the body. Extend the legs again before landing, and land softly with bent knees to absorb impact. Immediately jump again without a pause between repetitions.
The arm swing is often underused. A strong, coordinated arm swing can add several inches to jump height, and that additional height gives more time to complete the tuck before landing. Practice the arm swing — back and up — as a distinct component of the technique rather than treating it as an afterthought.
Landing between repetitions is the highest-injury-risk moment in this exercise. The knees should be soft on landing, the feet should contact the ground in a balanced position, and the landing force should be distributed through the ankle, knee, and hip rather than absorbed entirely by the knee. If landing feels out of control, slow down and allow a full reset between jumps before working back up to continuous repetitions.
Because of the impact forces involved, tuck jumps are best performed on a slightly forgiving surface — a wooden floor, a grass patch, or a light exercise mat — rather than concrete.
22 / 25
The burpee is the exercise most people cite when asked what they find most difficult in a bodyweight workout, and for good reason. It combines a squat, a plank, a push-up, and a jump into a single continuous movement that taxes the entire body simultaneously. Done in volume, it is one of the most effective cardiovascular conditioning exercises that requires no equipment. Done with proper form, it also builds strength in the chest, shoulders, arms, legs, and core.
The standard burpee begins standing. Drop your hands to the floor and jump or step your feet back into a plank position. Perform a push-up. Jump or step your feet back toward your hands. Then explosively jump up, reaching your arms overhead, and land softly before beginning the next repetition.
The push-up component is the element most frequently dropped as fatigue sets in. Skipping the push-up makes the exercise easier and removes much of the upper body work. If full push-ups become impossible mid-set, performing the plank phase without the push-up is a better choice than removing it entirely — it maintains the movement pattern while reducing the demand.
Burpees scale in both directions. Beginners can step the feet back and forward rather than jumping them, and can skip the jump at the top. This makes the movement accessible while retaining the pattern. Advanced athletes can add a tuck jump at the top, a clap at the peak of the jump, or perform burpees for extended time intervals — five minutes of continuous burpees at a controlled pace is a genuine cardiovascular challenge for most people.
A standard benchmark is ten burpees per minute for five minutes — 50 total — which serves as a useful conditioning target for people working toward general fitness. The pace matters more than raw speed: maintaining consistent form through 50 repetitions demonstrates more real fitness capacity than sprinting 20 and collapsing.
23 / 25
The wall-supported handstand is an advanced exercise that develops extraordinary shoulder strength, body awareness, and balance. It is a goal-oriented movement — many people spend months working toward their first confident hold — and the process of developing it builds meaningful upper body strength even before the target is achieved.
The most accessible entry point is facing the wall. Stand two to three feet from a wall, place your hands on the floor about shoulder-width apart, and walk your feet up the wall until your body is as vertical as possible. Hold this position. The wall provides support for balance, allowing you to focus on maintaining a tight body position — straight arms, engaged core, glutes squeezed, feet together — rather than managing the balance challenge of a freestanding handstand.
The shoulder demand is significant. Supporting full body weight on two hands with arms fully extended requires strength in the deltoids, upper trapezius, and the small stabilizing muscles of the rotator cuff. People who lack the baseline shoulder strength for this exercise will feel it immediately. Begin with shorter holds — 10 to 15 seconds — and build from there.
The kick-up entry, in which you kick up to a handstand rather than walking up a wall, requires more balance skill and confidence. It is a useful progression once wall walks feel comfortable — kick up with the dominant leg first, use the wall for balance initially, and gradually work toward coming off the wall for brief moments before returning to it.
A well-developed wall handstand hold of 30 to 60 seconds is a foundation for handstand push-ups, which represent one of the most advanced no-equipment upper body strength exercises available.
24 / 25
The pistol squat — a single-leg squat performed with the non-working leg extended straight in front of the body — is one of the most demanding lower body exercises in existence, with or without equipment. It requires the strength to lower and raise the entire body on one leg through a full range of motion, the flexibility to keep the extended leg elevated throughout, and the balance to control the movement without tipping sideways. It is a genuine test of lower body strength, mobility, and coordination.
Stand on one foot with the other leg extended straight in front of you. Keeping the extended leg off the floor, lower into a squat on the standing leg — descending as far as possible while keeping the heel on the floor and the torso upright. The goal is to reach full depth, with the standing thigh parallel to or below the floor, before driving back up to standing.
Most people cannot perform a pistol squat on their first attempt. The limiting factors are usually one or more of the following: insufficient single-leg strength, limited ankle mobility preventing the heel from staying flat at depth, hamstring tightness in the extended leg, or insufficient balance. Each of these is addressable with specific practice.
Progressions toward the full pistol include box pistols — lowering onto a box or chair and standing back up, which eliminates the deepest and hardest portion of the descent while building the strength and pattern — and assisted pistols, in which you hold a door frame or post for balance support while developing strength and range of motion.
When achievable, the pistol squat is a complete lower body exercise: it trains the quadriceps, hamstrings, glutes, and the deep stabilizers of the standing leg through a full range of motion that few equipment-based exercises match. A person who can perform five clean pistol squats per leg has developed a level of unilateral lower body strength that translates directly to athletic performance.
25 / 25
The plyometric push-up — also called a clap push-up — is an advanced upper body power exercise that takes the standard push-up and adds an explosive element: pressing so hard from the bottom position that the hands leave the floor at the top, allowing a clap before catching the descent. The explosive press develops the fast-twitch muscle fibers of the chest, shoulders, and triceps in a way that regular push-ups cannot, and it requires a level of upper body strength and control that makes it a meaningful progression target.
Begin in a standard push-up position. Lower your chest to the floor under control, then press explosively upward with as much force as possible. The goal is to generate enough force to lift both hands off the floor simultaneously. At the peak of the press, clap your hands together — or simply allow both hands to clear the floor if the clap is not yet achievable — then replace your hands and descend into the next repetition.
The landing is the critical safety point. Hands must be replaced in exactly the right position — directly below the shoulders — to catch the body weight safely. Hands too far forward or too far apart on landing can result in wrist injury. Practice the explosive press without the airtime first: press as hard as possible without letting the hands leave the floor, feeling the force but controlling the movement. Once the mechanics are solid, add the airtime.
Beginners should build to 15 to 20 solid standard push-ups before attempting plyometric push-ups. The strength base must be in place for the explosive version to be both effective and safe. Incline plyometric push-ups — hands elevated on a sturdy surface — reduce the load and are a useful intermediate step.
Plyometric push-ups sit near the upper end of the difficulty range of exercises on this list, alongside handstands and pistol squats. They are a legitimate training goal and a practical test of upper body power.
