From crispy cornbread to seared steak, these cast iron skillet recipes cover breakfast, dinner, and dessert — all made better by the pan's unmatched heat retention
Credit: Deane Bayas / Pexels
Cast iron skillets have been in continuous use in American kitchens since at least the early 19th century, and for good reason. Unlike stainless steel or nonstick pans, a well-seasoned cast iron skillet builds flavor over time. Every sear, every bake, every batch of bacon contributes a thin layer of polymerized oil to the surface — what cooks call seasoning — that makes the pan progressively more nonstick and more responsive to heat.
The chemistry behind cast iron's appeal is straightforward. Cast iron retains heat far better than most other materials, which means that once it's hot, it stays hot even when cold ingredients hit the surface. That thermal stability is why cast iron produces a better sear on a steak or a crisper crust on cornbread than a lighter pan would. The mass of the metal absorbs the shock of temperature change rather than cooling down.
Cast iron also transitions from stovetop to oven without issue, which opens up a range of cooking techniques that other pans can't support. You can sear a piece of chicken on the stovetop and slide the whole pan into the oven to finish — no transferring, no extra dishes. The same pan that fries eggs in the morning can bake a skillet cookie at night.
There are a few things worth knowing before you cook with cast iron. The pan needs to be preheated slowly and evenly to avoid hot spots. It should be dried thoroughly after washing, and a light coating of oil applied before storage to prevent rust. Acidic ingredients like tomatoes or citrus can react with bare cast iron and strip seasoning if left in contact for too long, though a well-seasoned pan handles brief exposure without issue.
Cast iron is also heavier than most cookware, which is worth considering. A 12-inch cast iron skillet typically weighs between seven and eight pounds, and handling it with one hand — especially when it's full and hot — takes some getting used to. But for most cooks, the trade-off is worth it.
The 26 recipes below are organized to show the range of what cast iron can do. Some are weeknight staples. Others take more time. All of them benefit from the pan's specific properties in ways that would be difficult to replicate with other cookware.
Credit: Marcelo Leal / Unsplash
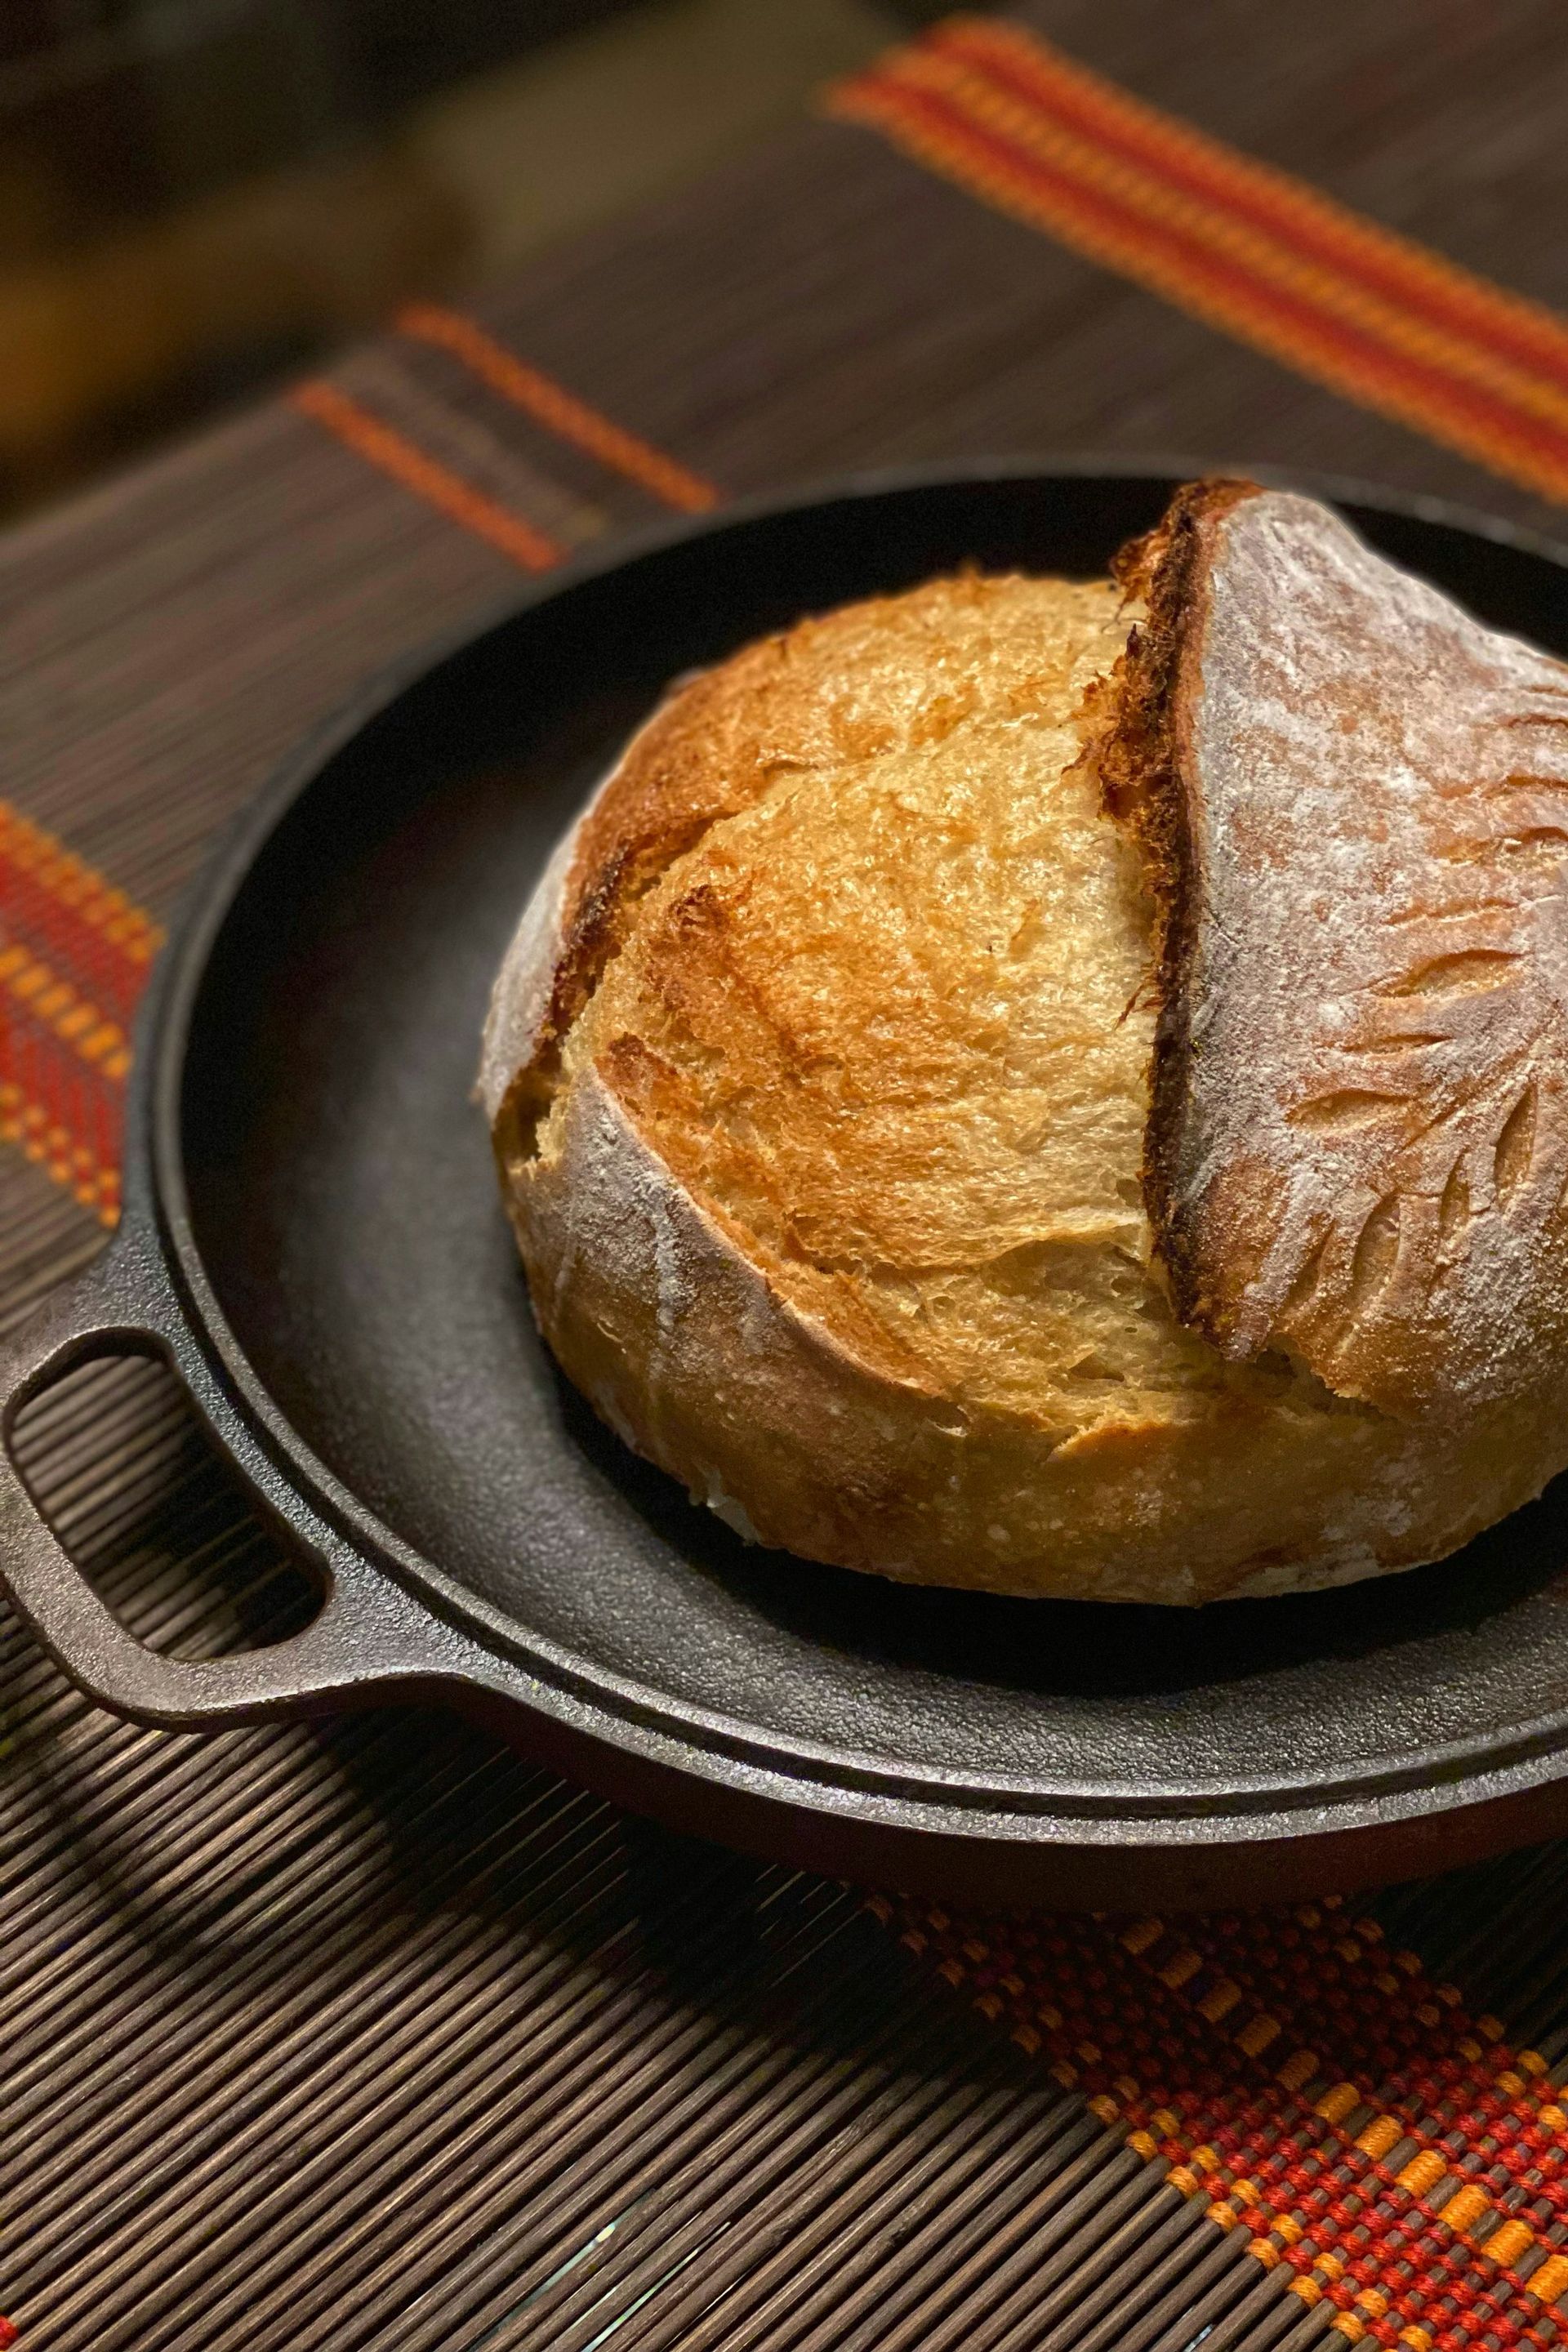
Cornbread cooked in a cast iron skillet has a crust that no baking dish can replicate. The secret is heat. Before the batter goes in, the skillet needs to be hot — genuinely hot, preheated in the oven or on the stovetop until a drop of water skitters across the surface. When the cold batter hits the hot pan, the bottom begins to set immediately, creating a crust that is crisp and almost crackerlike while the interior stays tender and moist.
The basic formula for skillet cornbread is simple: cornmeal, flour, eggs, buttermilk, baking powder, salt, and fat. The ratio of cornmeal to flour affects the texture. More cornmeal produces a grainier, more crumbly bread with a stronger corn flavor. More flour softens the crumb and makes the bread easier to slice cleanly. Most recipes fall somewhere around a 3:1 cornmeal-to-flour ratio, though preferences vary significantly by region. Southern cornbread tends to use very little sugar and a higher proportion of cornmeal. Northern and Midwestern versions often include more sugar and more flour.
The fat matters, too. Bacon drippings are traditional in many Southern recipes and add a savory depth that butter can't match. If you've been cooking bacon in the skillet earlier in the day, simply leave the drippings in the pan and use them to grease it before adding the batter. Butter produces a slightly richer, more neutral flavor. A neutral oil like vegetable or canola works but adds nothing to the flavor.
Buttermilk is worth using if you can find it. It reacts with the baking powder to produce a lighter crumb and adds a mild tang that plain milk doesn't contribute. If you don't have buttermilk, you can make a rough substitute by adding a tablespoon of white vinegar or lemon juice to a cup of whole milk and letting it sit for five minutes.
The bake time at 425°F is typically 20 to 25 minutes, until the top is golden and a toothpick inserted in the center comes out clean. Let it cool in the pan for five minutes before turning it out, and serve it cut into wedges directly from the skillet. Leftovers reheat well in the oven at low temperature, though they're best fresh.
Credit: Deane Bayas / Pexels
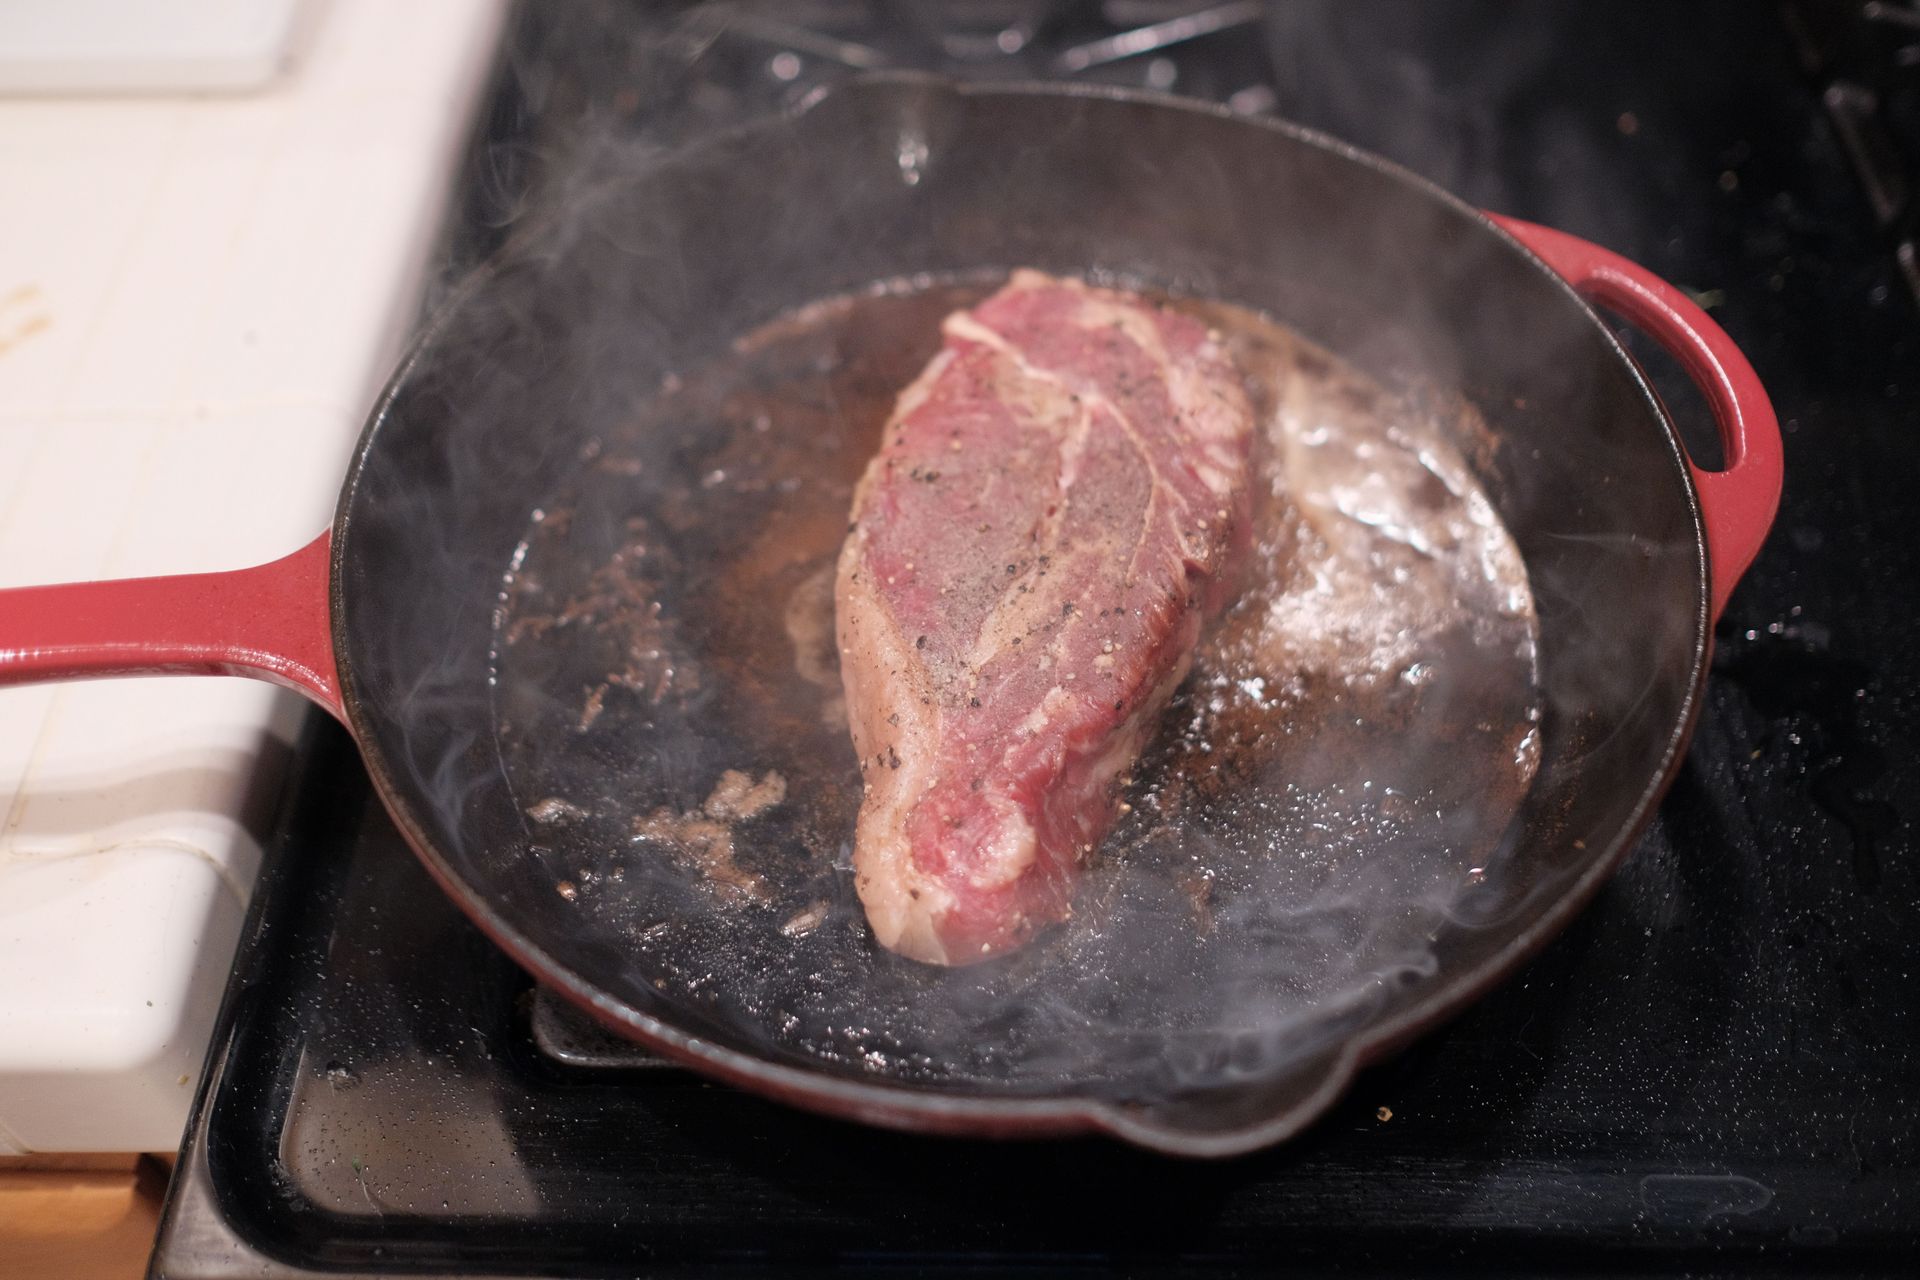
A ribeye steak seared in cast iron is one of the most direct demonstrations of what the pan does well. The high heat, the even contact between the meat and the flat surface, and the skillet's ability to maintain temperature under load all contribute to a crust that a grill or a lighter pan rarely matches indoors.
Start with a ribeye that's at least an inch thick — ideally closer to an inch and a half. Thinner steaks cook through too quickly to develop a proper crust without overcooking the interior. Pat the steak completely dry with paper towels. Surface moisture is the enemy of a good sear; any water on the meat will steam before it browns, slowing the Maillard reaction that creates flavor.
Season generously with salt — more than feels comfortable — and let the steak sit at room temperature for 30 to 45 minutes before cooking. This reduces the temperature gradient between the surface and the center, which helps the steak cook more evenly. Some cooks prefer to salt and refrigerate the steak uncovered overnight, which draws out moisture and then reabsorbs it for a drier surface and a more concentrated flavor.
Heat the cast iron skillet over high heat for at least five minutes. The pan should be visibly smoking before the steak goes in. Add a high-smoke-point oil — avocado oil, grapeseed oil, or refined coconut oil — and swirl to coat. Place the steak away from you to avoid splatter.
Don't move it. Let it cook undisturbed for three to four minutes, then flip once. After the flip, add butter, a few smashed garlic cloves, and thyme or rosemary to the pan. Tilt the pan and baste the steak repeatedly with the foaming butter for another two to three minutes. For a medium-rare finish, pull the steak at an internal temperature of 125°F and rest it on a cutting board for five minutes before slicing. The temperature will rise another five degrees as it rests.
Credit: Angela Khebou / Pexels
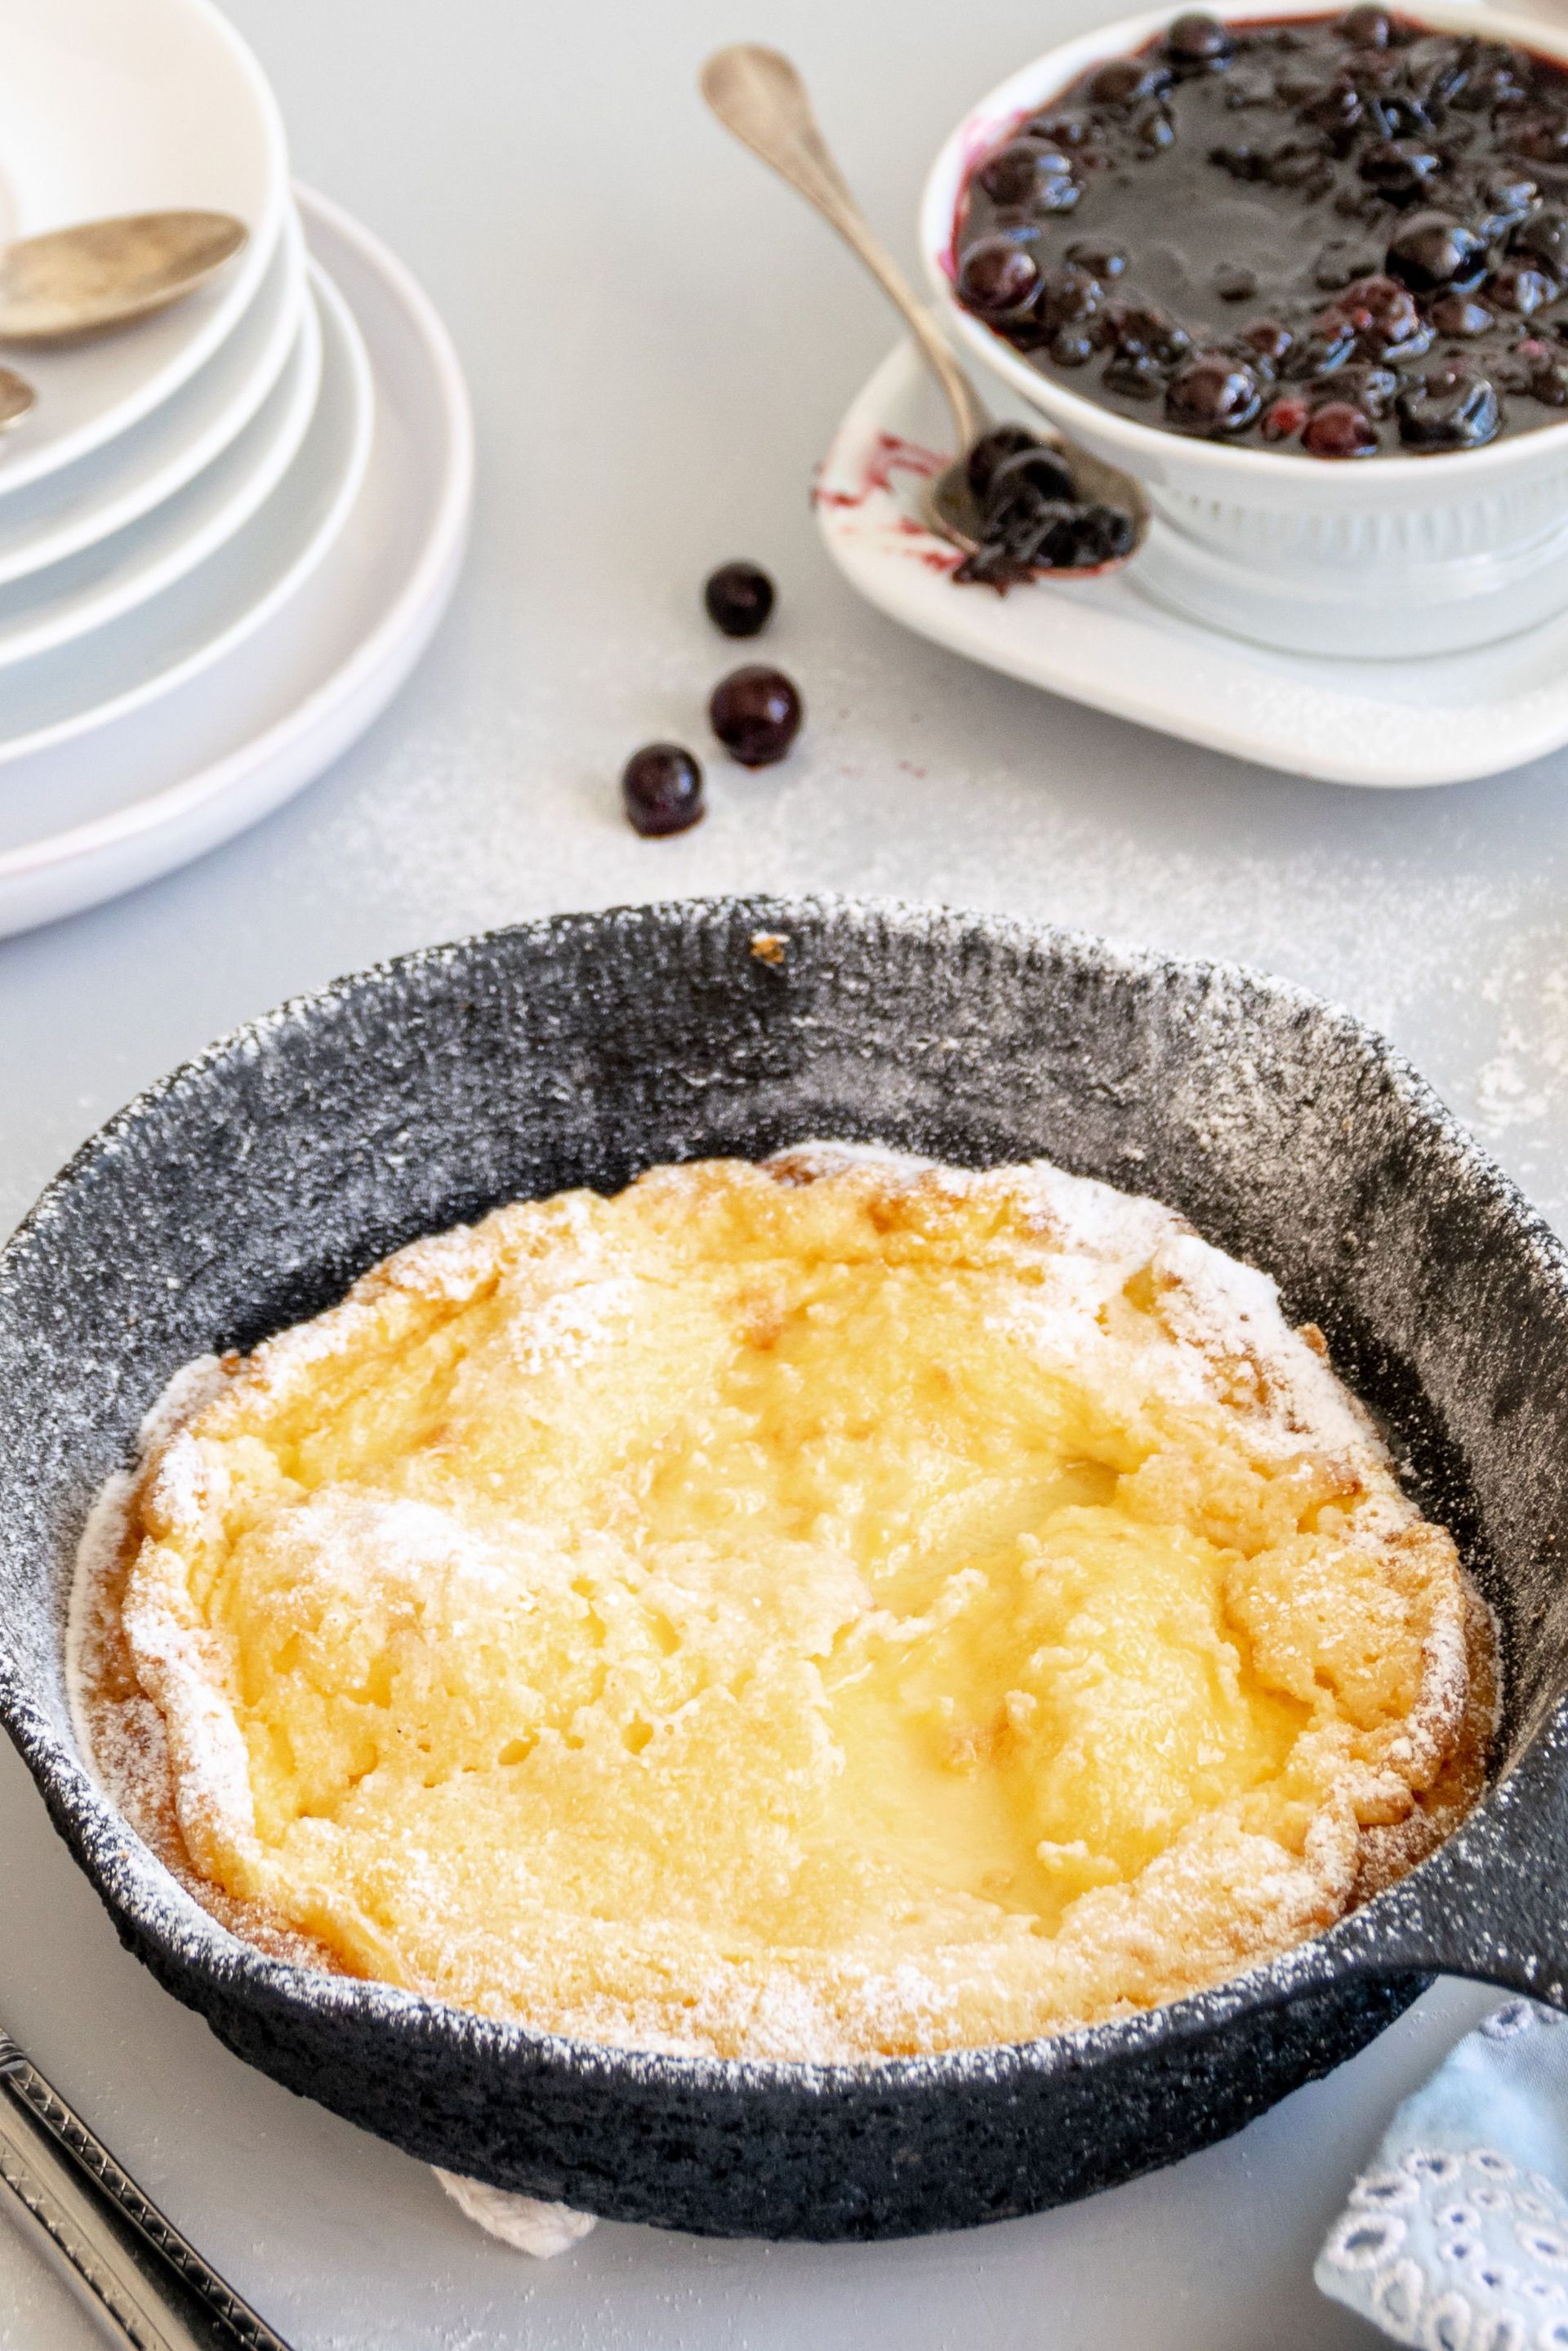
A Dutch baby is a baked pancake that puffs dramatically in the oven, developing tall, crispy edges and a custardy center. It's made from a thin batter of eggs, milk, flour, and butter, and it requires a hot cast iron skillet to achieve its signature rise. The thermal shock of cold batter hitting a blazing pan starts the cooking process before the pancake even goes into the oven.
The batter comes together in minutes. Blend or whisk two to three eggs, half a cup of milk, half a cup of flour, a pinch of salt, and a teaspoon of vanilla until completely smooth. Some recipes add sugar; others don't. The pancake is traditionally served with toppings, so the batter itself doesn't need to be sweet.
The key steps are: preheat the oven to 425°F with the cast iron skillet inside; when the oven reaches temperature, add two tablespoons of butter to the hot skillet and let it melt and begin to brown; then pour in the batter quickly and return the pan to the oven. Don't open the oven during the first 15 minutes. The pancake will puff — sometimes dramatically, sometimes unevenly, always imperfectly — and then settle slightly as it cools. That's expected.
The Dutch baby is done when the edges are deep golden and the center is set but still slightly jiggly. Total bake time is typically 18 to 22 minutes. Serve it immediately; it deflates quickly once out of the oven, which is fine. The crispy edges and soft center remain.
Classic toppings include powdered sugar and lemon juice, which is the simplest and arguably the best version. Sliced fresh fruit, a drizzle of maple syrup, or a dollop of whipped cream all work. A savory version — topped with smoked salmon, crème fraîche, and capers — is less common but worth trying.
-1920x1280.jpg)
Credit: Daniela Elena Tentis / Pexels
Shakshuka is a North African and Middle Eastern dish of eggs poached directly in a spiced tomato sauce. It's made in a single pan, comes together in under 30 minutes, and works equally well as a weeknight dinner or a weekend brunch. Cast iron is ideal for it: the pan heats evenly and retains temperature, which helps the sauce simmer steadily and the eggs cook at a controlled pace.
The base is a sauce built on onion, garlic, red bell pepper, and canned whole tomatoes. The spices vary by region and by cook, but cumin, smoked paprika, and cayenne are common. Some versions include harissa for heat; others add a can of chickpeas for protein and body. Brown the onion and pepper in olive oil until softened, add the garlic and spices and cook until fragrant, then crush the tomatoes into the pan and let the sauce reduce for 10 to 15 minutes until it thickens.
Once the sauce is ready, use a spoon to make shallow wells and crack an egg directly into each one. The number of eggs depends on the size of the pan; a 12-inch skillet typically holds five or six comfortably without crowding. Cover the pan with a lid or a sheet of foil and let the eggs cook over medium-low heat until the whites are set but the yolks are still soft — about six to eight minutes.
Serve directly from the skillet with crusty bread for scooping. A crumble of feta over the top is common and adds a salty contrast to the acidic sauce. Fresh herbs — parsley, cilantro, or both — finish the dish. Leftovers keep well in the refrigerator for two days; reheat the sauce separately and poach fresh eggs rather than reheating already-cooked ones.
-1920x1280.jpg)
Credit: Laurine / Unsplash
A cast iron skillet produces a chocolate chip cookie with a different texture than a sheet pan: the bottom and edges caramelize from direct contact with the metal, the center stays soft and almost underbaked, and the whole thing is served warm from the pan and scooped rather than cut into slices. It's a different eating experience from a standard cookie — closer to a dessert bar than a hand-held cookie.
Use a standard chocolate chip cookie dough: butter, brown sugar, white sugar, eggs, vanilla, flour, baking soda, salt, and chocolate chips. Brown butter is worth the extra step. Melt the butter over medium heat in the skillet before mixing the dough, swirling occasionally, until the milk solids turn golden and the butter smells nutty. Pour it into a mixing bowl and let it cool slightly before proceeding. The browned butter contributes a toffee-like depth to the finished cookie that regular melted butter doesn't.
Mix the dough and press it evenly into the greased skillet. Don't pack it in too tightly; the dough needs room to spread. Add extra chocolate chips to the surface. Bake at 350°F for 20 to 25 minutes, until the edges are set and golden and the center still looks slightly underdone. This is intentional. The residual heat from the cast iron will continue to cook the center after the pan comes out of the oven, and the goal is a center that's soft and fudgy rather than fully baked through.
Let it cool for at least 10 minutes before serving. Serve directly from the pan with vanilla ice cream on top, which melts into the warm cookie. The combination of the crispy caramelized edge, the soft gooey center, and the melting ice cream is the point of the dish.
Credit: RDNE Stock project / Pexels
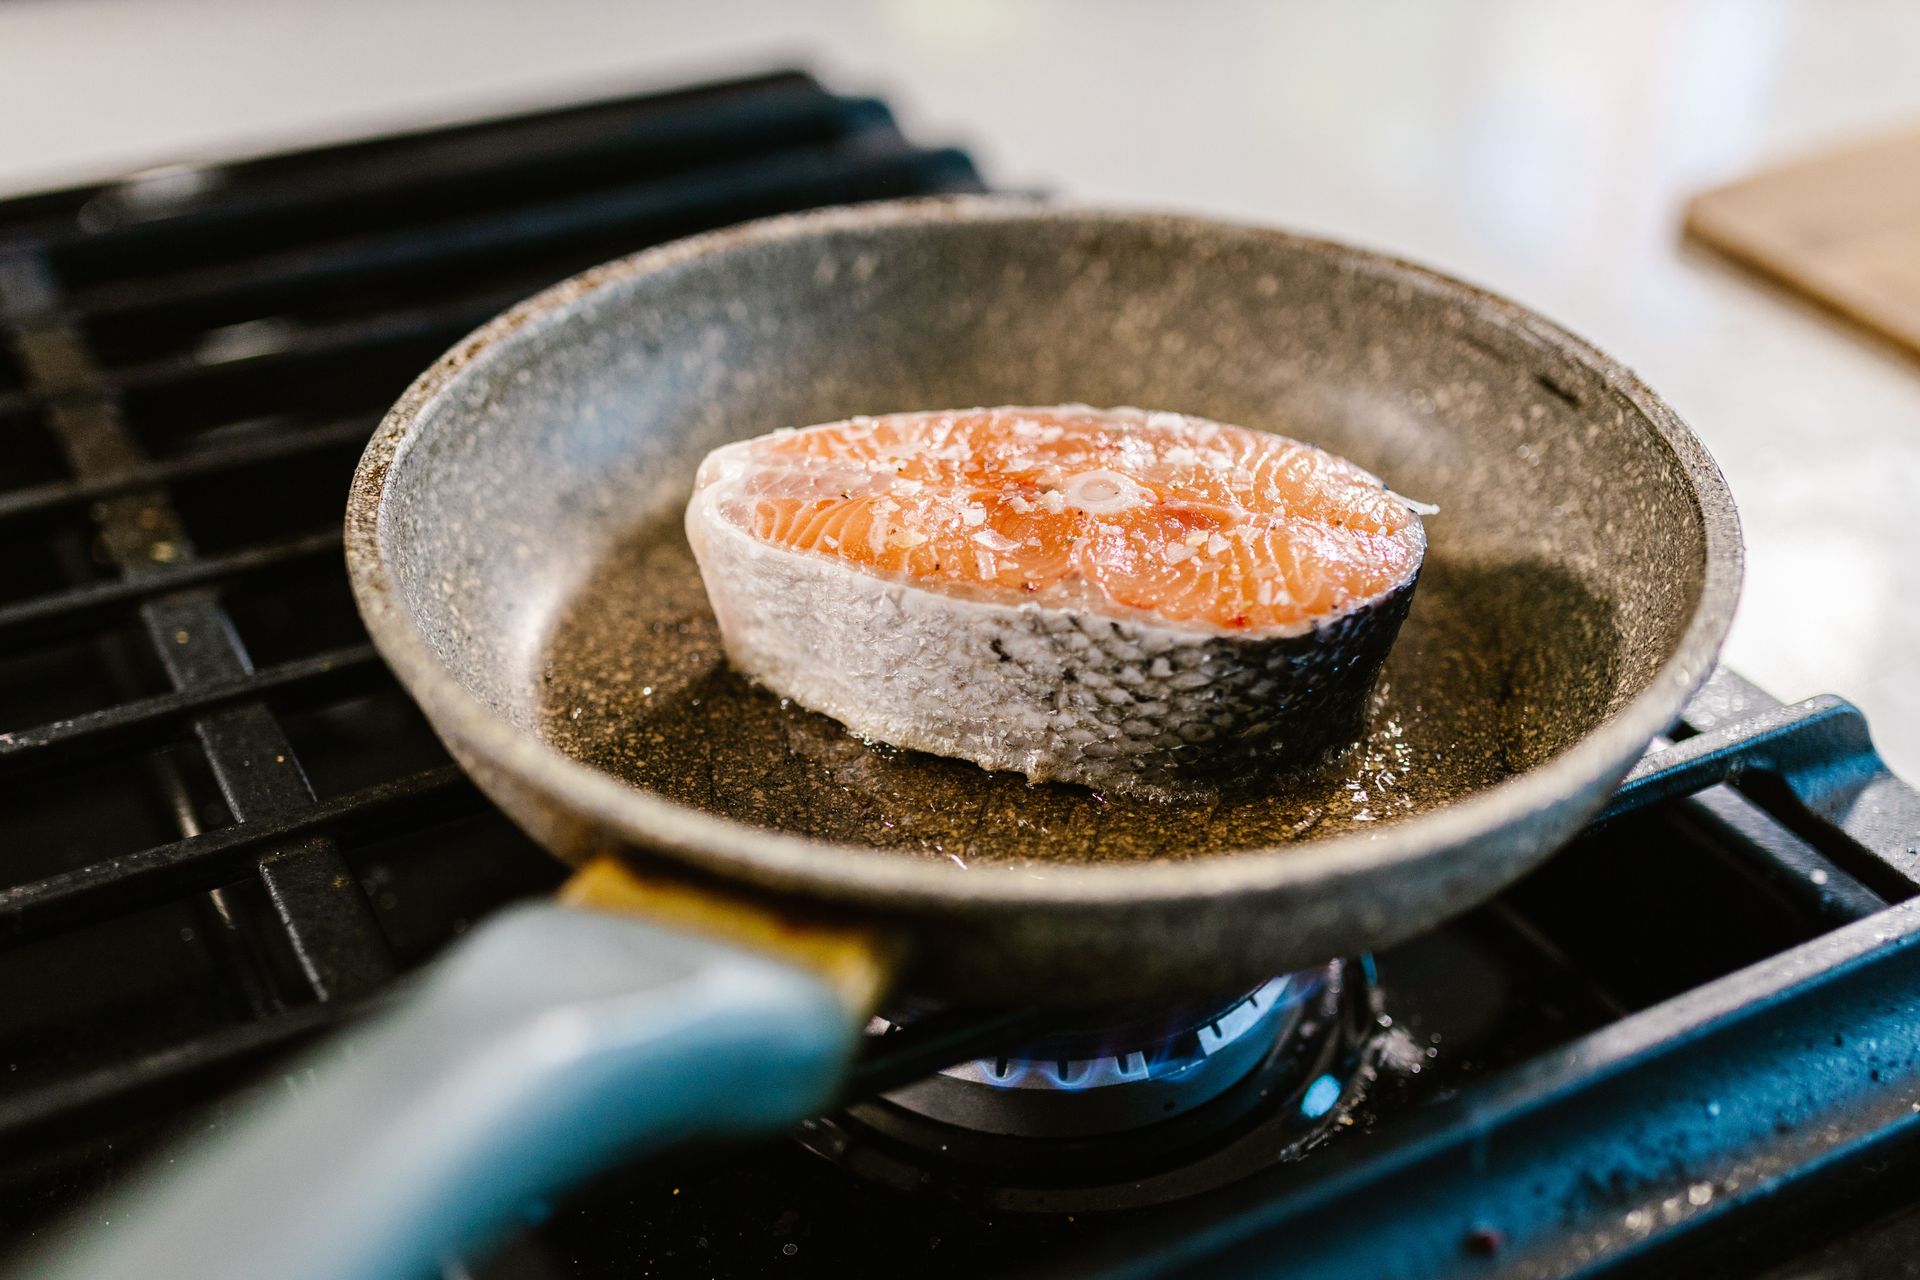
Getting salmon skin genuinely crispy is one of the more satisfying things you can do with a cast iron skillet. The skin needs high, consistent heat and dry contact with the pan surface — conditions that cast iron provides reliably.
Start with skin-on salmon fillets, preferably center-cut pieces of roughly equal thickness so they cook at the same rate. Pat the skin side completely dry with paper towels. Any moisture will create steam and prevent crisping. Season both sides with salt and pepper, but be especially thorough on the skin side.
Heat the skillet over medium-high heat for three to four minutes before adding oil. The pan should be hot before the oil goes in, and the oil should shimmer and begin to smoke lightly before the fish does. Place the salmon skin-side down in the pan, pressing gently for the first 30 seconds with a spatula to ensure full contact. Fish skin tends to contract from heat and curl away from the pan; holding it down briefly prevents this.
Cook the salmon 80 to 90 percent of the way through on the skin side — typically four to six minutes for a one-inch-thick fillet. The flesh should look opaque from the bottom up to within about a quarter inch of the top. Flip once, cook for another 30 to 60 seconds, and remove from heat. The skin will be deeply golden and crisp. Resting for two minutes before serving lets the fish finish cooking gently without overcooking.
A simple pan sauce can be made immediately in the same skillet: deglaze with white wine or lemon juice, add a pat of butter and some capers or fresh herbs, and swirl until the sauce comes together. The browned bits from the fish dissolve into the sauce and add flavor.
Credit: Mateusz Feliksik / Pexels
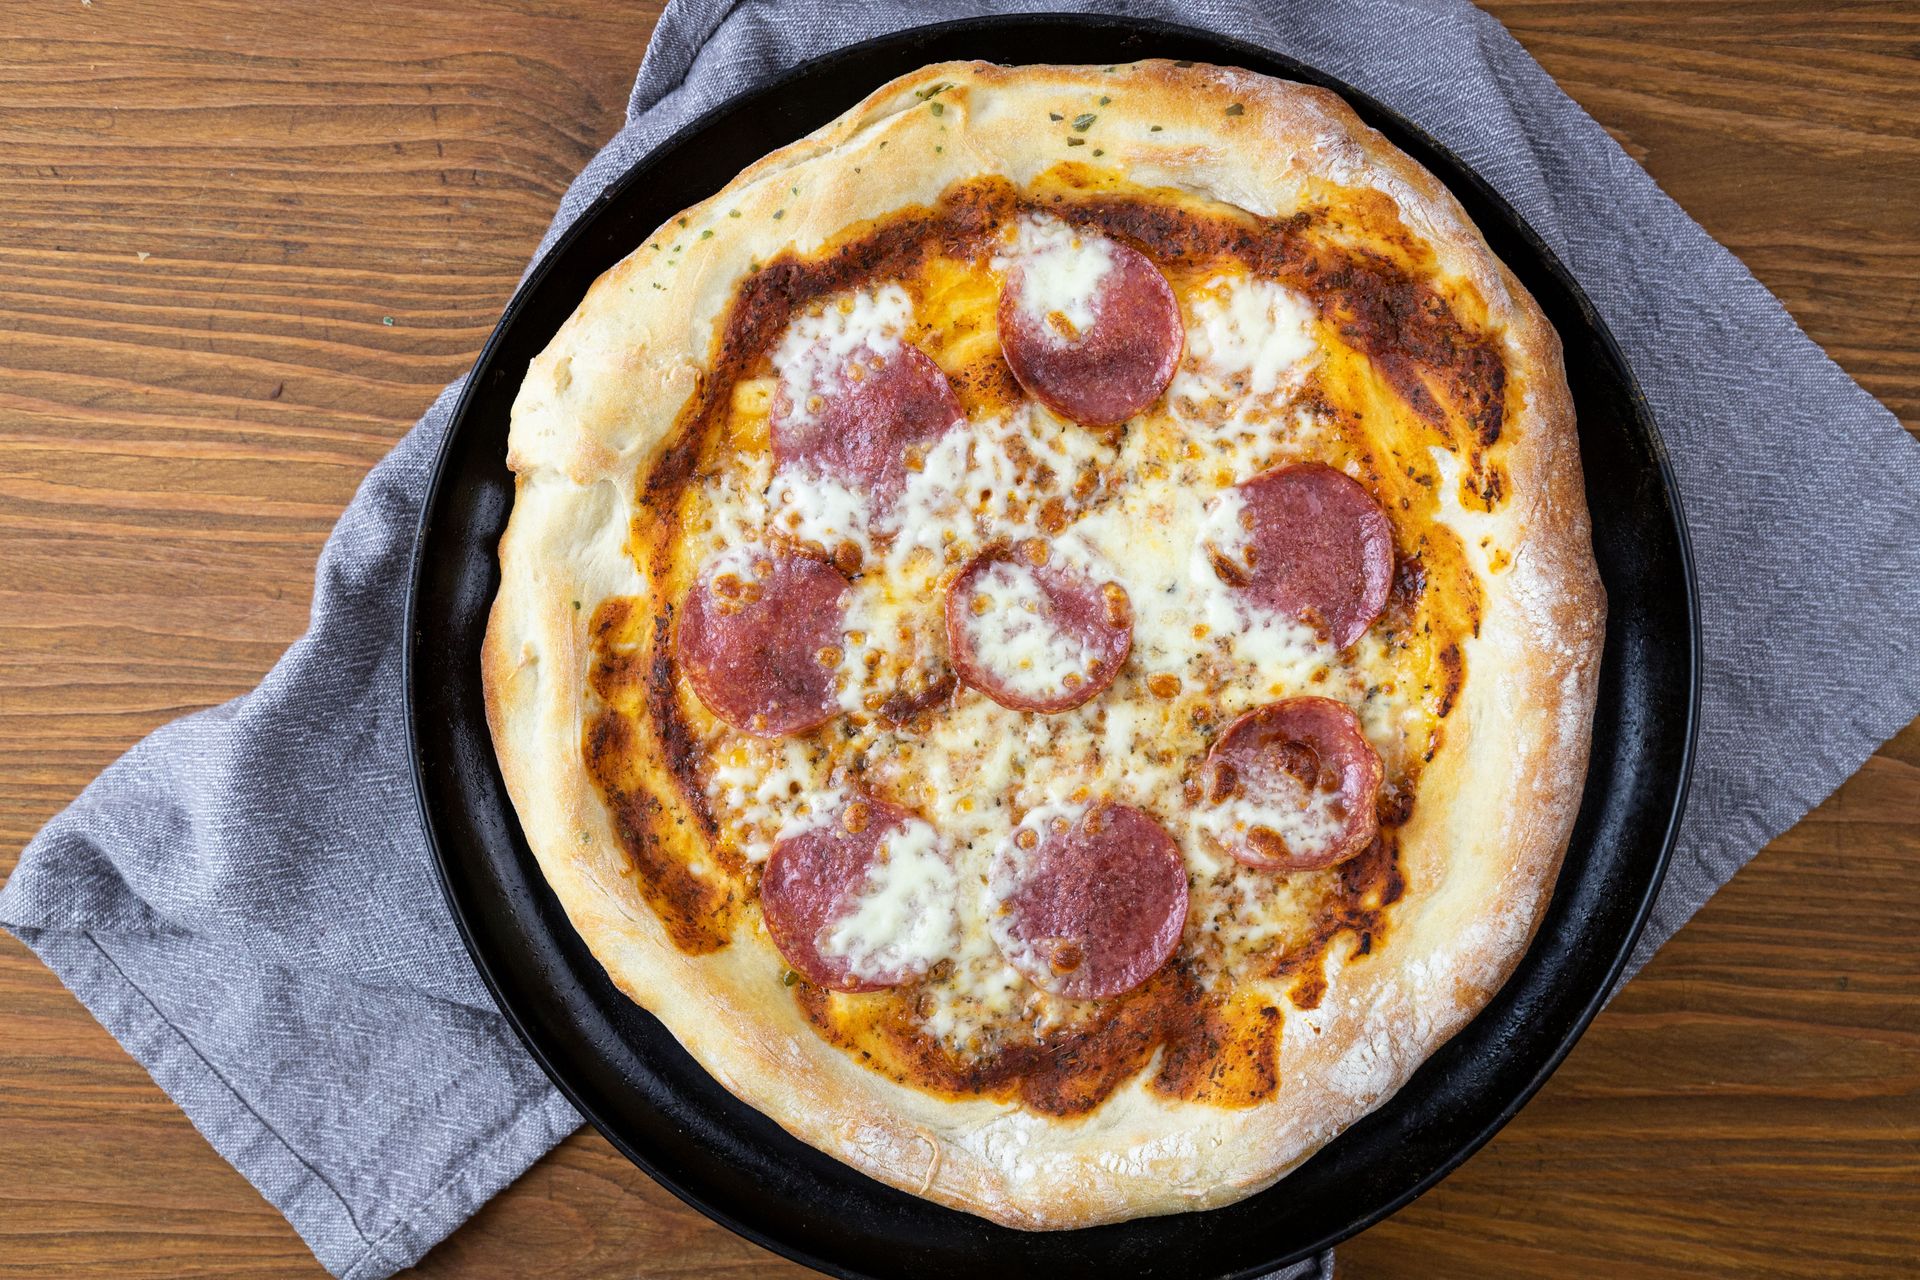
Cast iron skillets can produce a style of pizza with a thick, focaccia-like crust that's simultaneously crispy on the bottom and airy in the interior. The pan's heat retention and its ability to go from stovetop to oven without issue are both essential to the technique.
Use any pizza dough — homemade or store-bought. Let it rest at room temperature for at least an hour before stretching it, so the gluten relaxes and the dough is easier to shape. Coat the bottom and sides of a 12-inch cast iron skillet generously with olive oil — more than feels necessary. Press the dough into the pan from the center outward, letting it rest a few minutes if it springs back before continuing. The dough doesn't need to be perfectly even, and it should come up the sides slightly to form a crust rim.
Here is the key step: before topping, heat the skillet on the stovetop over medium heat for five minutes. This starts the bottom crust cooking before it ever goes in the oven, which is how you get the crispiness. Then top with sauce, cheese, and toppings and transfer to a 500°F oven. Cook for 12 to 15 minutes until the cheese is bubbling and the crust is visibly deep brown on the bottom, which you can check by lifting an edge with a spatula.
Let the pizza rest in the pan for five minutes before sliding it out or cutting it in the pan. The cast iron holds heat well enough that the pizza stays warm on the table during serving. The thick, oily, crispy bottom is the defining characteristic of this style, and it's difficult to achieve with a standard pizza stone or sheet pan.
Credit: Masuma Rahaman / Pexels
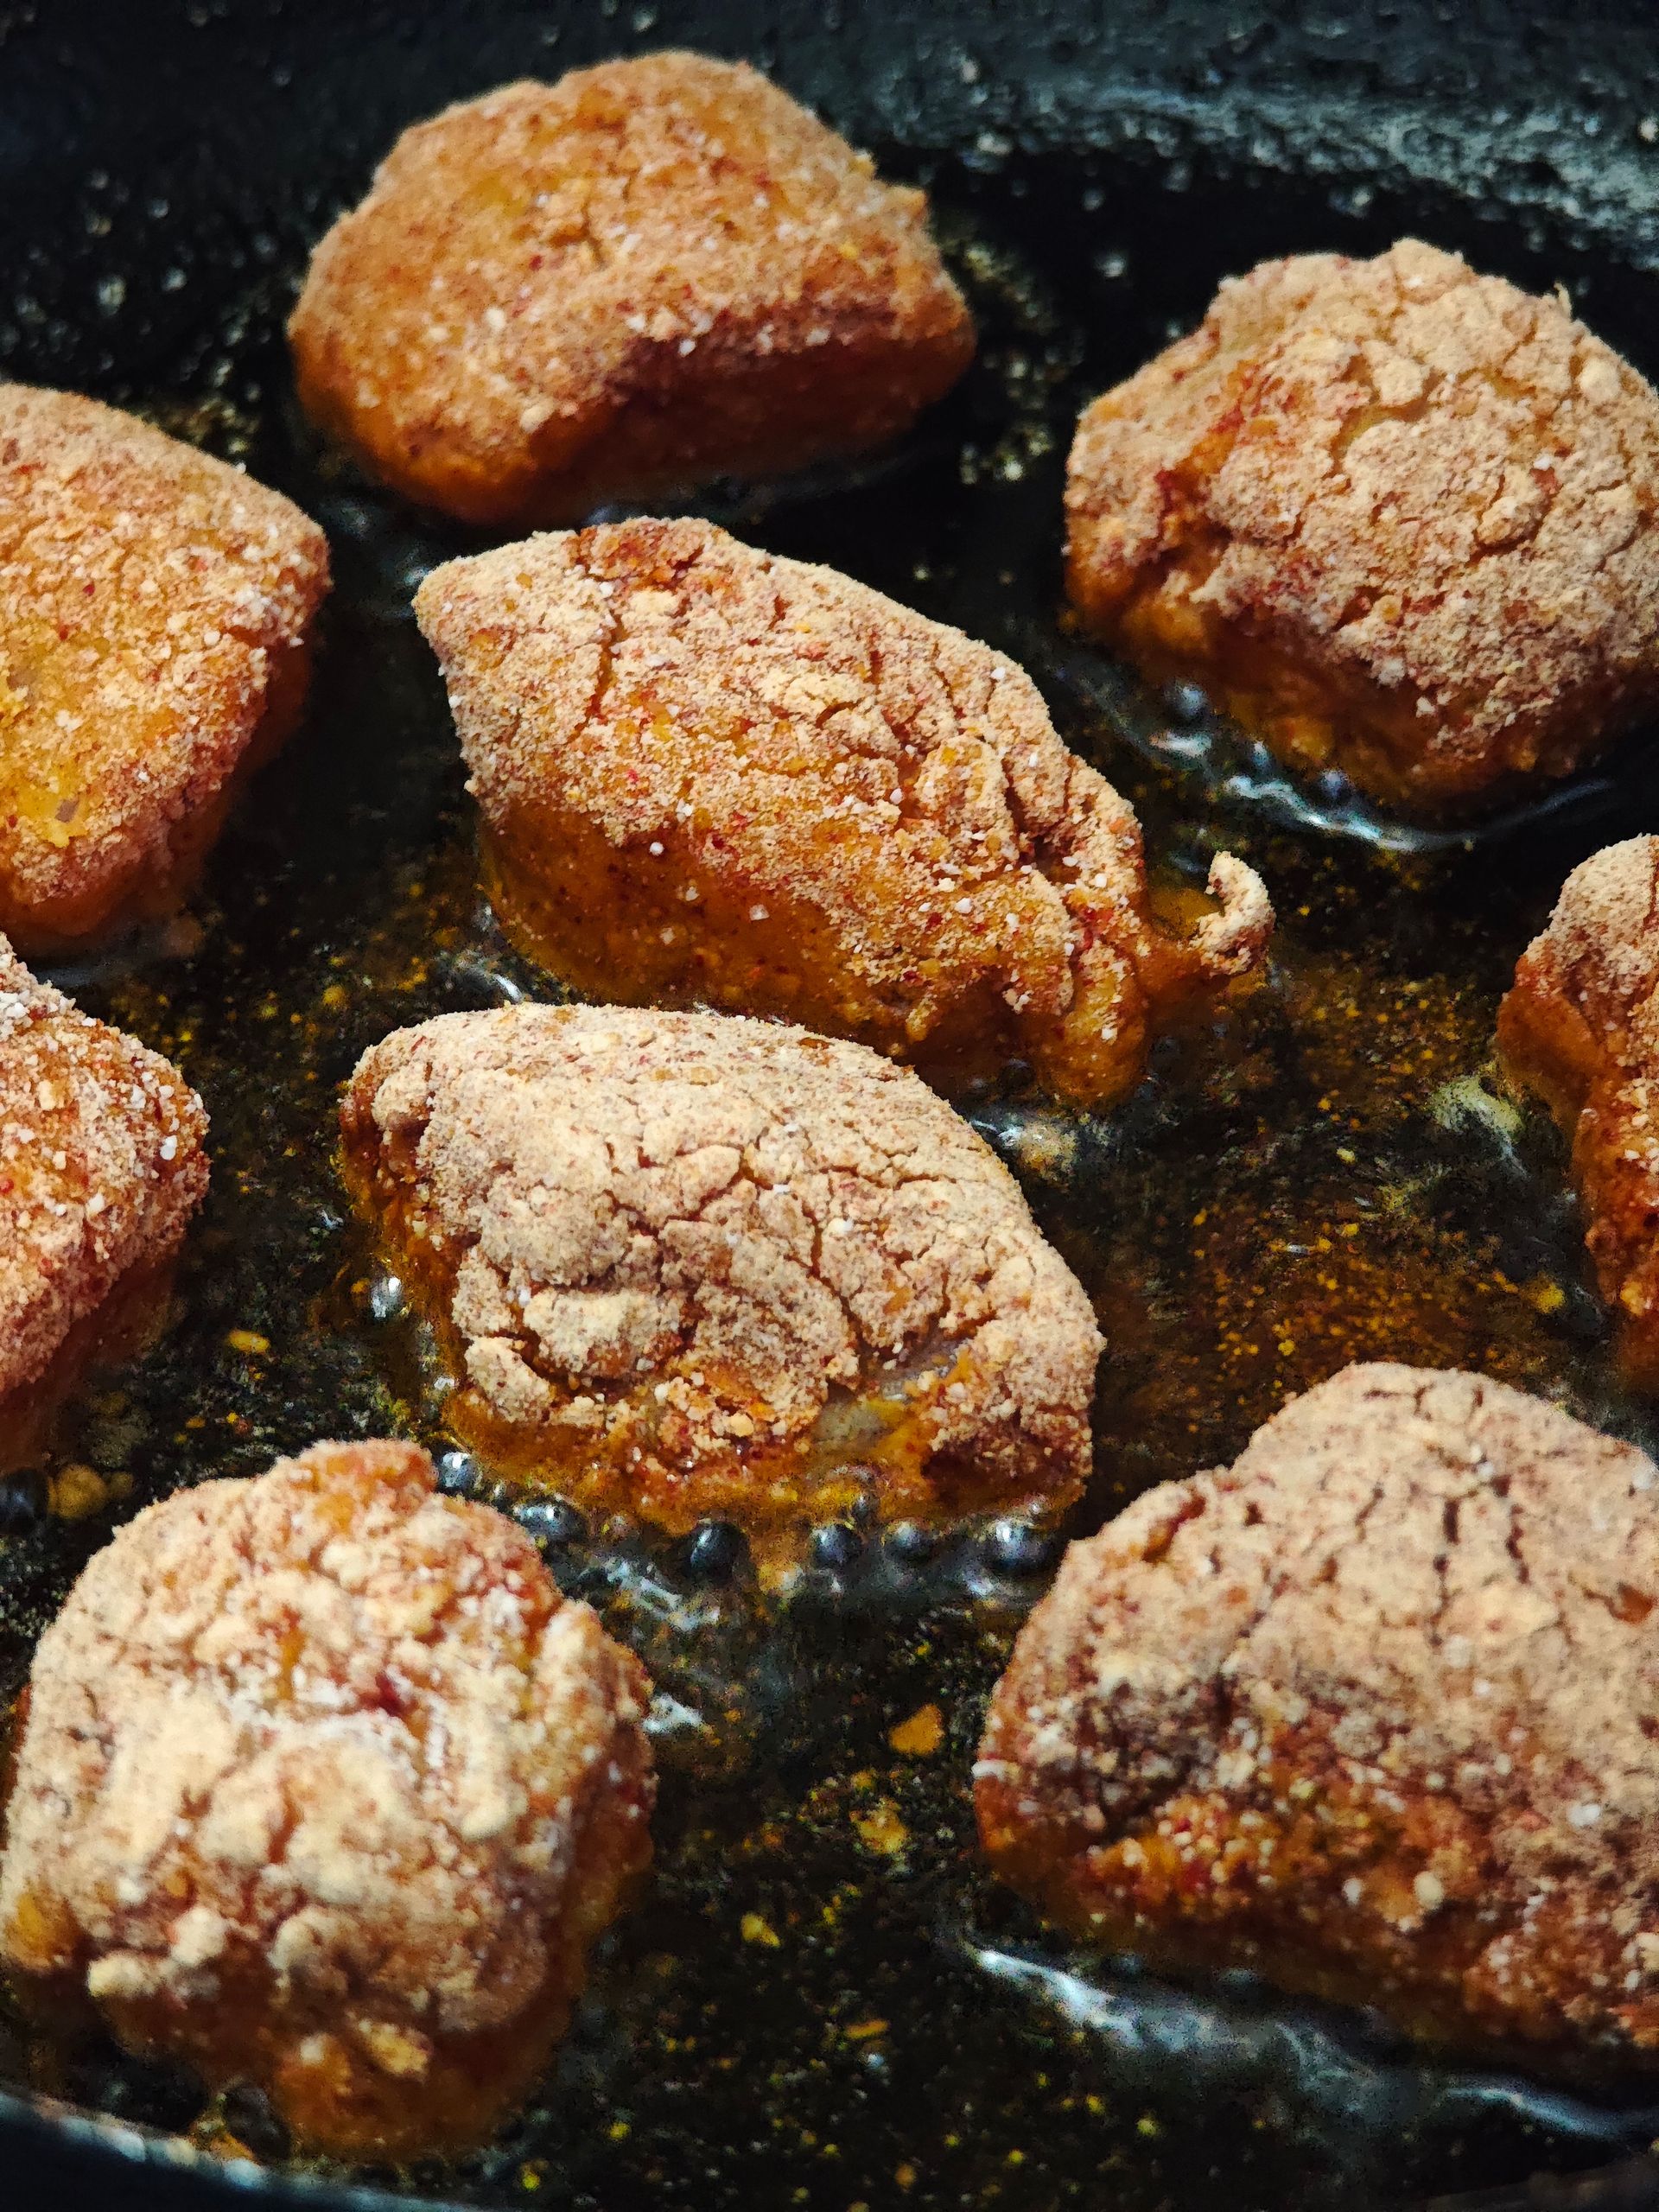
Cast iron is the traditional vessel for American Southern fried chicken, and the reason is physics. Frying requires maintaining oil temperature as cold chicken is added to the pan; cast iron's thermal mass does this better than lighter pans, which cool down quickly under the same conditions and produce greasy, pale-crusted chicken rather than crispy, deeply golden chicken.
The process starts with a brine or buttermilk marinade. Submerge bone-in, skin-on chicken pieces in buttermilk seasoned with salt, garlic, hot sauce, and herbs for at least four hours — overnight produces better results. The buttermilk tenderizes the meat slightly and the coating adheres better to the tangy surface.
The dredge is a mixture of all-purpose flour, cornstarch — which adds extra crispiness — salt, black pepper, paprika, garlic powder, and cayenne. Shake excess buttermilk off each piece of chicken and press it into the flour mixture firmly, ensuring full coverage, including under flaps of skin.
Fill the skillet with about an inch of neutral oil and heat to 325°F. This is lower than you might expect; cast iron retains heat and can run hotter than the measured surface temperature suggests, and lower-and-slower frying renders the fat under the skin before the exterior overcooks. Add chicken pieces skin-side down without crowding — work in batches if necessary. Fry for about 12 minutes per side, monitoring the oil temperature and adjusting the heat to stay near 325°F. Chicken is done when it reaches an internal temperature of 165°F and the crust is deeply golden.
Drain on a wire rack, not paper towels, which trap steam and soften the crust.
Credit: Valeria Boltneva / Pexels
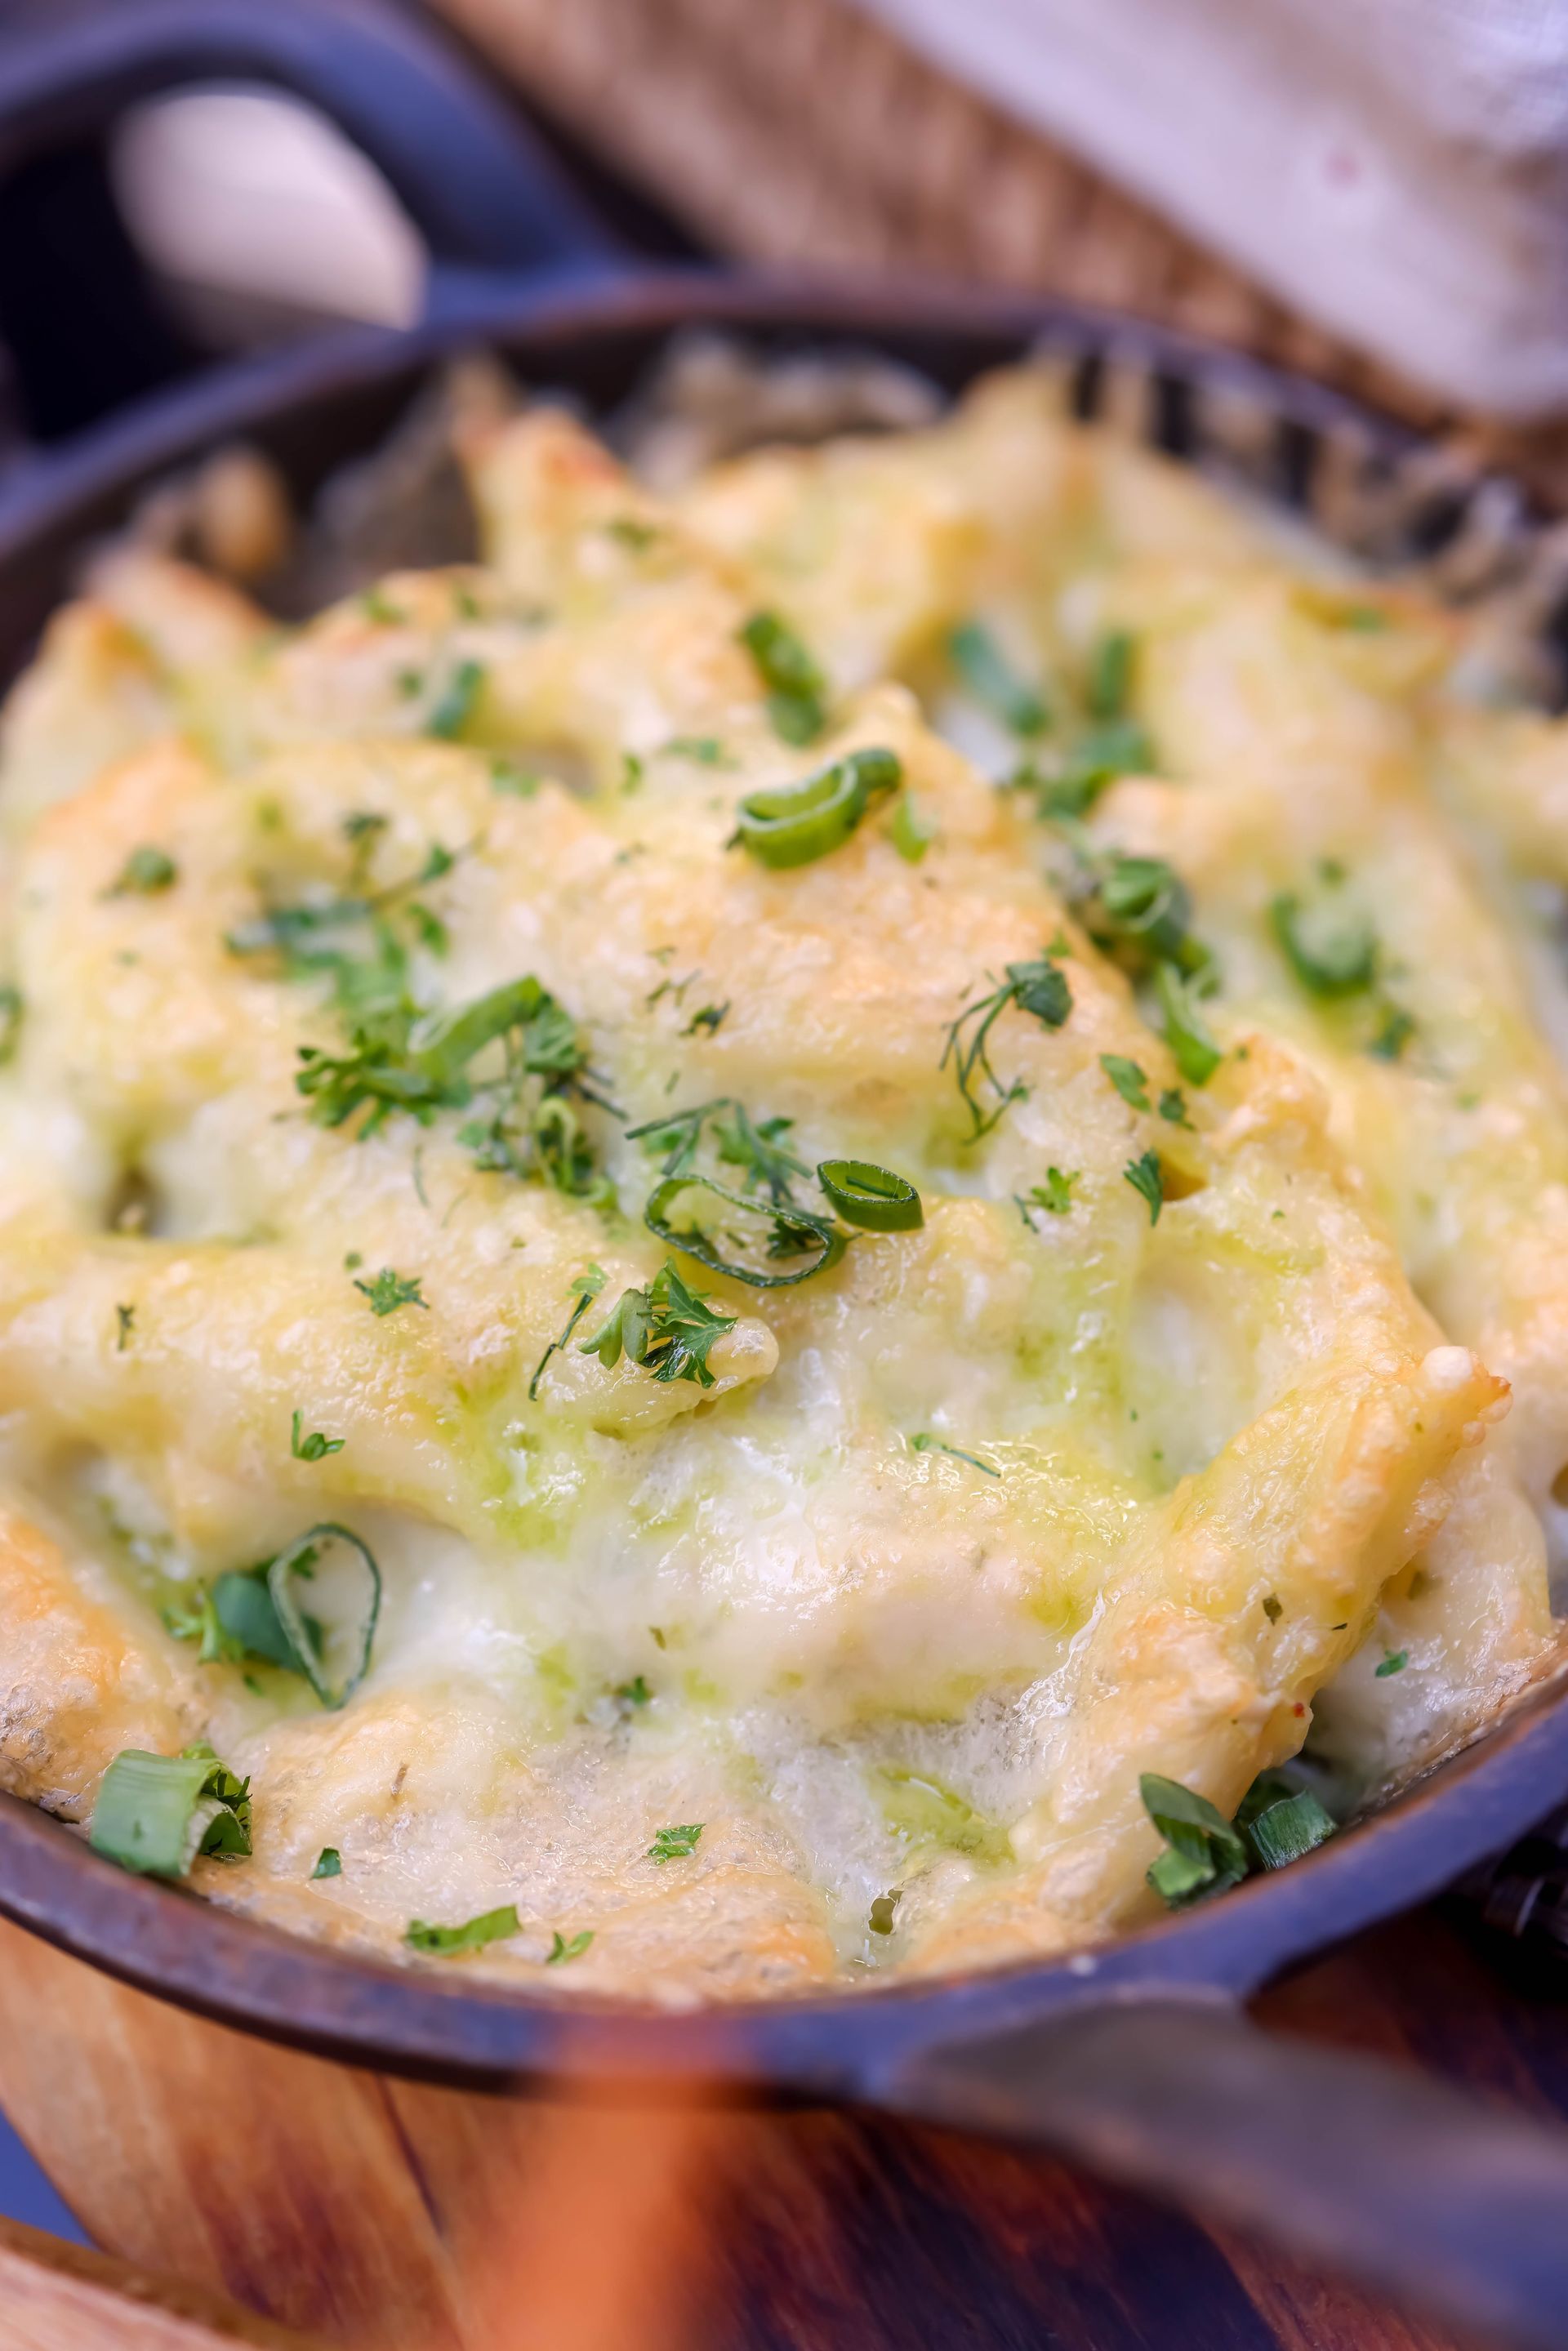
Skillet lasagna is a stovetop adaptation of the oven-baked original. It uses broken or short pasta instead of lasagna sheets, cooks everything in one pan, and comes together in about 30 minutes. Cast iron is well suited to it because the pan holds heat evenly and the pasta cooks gently without scorching at the bottom.
Brown ground beef or Italian sausage in the skillet and drain excess fat. Add diced onion and garlic and cook until softened. Pour in crushed tomatoes or marinara sauce, a splash of water, and season with Italian seasoning, salt, and red pepper flakes. Bring to a simmer, then add broken lasagna noodles or short pasta like rigatoni directly to the sauce. The pasta cooks submerged in the liquid, absorbing the sauce and releasing starch that thickens it.
Cover and cook over medium-low heat, stirring occasionally to prevent sticking, until the pasta is tender — about 15 to 18 minutes depending on the shape. Add splashes of water if the sauce thickens too much before the pasta is done.
When the pasta is cooked through, dollop ricotta over the surface in spoonfuls, scatter shredded mozzarella over the top, and cover again until the cheese melts — about three minutes. Finish with fresh basil and grated Parmesan if desired.
The result is genuinely reminiscent of lasagna — the same combination of meaty sauce, pasta, and layered cheese — but without the 90-minute bake time or the stack of dishes. It feeds four generously from a single 12-inch skillet and reheats well the next day.
Credit: chaewon you / Unsplash
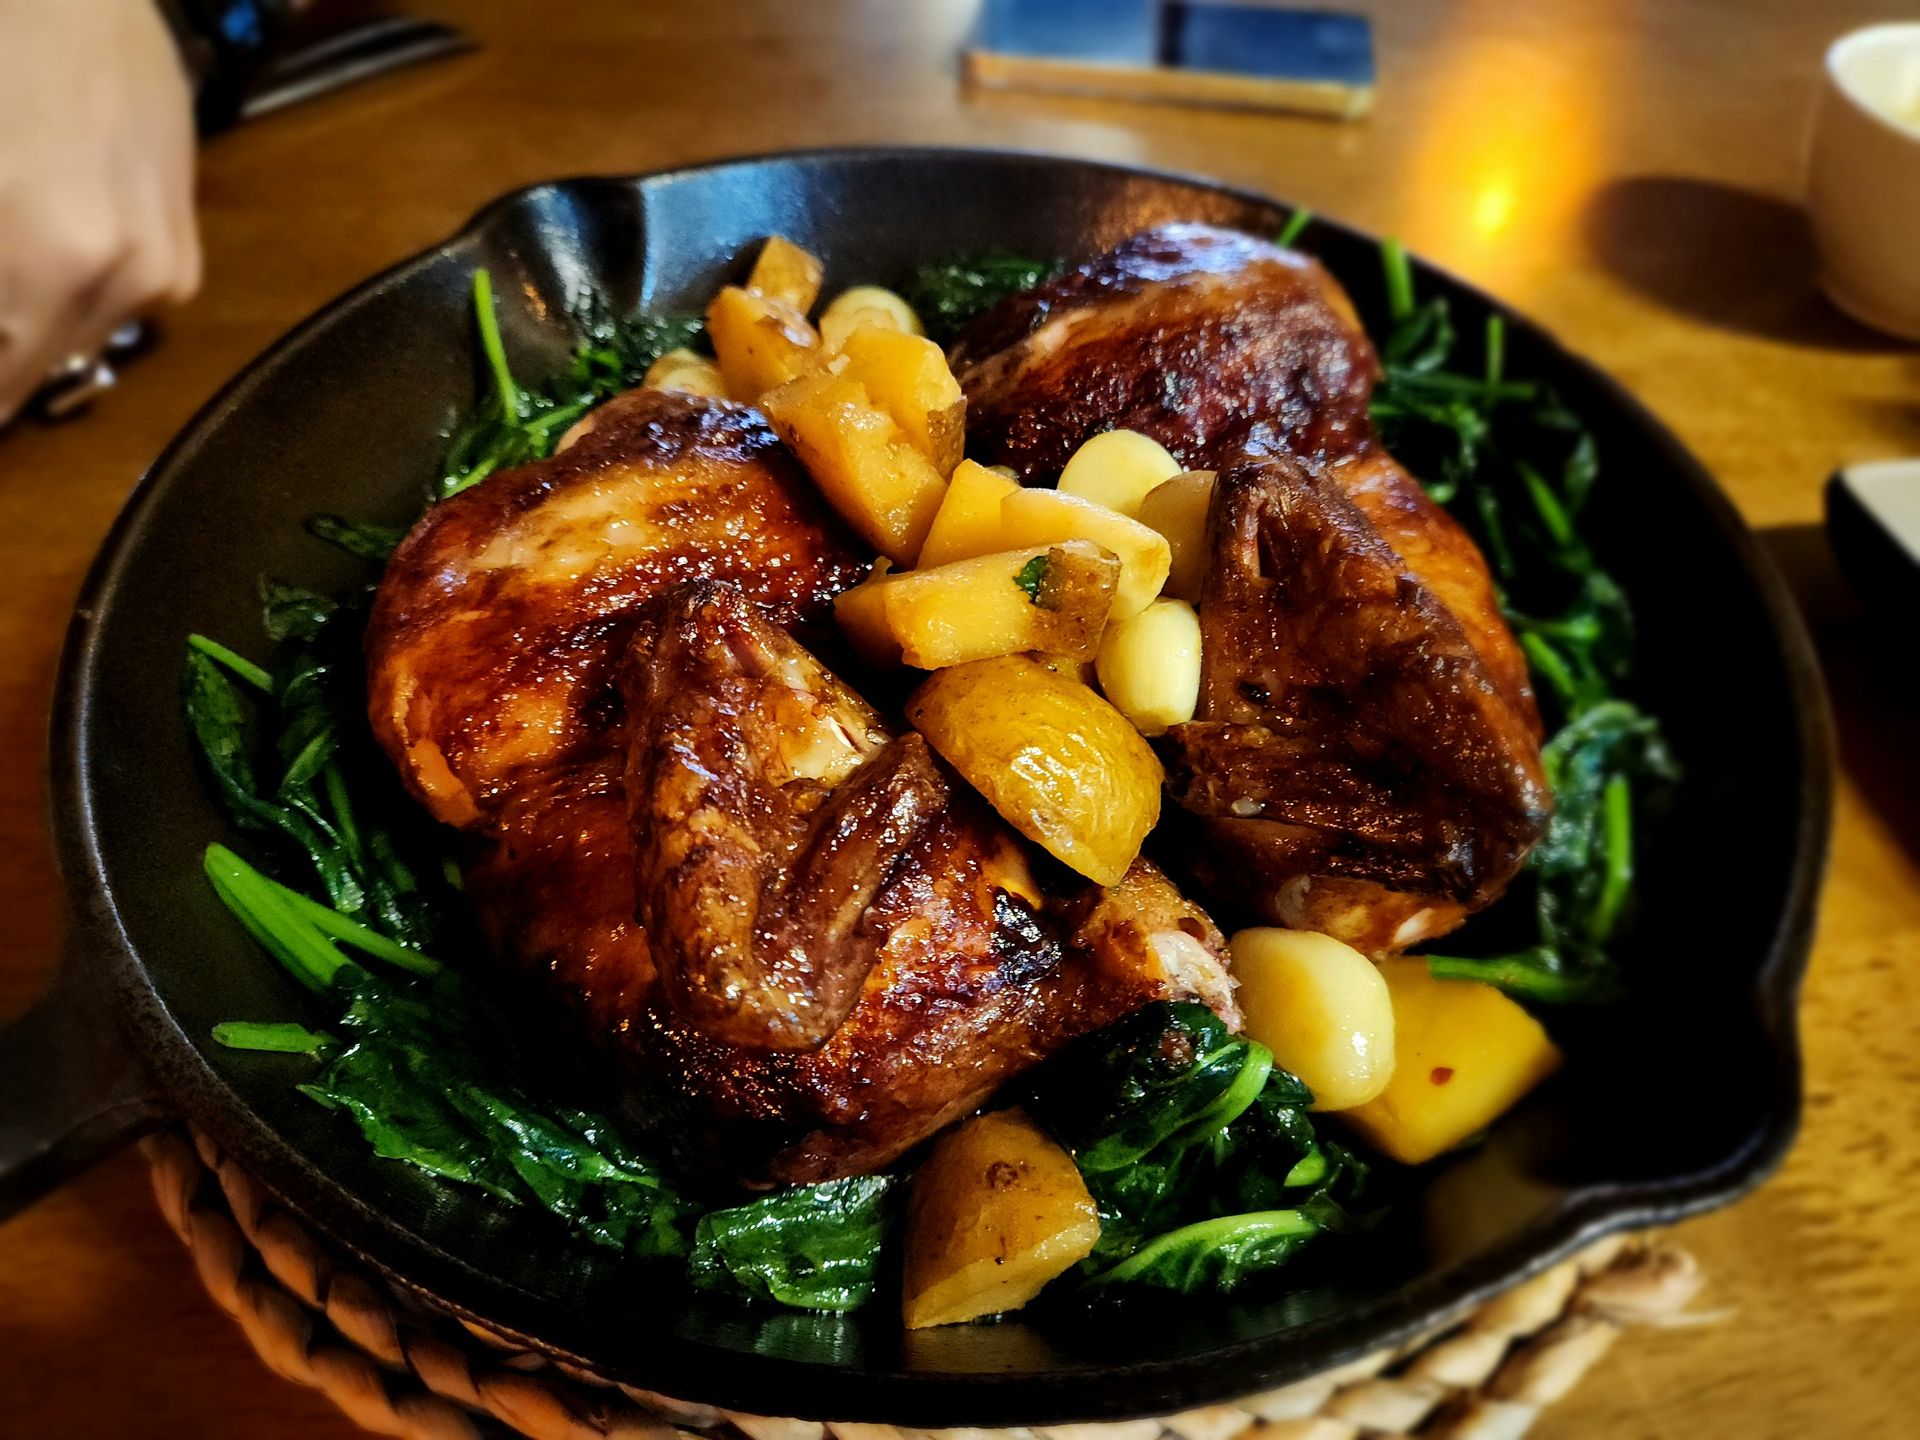
Bone-in, skin-on chicken thighs are one of the most forgiving cuts to cook in cast iron. They have enough fat in the skin and around the bone to stay moist even if slightly overcooked, and the skin crisps reliably in the pan's heat.
Season the thighs generously with salt, pepper, and any other aromatics — smoked paprika, garlic powder, dried herbs, or a spice blend. Heat the skillet over medium-high heat, add oil, and place the thighs skin-side down. Cook undisturbed for eight to 10 minutes, until the skin releases from the pan on its own and is deep golden brown. This step renders much of the fat under the skin before the oven finishes the job, resulting in crisper skin than you'd get from oven-only cooking.
Remove the thighs temporarily and add vegetables to the skillet in the rendered chicken fat — diced potatoes, halved Brussels sprouts, carrots, fennel, or whatever is on hand. Toss to coat and season. Nestle the thighs back on top, skin-side up, and transfer the entire skillet to a 425°F oven.
Roast for 25 to 30 minutes until the thighs reach an internal temperature of 165°F and the skin is fully crisp. The vegetables cook in the chicken fat and the juices that run from the meat, which gives them flavor that roasting them plain in a sheet pan doesn't produce. Let rest for five minutes before serving; the whole meal comes out of a single pan.
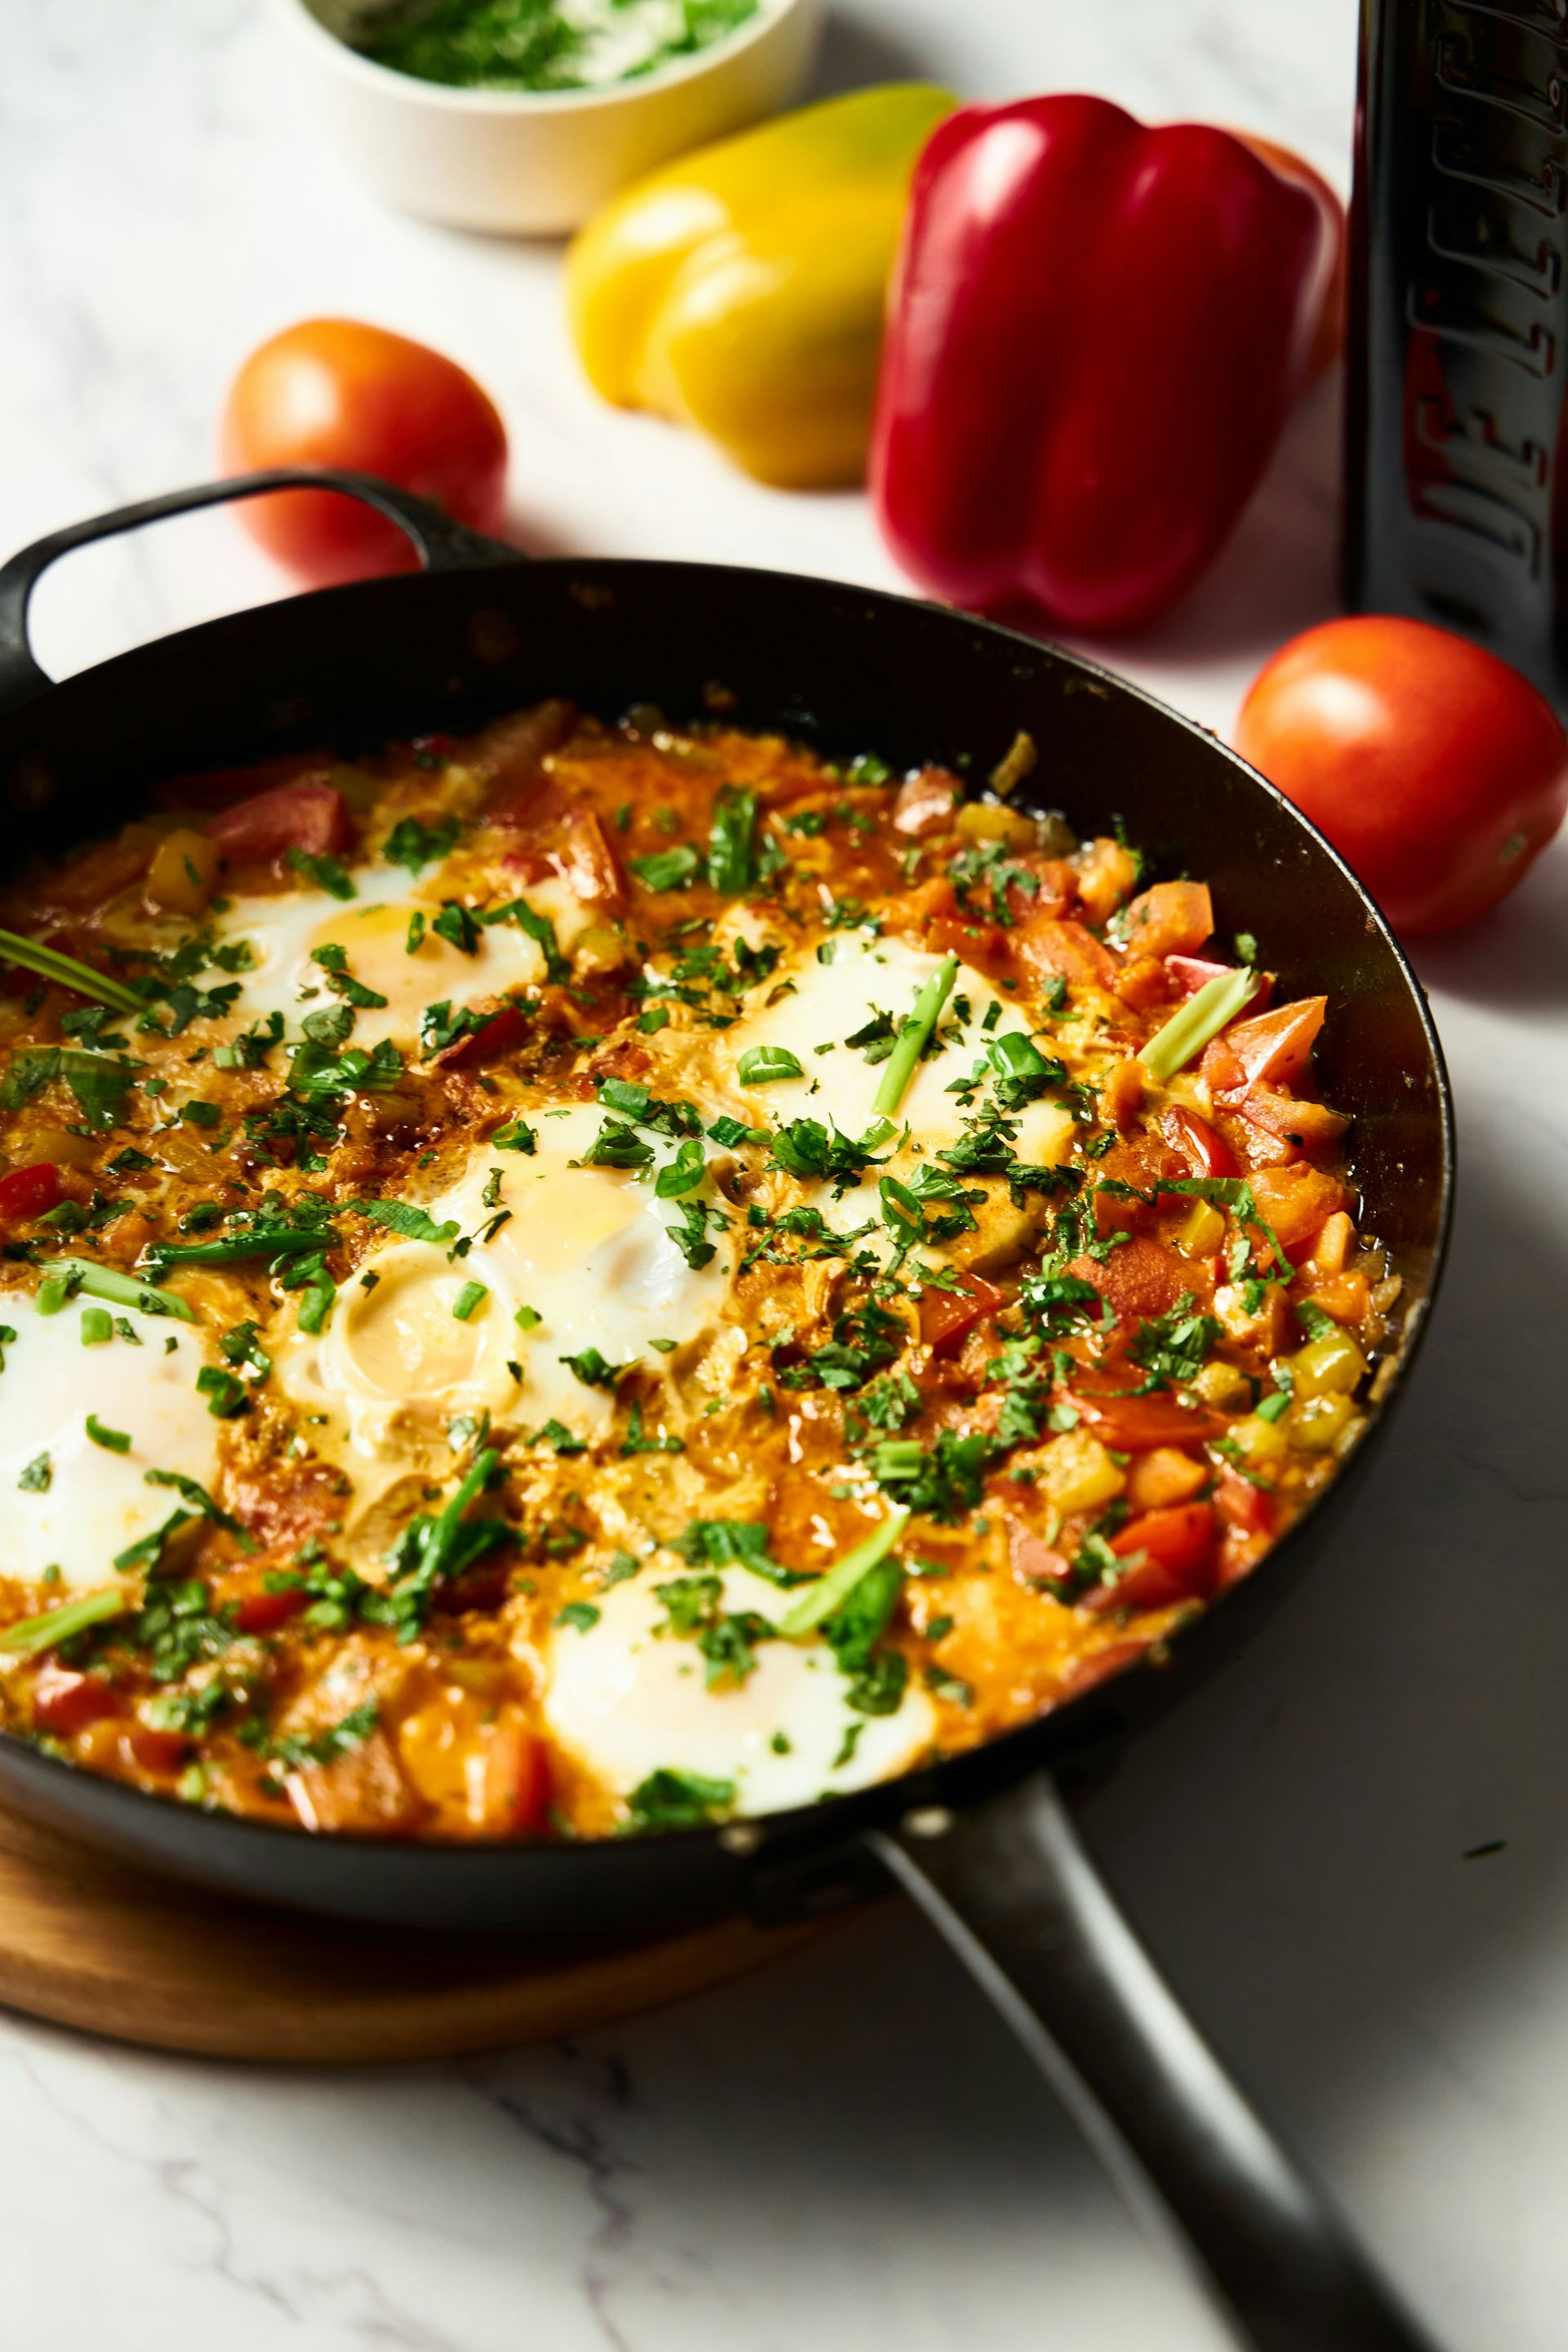
Credit: Alex Bayev / Unsplash
This is a variation on the classic shakshuka that adds white beans and wilted greens to the spiced tomato base, making it a more substantial meal while keeping the one-pan format and the eggs as the centerpiece.
Use the same base as the classic version — onion, garlic, bell pepper, canned tomatoes, cumin, and smoked paprika — but add a can of drained white beans (cannellini or great northern) to the sauce as it simmers. The beans add body and protein and absorb the flavors of the spice-laden sauce as they heat through.
When the sauce is ready, stir in several handfuls of chopped greens — spinach, Swiss chard, or kale — and let them wilt into the sauce. Spinach takes about 30 seconds; kale and chard need a few minutes and should be added before making the egg wells. Once the greens are incorporated, the sauce should be dense and well-seasoned. Taste and adjust salt, acidity with a splash of lemon juice, and heat with additional cayenne or harissa.
Make the egg wells and poach the eggs as in the classic version: cover and cook until the whites are set and the yolks are still runny, about six to eight minutes. The finished dish is considerably heartier than the classic version — two to three eggs per person is filling as a full meal rather than a light one.
Serve with flatbread or pita, a drizzle of olive oil over the top, and a sprinkle of za'atar or sumac if you have them. A dollop of yogurt alongside adds a cool contrast to the warm, spiced sauce.
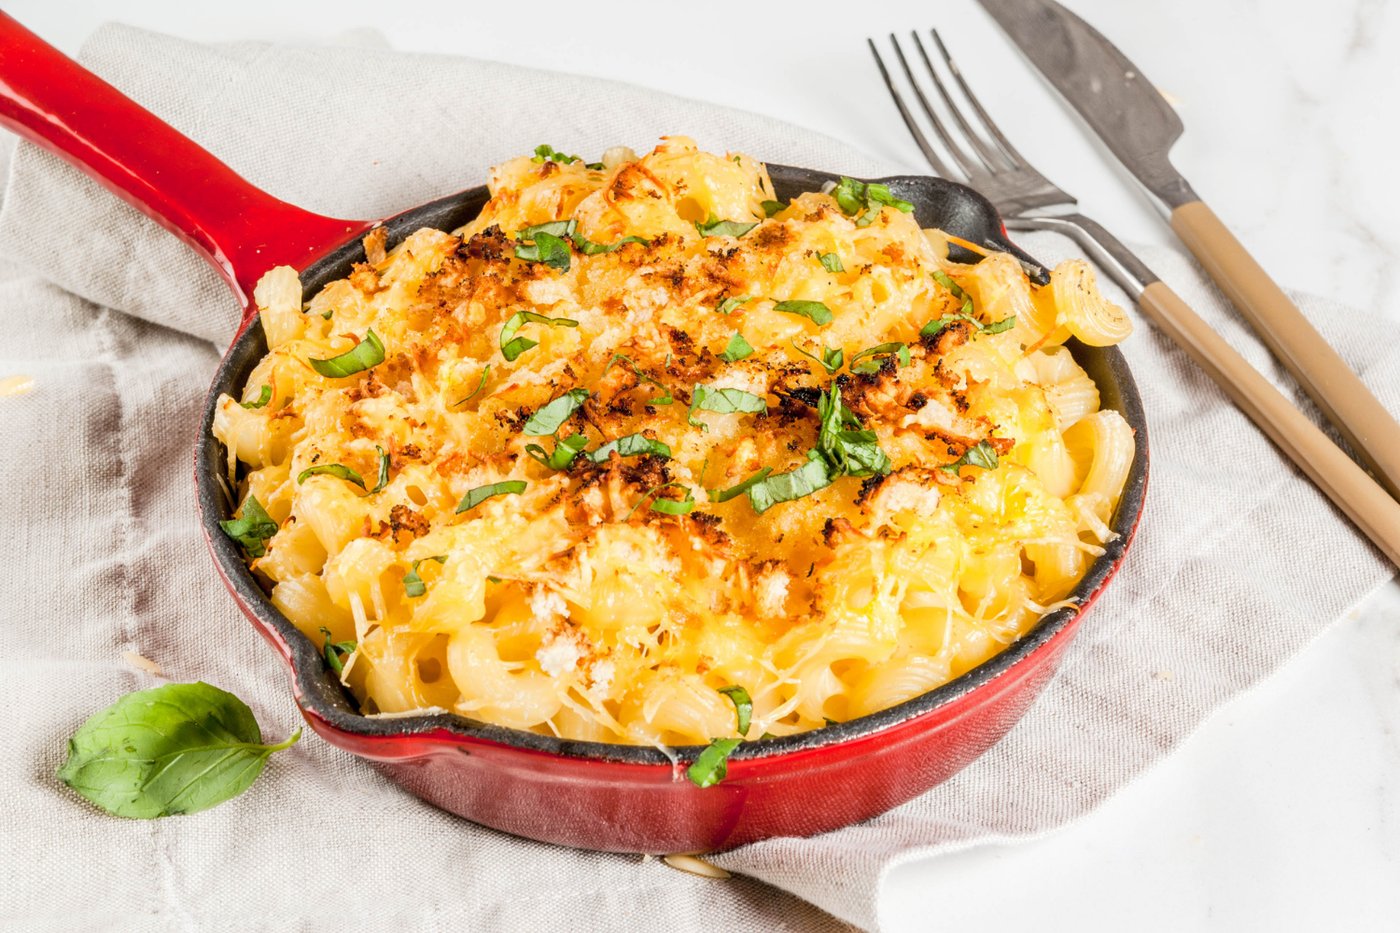
Credit: Canva Images
Stovetop mac and cheese made in a cast iron skillet can achieve a range of textures depending on finishing technique. The base is a classic béchamel — butter, flour, milk — enriched with sharp cheddar and whatever other cheeses suit the occasion. The cast iron conducts heat evenly, which prevents hot spots that can cause the cheese sauce to break or scorch.
Melt butter in the skillet over medium heat, whisk in an equal amount of flour, and cook the roux for two minutes to eliminate the raw flour flavor. Whisk in warm milk gradually, keeping the sauce smooth and lump-free. Let it simmer until thickened, then remove from heat before adding the cheese. Adding cheese to a sauce that's too hot causes the proteins to seize and the sauce to become grainy; off the heat, the residual warmth melts the cheese gently.
Stir in shredded sharp cheddar and an aged cheese with more complexity — Gruyère, fontina, or even a sharp aged gouda. Season with salt, black pepper, mustard powder (which sharpens the cheese flavor without adding a mustard taste), and a few dashes of hot sauce. Add cooked elbow macaroni or any short pasta and stir to combine.
For a baked finish, scatter breadcrumbs mixed with butter and a little more grated cheese over the top and transfer the skillet to a broiler or 400°F oven for eight to 10 minutes until the top is golden and bubbling. The cast iron maintains the heat of the sauce during the baking step and produces a slightly crispy bottom layer where the pasta contacts the pan.
Serve immediately; mac and cheese stiffens as it cools, and the texture is at its best straight from the pan.
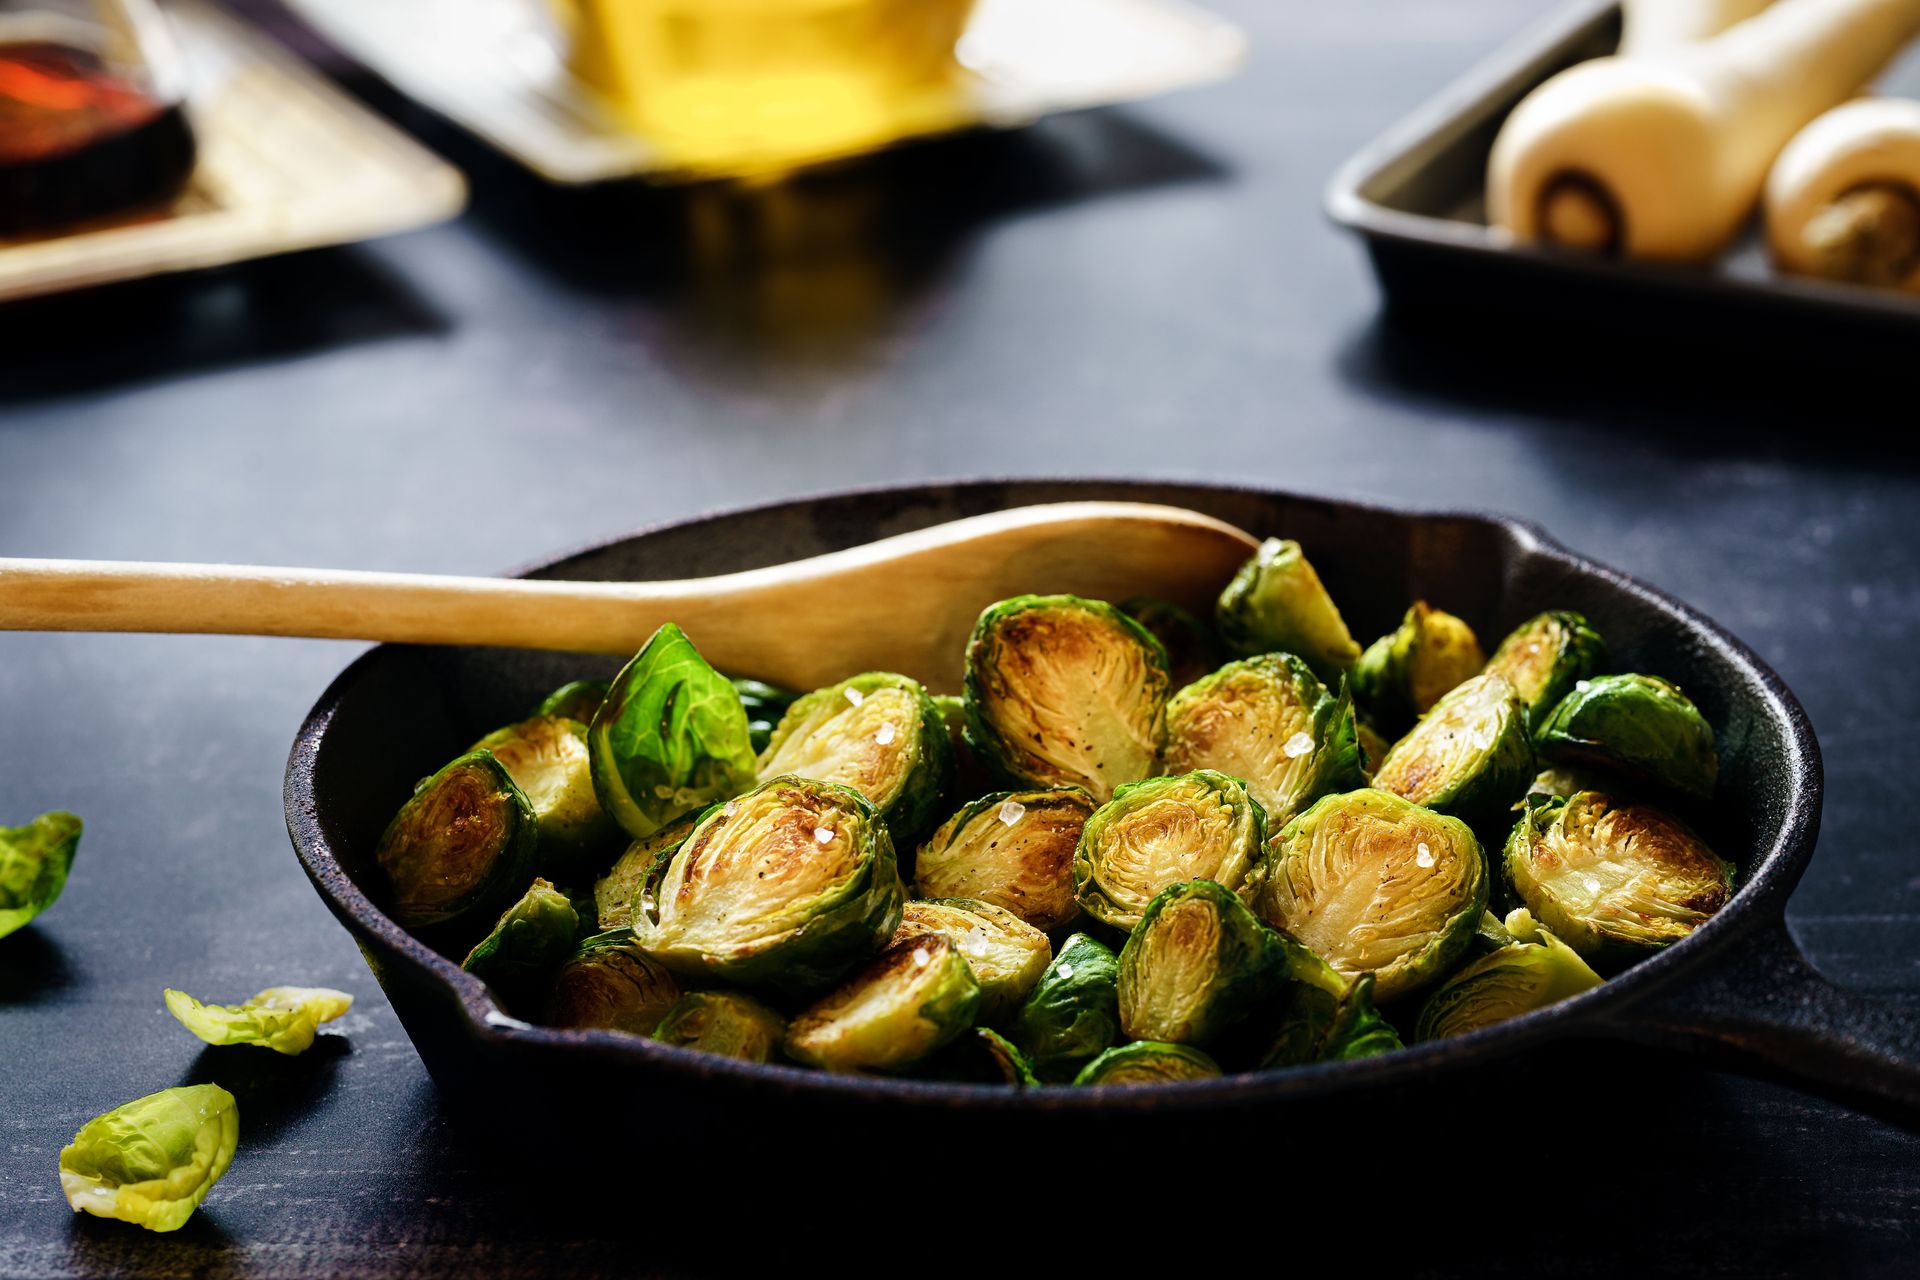
Credit: Sebastian Coman Photography / Pexels
Brussels sprouts cooked in a cast iron skillet get caramelized cut surfaces that roasting in a sheet pan can match but stovetop cooking in a lighter pan often can't. The combination of high heat on the flat surface and even thermal distribution across the pan is what makes the difference.
Trim the sprouts and halve them through the stem. Dry them thoroughly — any moisture causes steaming rather than browning. Heat the skillet over high heat until very hot, add oil, then place the sprouts cut-side down in a single layer without crowding. This is important: overcrowding drops the pan temperature and causes steaming. Work in batches if necessary.
Cook without moving for four to five minutes, until the cut surface is deeply browned — not just golden, but genuinely dark. That caramelization is where most of the flavor comes from. Toss or stir, season generously with salt and pepper, and continue cooking for another three to four minutes until the sprouts are tender throughout.
Add any additional flavors in the last minute or two: a drizzle of balsamic vinegar that reduces quickly in the hot pan, a handful of toasted walnuts or sliced almonds, a few strips of crispy bacon, or a squeeze of lemon juice with shaved Parmesan. All of these work well. The sprouts themselves need only the browning and seasoning to taste good; the additions are finishing touches.
The whole process takes about 10 minutes and the result is significantly better than boiled or steamed sprouts. The high heat cooking method works equally well with other vegetables: broccoli florets, cauliflower, quartered cabbage wedges, and thick-cut zucchini all respond similarly.
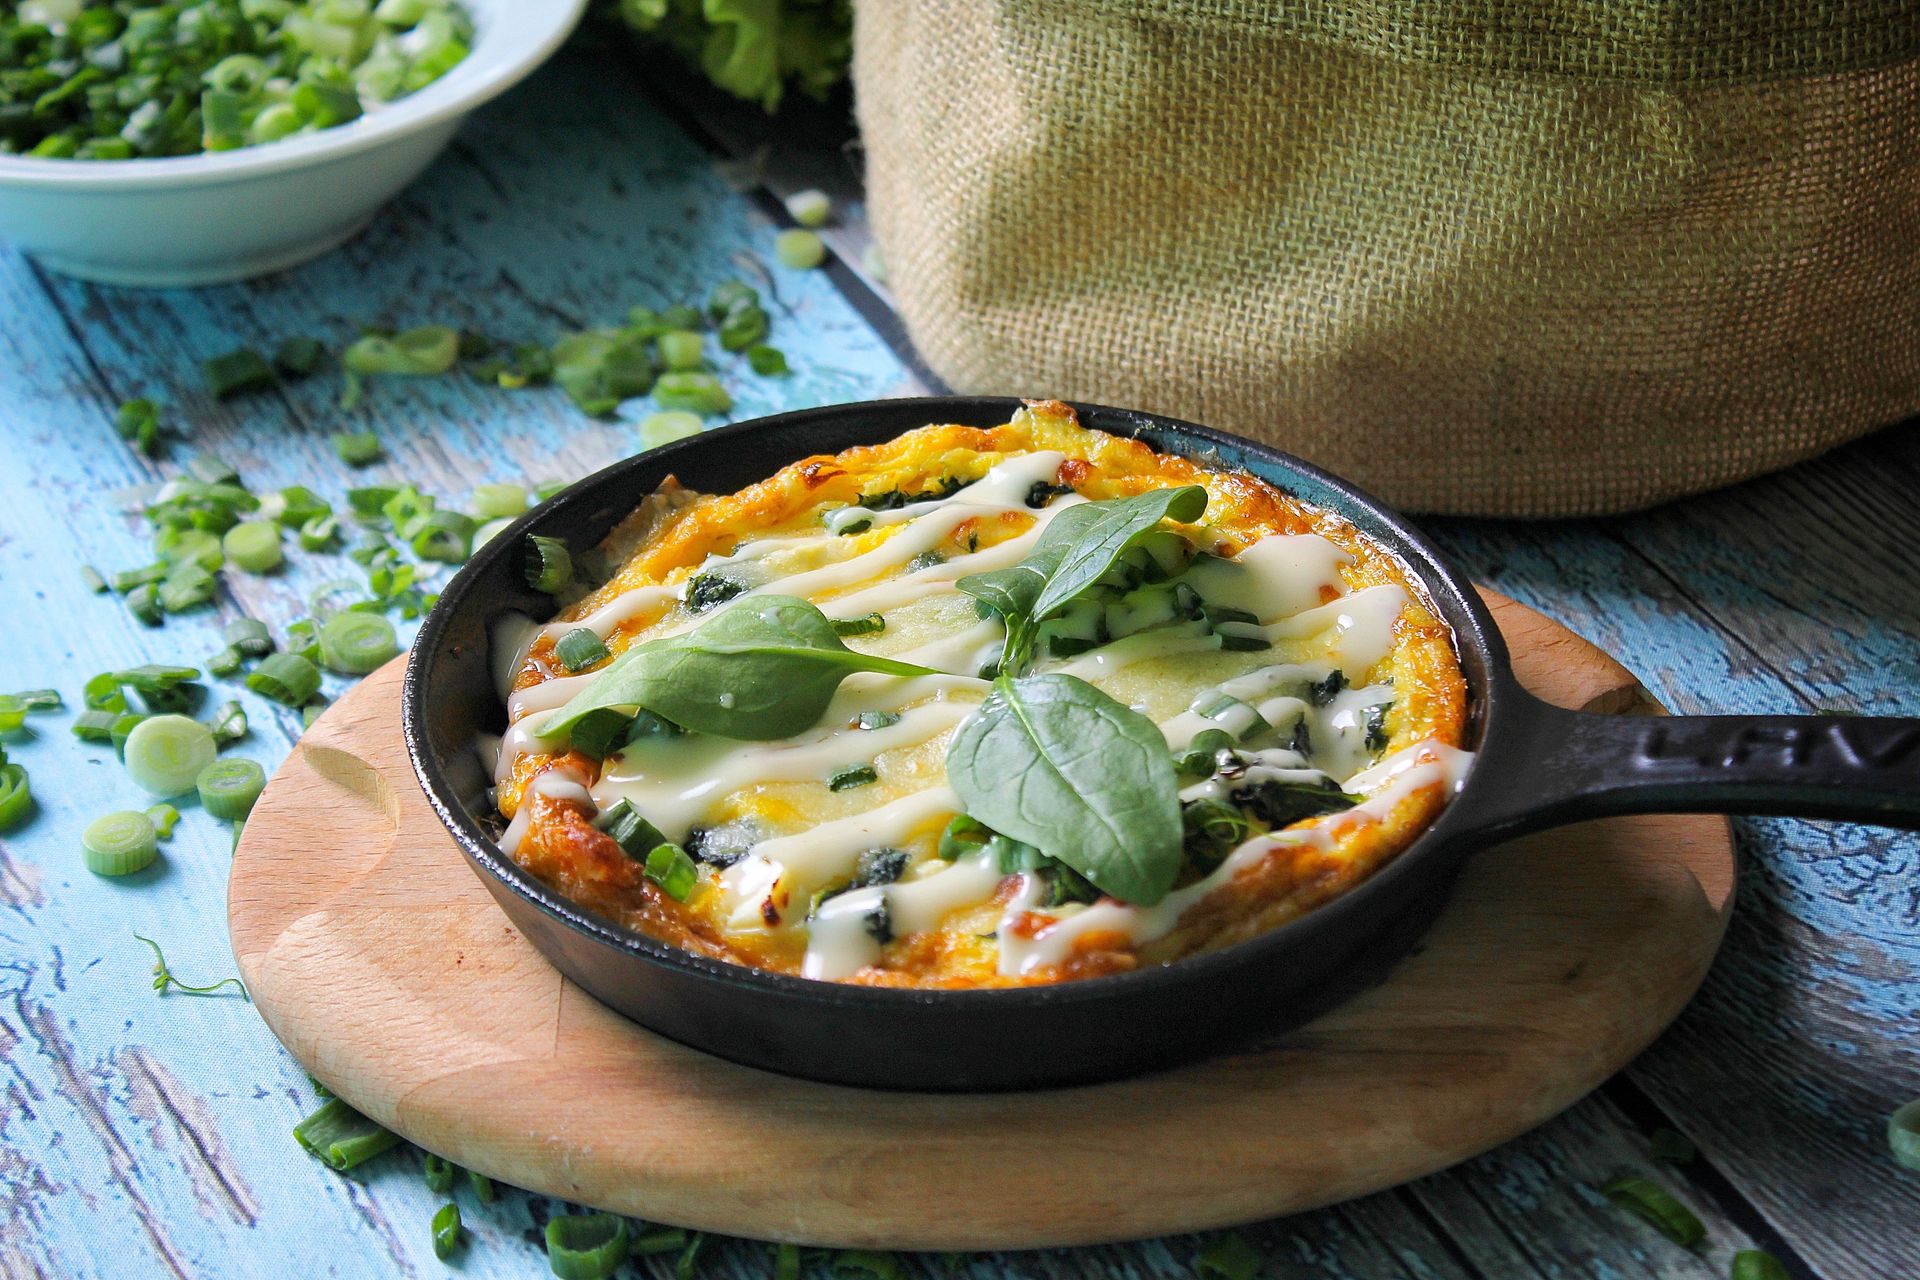
Credit: Shameel mukkath / Pexels
A frittata is an Italian egg dish that's somewhere between an omelette and a baked egg casserole. Unlike an omelette, it's not folded; unlike a quiche, it has no pastry crust. It's cooked partway on the stovetop and finished under the broiler, a process that cast iron handles well.
The base is eggs — six to eight for a 10- or 12-inch skillet — whisked with a splash of milk or cream, salt, pepper, and any fresh herbs. The fillings can be almost anything: sautéed vegetables, leftover roasted potatoes, cooked sausage or bacon, cheese, or a combination. The filling should be cooked and seasoned before the eggs go in; the frittata time is too short to cook raw fillings through.
Heat the skillet over medium heat, add oil or butter, and cook any raw aromatics — shallot, garlic — until softened. Add the pre-cooked filling ingredients and spread them evenly. Pour in the egg mixture, which should just cover everything. Cook over medium-low heat without stirring until the edges are set and the center is still slightly runny — about five to seven minutes. Don't rush this; the goal is a frittata that's creamy and just-set throughout, not rubbery.
Transfer the skillet to a broiler set to high and cook for two to three minutes until the surface is golden and fully set. Watch it carefully; it can go from perfect to overcooked quickly under a broiler. Remove and let rest for a few minutes before slicing.
A frittata can be served warm, at room temperature, or cold, which makes it useful for meal prep, packed lunches, or picnic food. It keeps well in the refrigerator for three days.
Credit: Canva Images
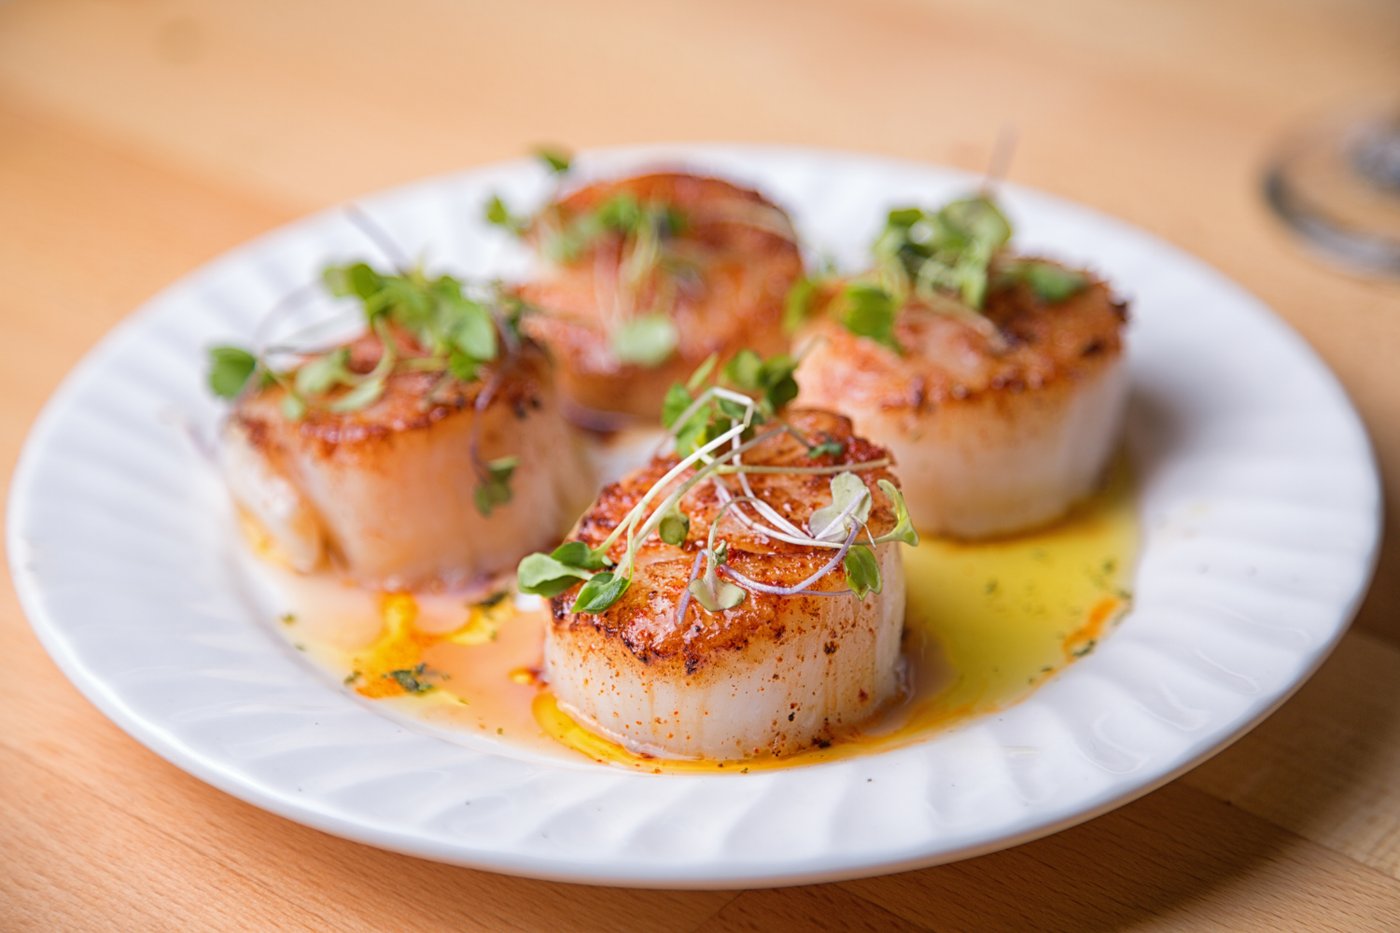
Large sea scallops seared in cast iron achieve the caramelized crust that defines the dish. The cast iron's heat retention is essential: scallops release moisture when they hit the pan, which can dramatically drop the temperature of a lighter pan and prevent browning. Cast iron absorbs that moisture-driven cooling more effectively.
Buy large "dry" sea scallops if possible. "Wet" scallops have been treated with sodium tripolyphosphate, which causes them to release more water in the pan and makes browning harder to achieve. The size difference also matters: larger scallops give you more time to develop a crust on the outside before the interior overcooks.
Pat the scallops completely dry and season with salt just before cooking — not earlier. Salt draws moisture out of the scallop, and surface moisture is the enemy of a good sear. Heat the skillet to very high heat — hotter than you think is necessary — and add a high-smoke-point oil. When the oil begins to smoke, add the scallops in a single layer with space between each one.
Don't move them. Don't press them. Don't check them too early. After about two minutes, a scallop should release from the pan naturally when it's ready to flip. If it sticks, it needs more time. Flip and cook for another 60 to 90 seconds; the interior should be barely opaque at the center.
Add butter, garlic, and thyme to the pan after flipping and baste continuously. Remove from heat immediately when done; scallops overcook quickly and become rubbery. Serve with the pan sauce and something acidic alongside — lemon, a light salad, or a pea purée that cuts the richness.
Credit: Canva Images
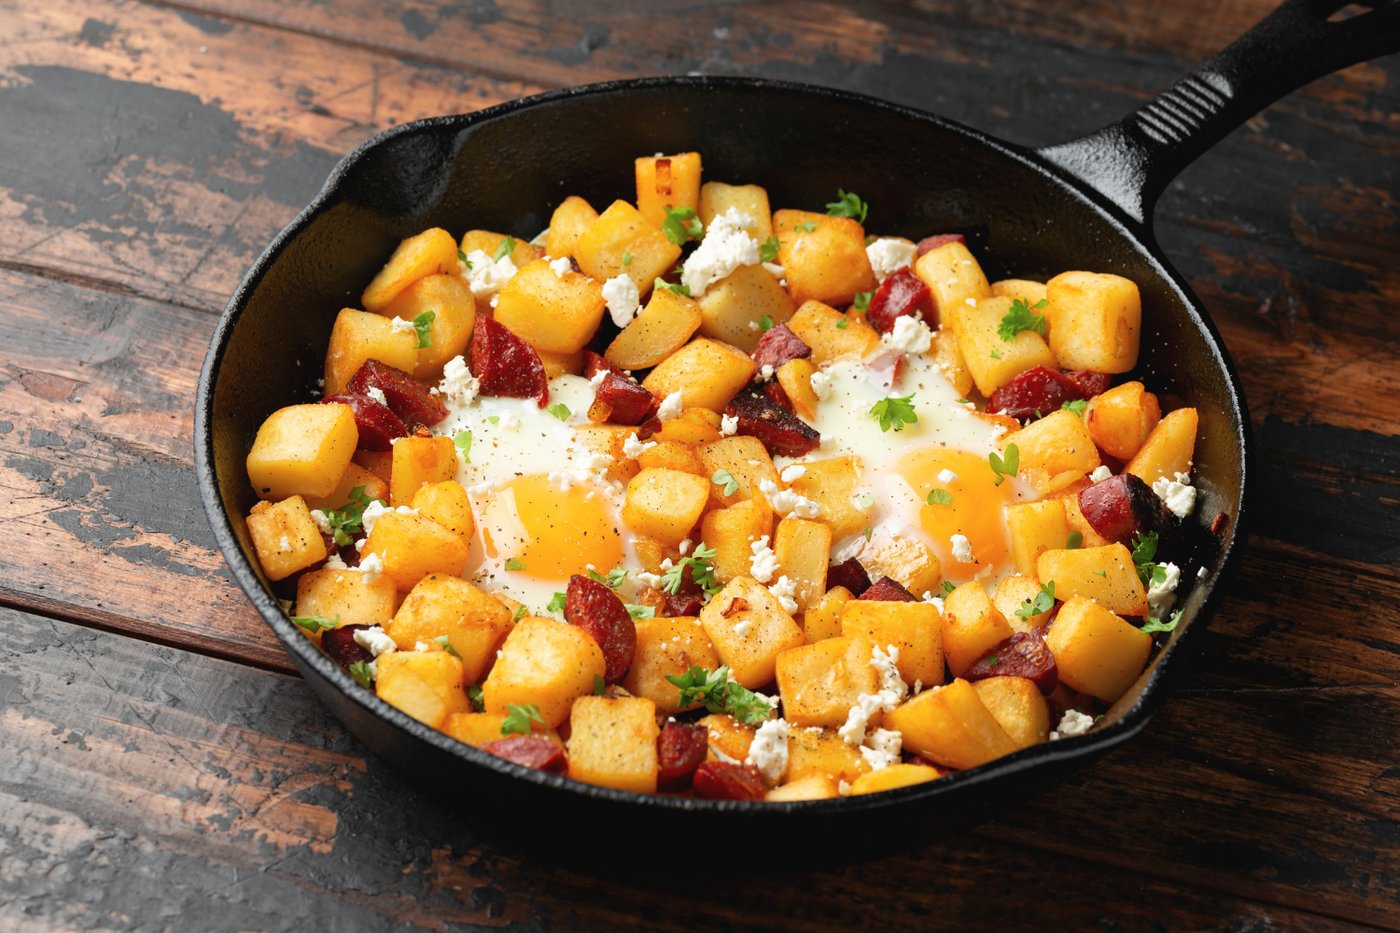
Cast iron is the best pan for potato hash. The surface browns and crisps the potatoes evenly, the pan holds heat while the potatoes develop a crust, and the low sides allow steam to escape so the potatoes don't soften and stew.
The most important step is one most recipes skip: parboil the diced potatoes before they go into the skillet. Raw potatoes require a long cook time in the pan to become tender on the inside, and by the time the interior is cooked through, the exterior is often overdone or the pan has been on the heat so long that burned spots accumulate. Parboiling — bringing diced potatoes to a boil in salted water, cooking until just barely tender, draining, and letting them dry in the colander — takes 10 minutes and produces a hash that crisps quickly and evenly in the pan.
Heat the cast iron skillet over medium-high heat, add oil and a generous amount of butter for flavor, and add the parboiled potatoes in a single layer. Don't stir for at least five minutes; let the bottom crust develop. Then toss, press flat again, and let them sit for another four to five minutes. The exterior should be deeply golden and very crispy.
Add diced onion and bell pepper partway through — after the first toss — so they soften but retain some texture. Season aggressively with salt, pepper, garlic powder, and smoked paprika. In the last minute, some cooks add hot sauce or Worcestershire sauce, which adds depth without flavor-identifying them.
Serve with fried eggs on top, which is the most common approach, or with any protein alongside.
Credit: B R A Y D E N / Unsplash
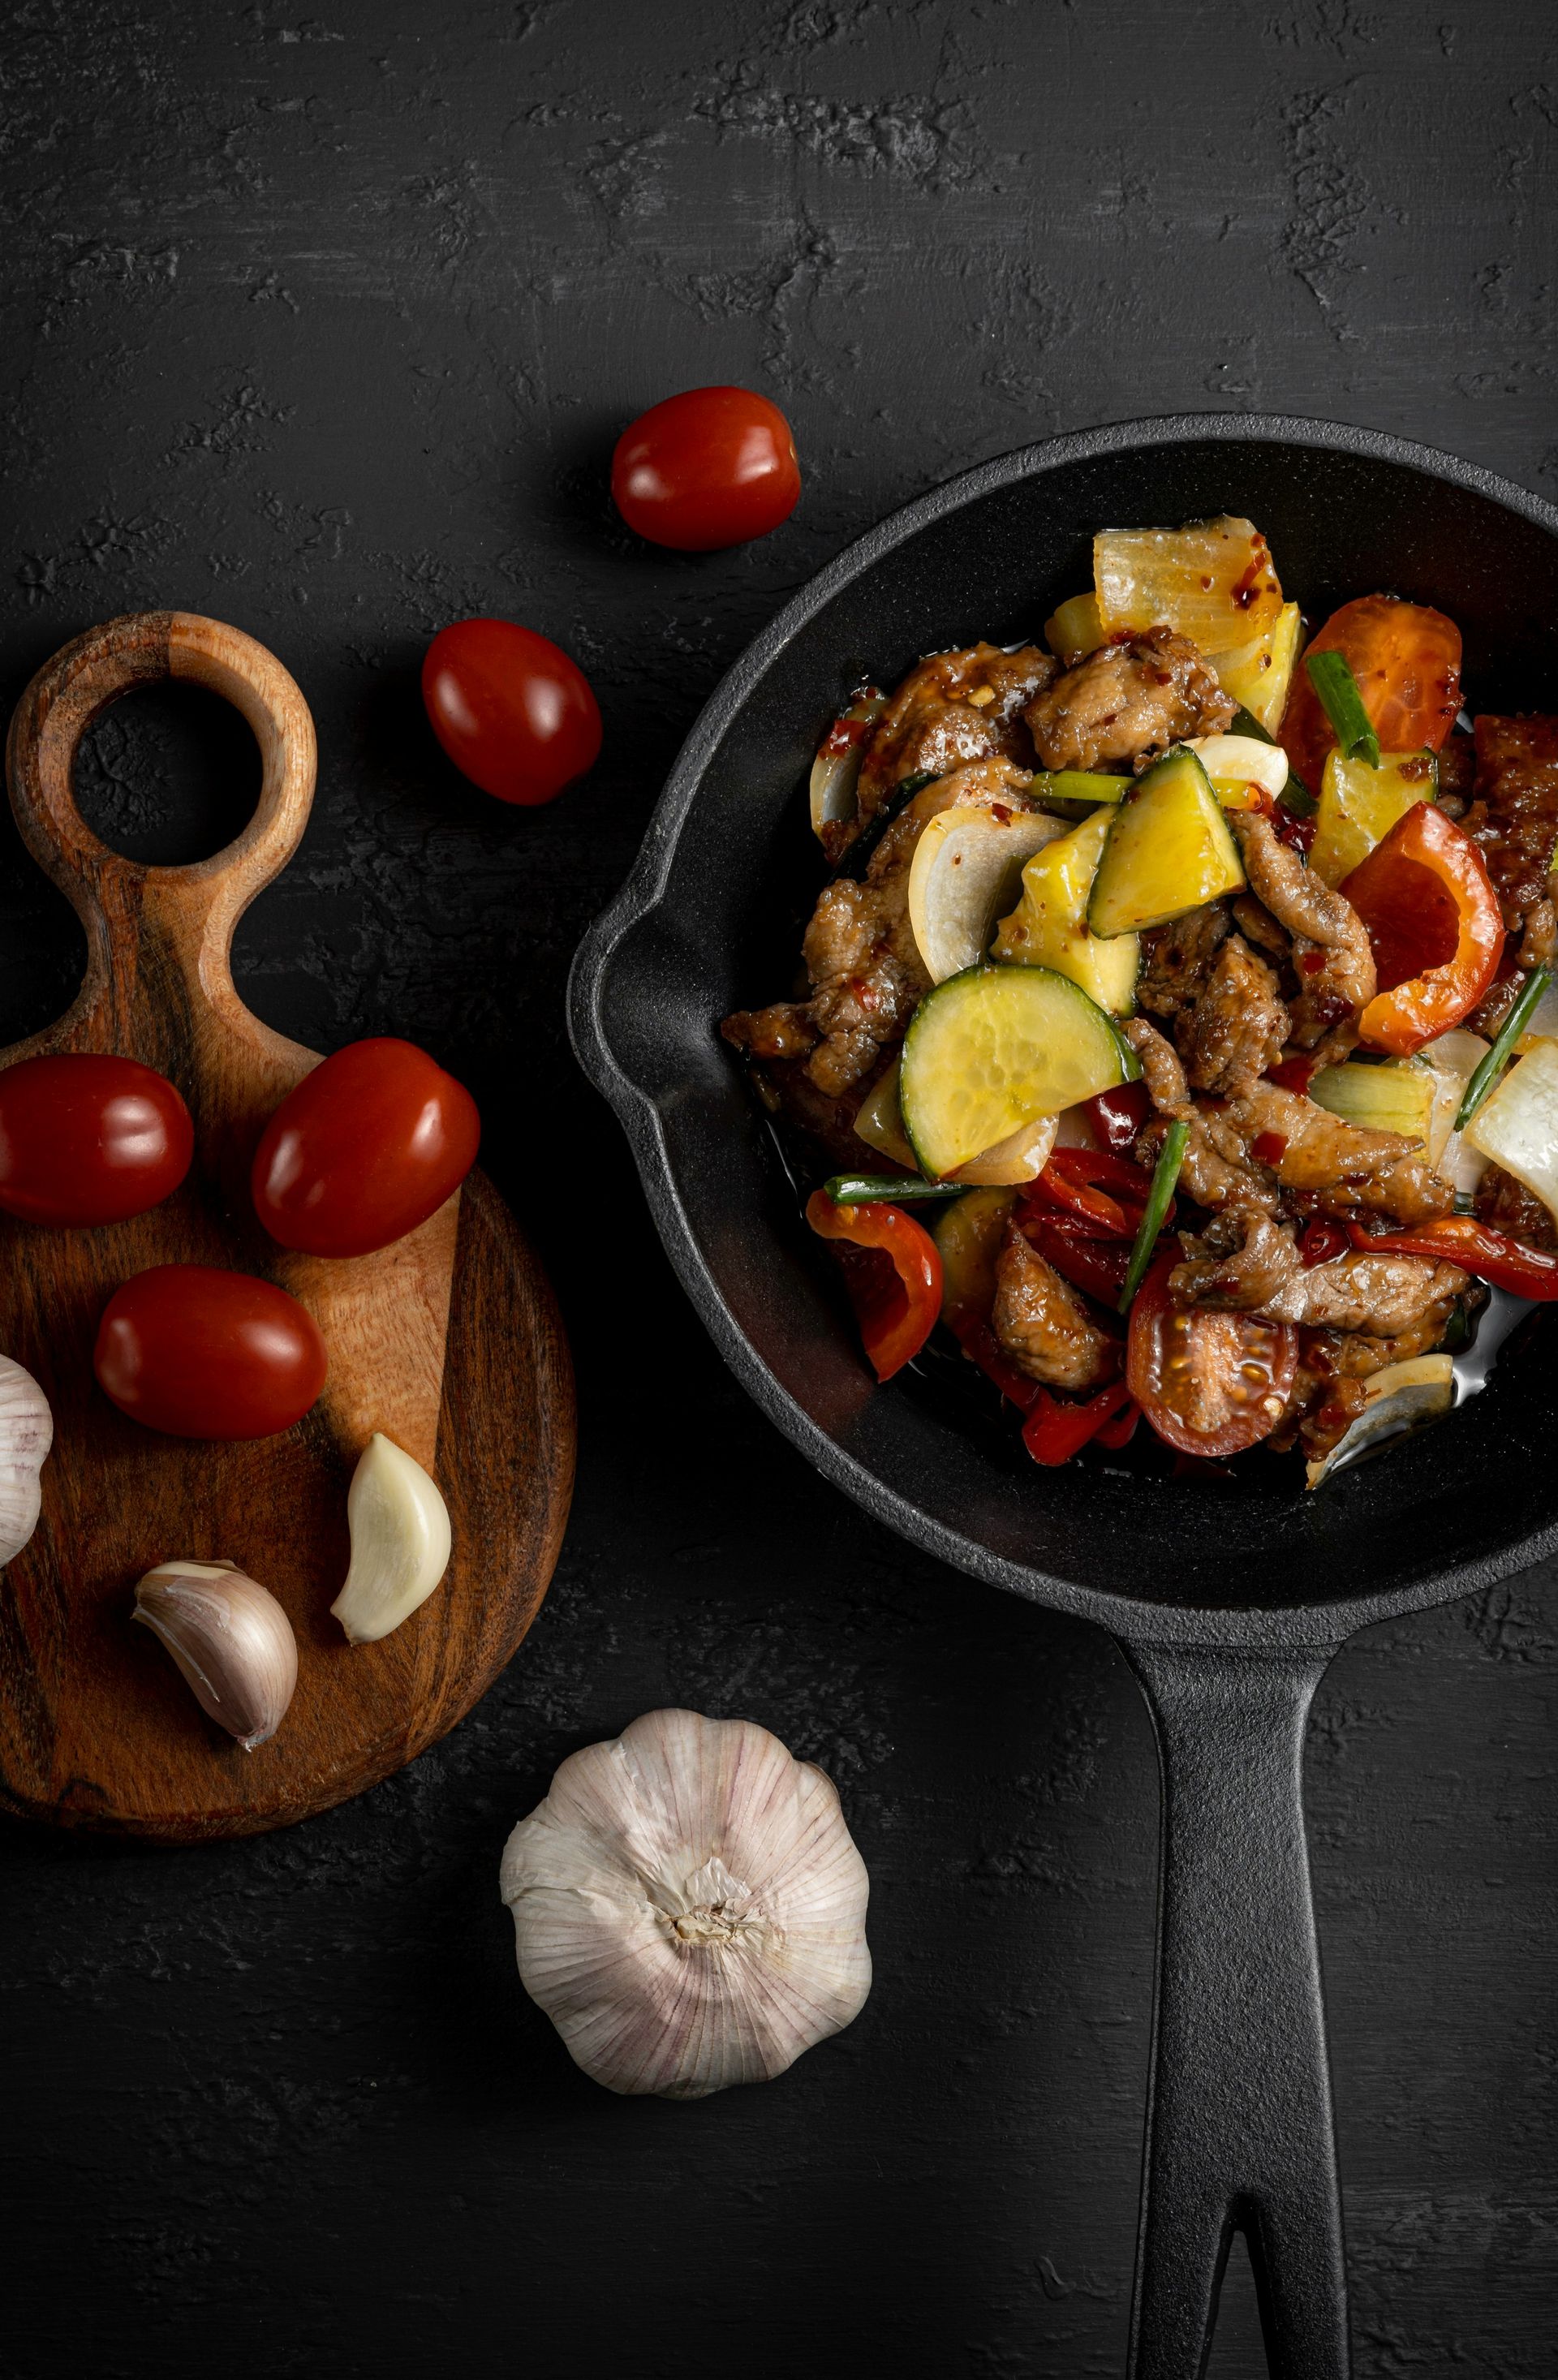
Cast iron is not the traditional choice for stir-fry — a wok is — but it works well if you adjust the technique. The key difference is that a wok's curved sides allow you to toss ingredients continuously over very high heat; cast iron's flat surface means you work in a smaller zone, which requires cooking in batches to avoid crowding and steaming.
Slice beef — flank steak or sirloin work well — very thinly against the grain. Marinate it briefly in soy sauce, sesame oil, a small amount of cornstarch, and a pinch of baking soda. The cornstarch and baking soda together tenderize the meat and help it develop a light crust in the pan.
Heat the cast iron to very high heat — higher than you'd use for most other purposes. Add oil, and when it's smoking hard, add the beef in a single layer without crowding. Cook for 60 to 90 seconds without moving until browned on one side, then toss quickly and remove the beef to a plate. Cook the vegetables next, working in batches: hard vegetables like carrots and broccoli first, softer ones like bell pepper and snap peas second.
Return everything to the pan, add the sauce — a mix of soy sauce, oyster sauce, a little sugar, cornstarch dissolved in water, and garlic and ginger that were bloomed in oil before the cook — and toss everything together for 30 to 60 seconds until the sauce thickens and coats everything.
Serve immediately over steamed rice. The dish degrades quickly as it sits; the vegetables continue to cook in the residual heat and the sauce thickens further.
Credit: Canva Images
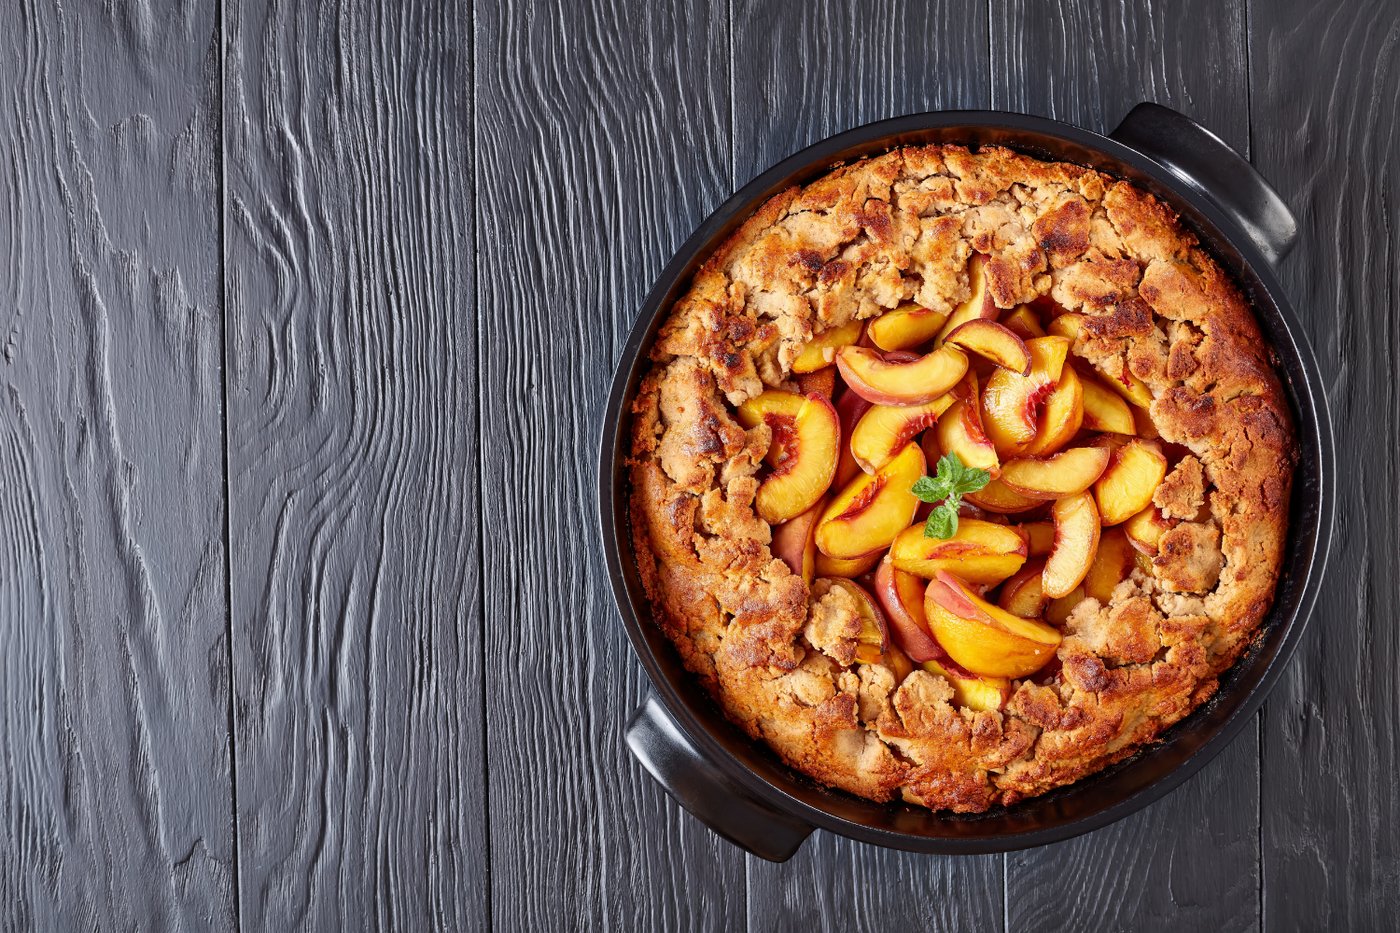
A peach cobbler made in a cast iron skillet produces a crust that's butterscotch-rich at the edges where it contacts the hot pan and tender in the center. The filling can be made with fresh, frozen, or canned peaches, making it a viable recipe year-round.
For the filling: combine sliced peaches with sugar, a squeeze of lemon juice, cornstarch to thicken the juices, cinnamon, and a pinch of salt. If using fresh peaches, taste and adjust sugar depending on sweetness; summer peaches may need very little. If using canned peaches, drain most of the syrup and reduce the sugar in the recipe.
For the topping: whisk together flour, sugar, baking powder, salt, and mix in cold butter cut into small pieces until the mixture resembles coarse crumbs. Add cold buttermilk and stir just until a shaggy dough forms. Don't overwork it; a slightly rough, lumpy dough produces a more tender biscuit topping than a smooth one.
Melt two tablespoons of butter in the cast iron skillet over medium heat on the stovetop until it foams and begins to brown. Add the peach filling and let it bubble for a minute. Drop spoonfuls of the biscuit dough over the top of the fruit, leaving gaps for the filling to bubble through. The topping doesn't need to be even or neat.
Transfer to a 375°F oven and bake for 30 to 35 minutes until the biscuit topping is golden, the filling is bubbling at the edges, and a toothpick inserted in the center of the topping comes out clean. Let cool for 15 minutes before serving. Vanilla ice cream or lightly sweetened whipped cream alongside is the conventional accompaniment.
Credit: Eiliv Aceron / Unsplash
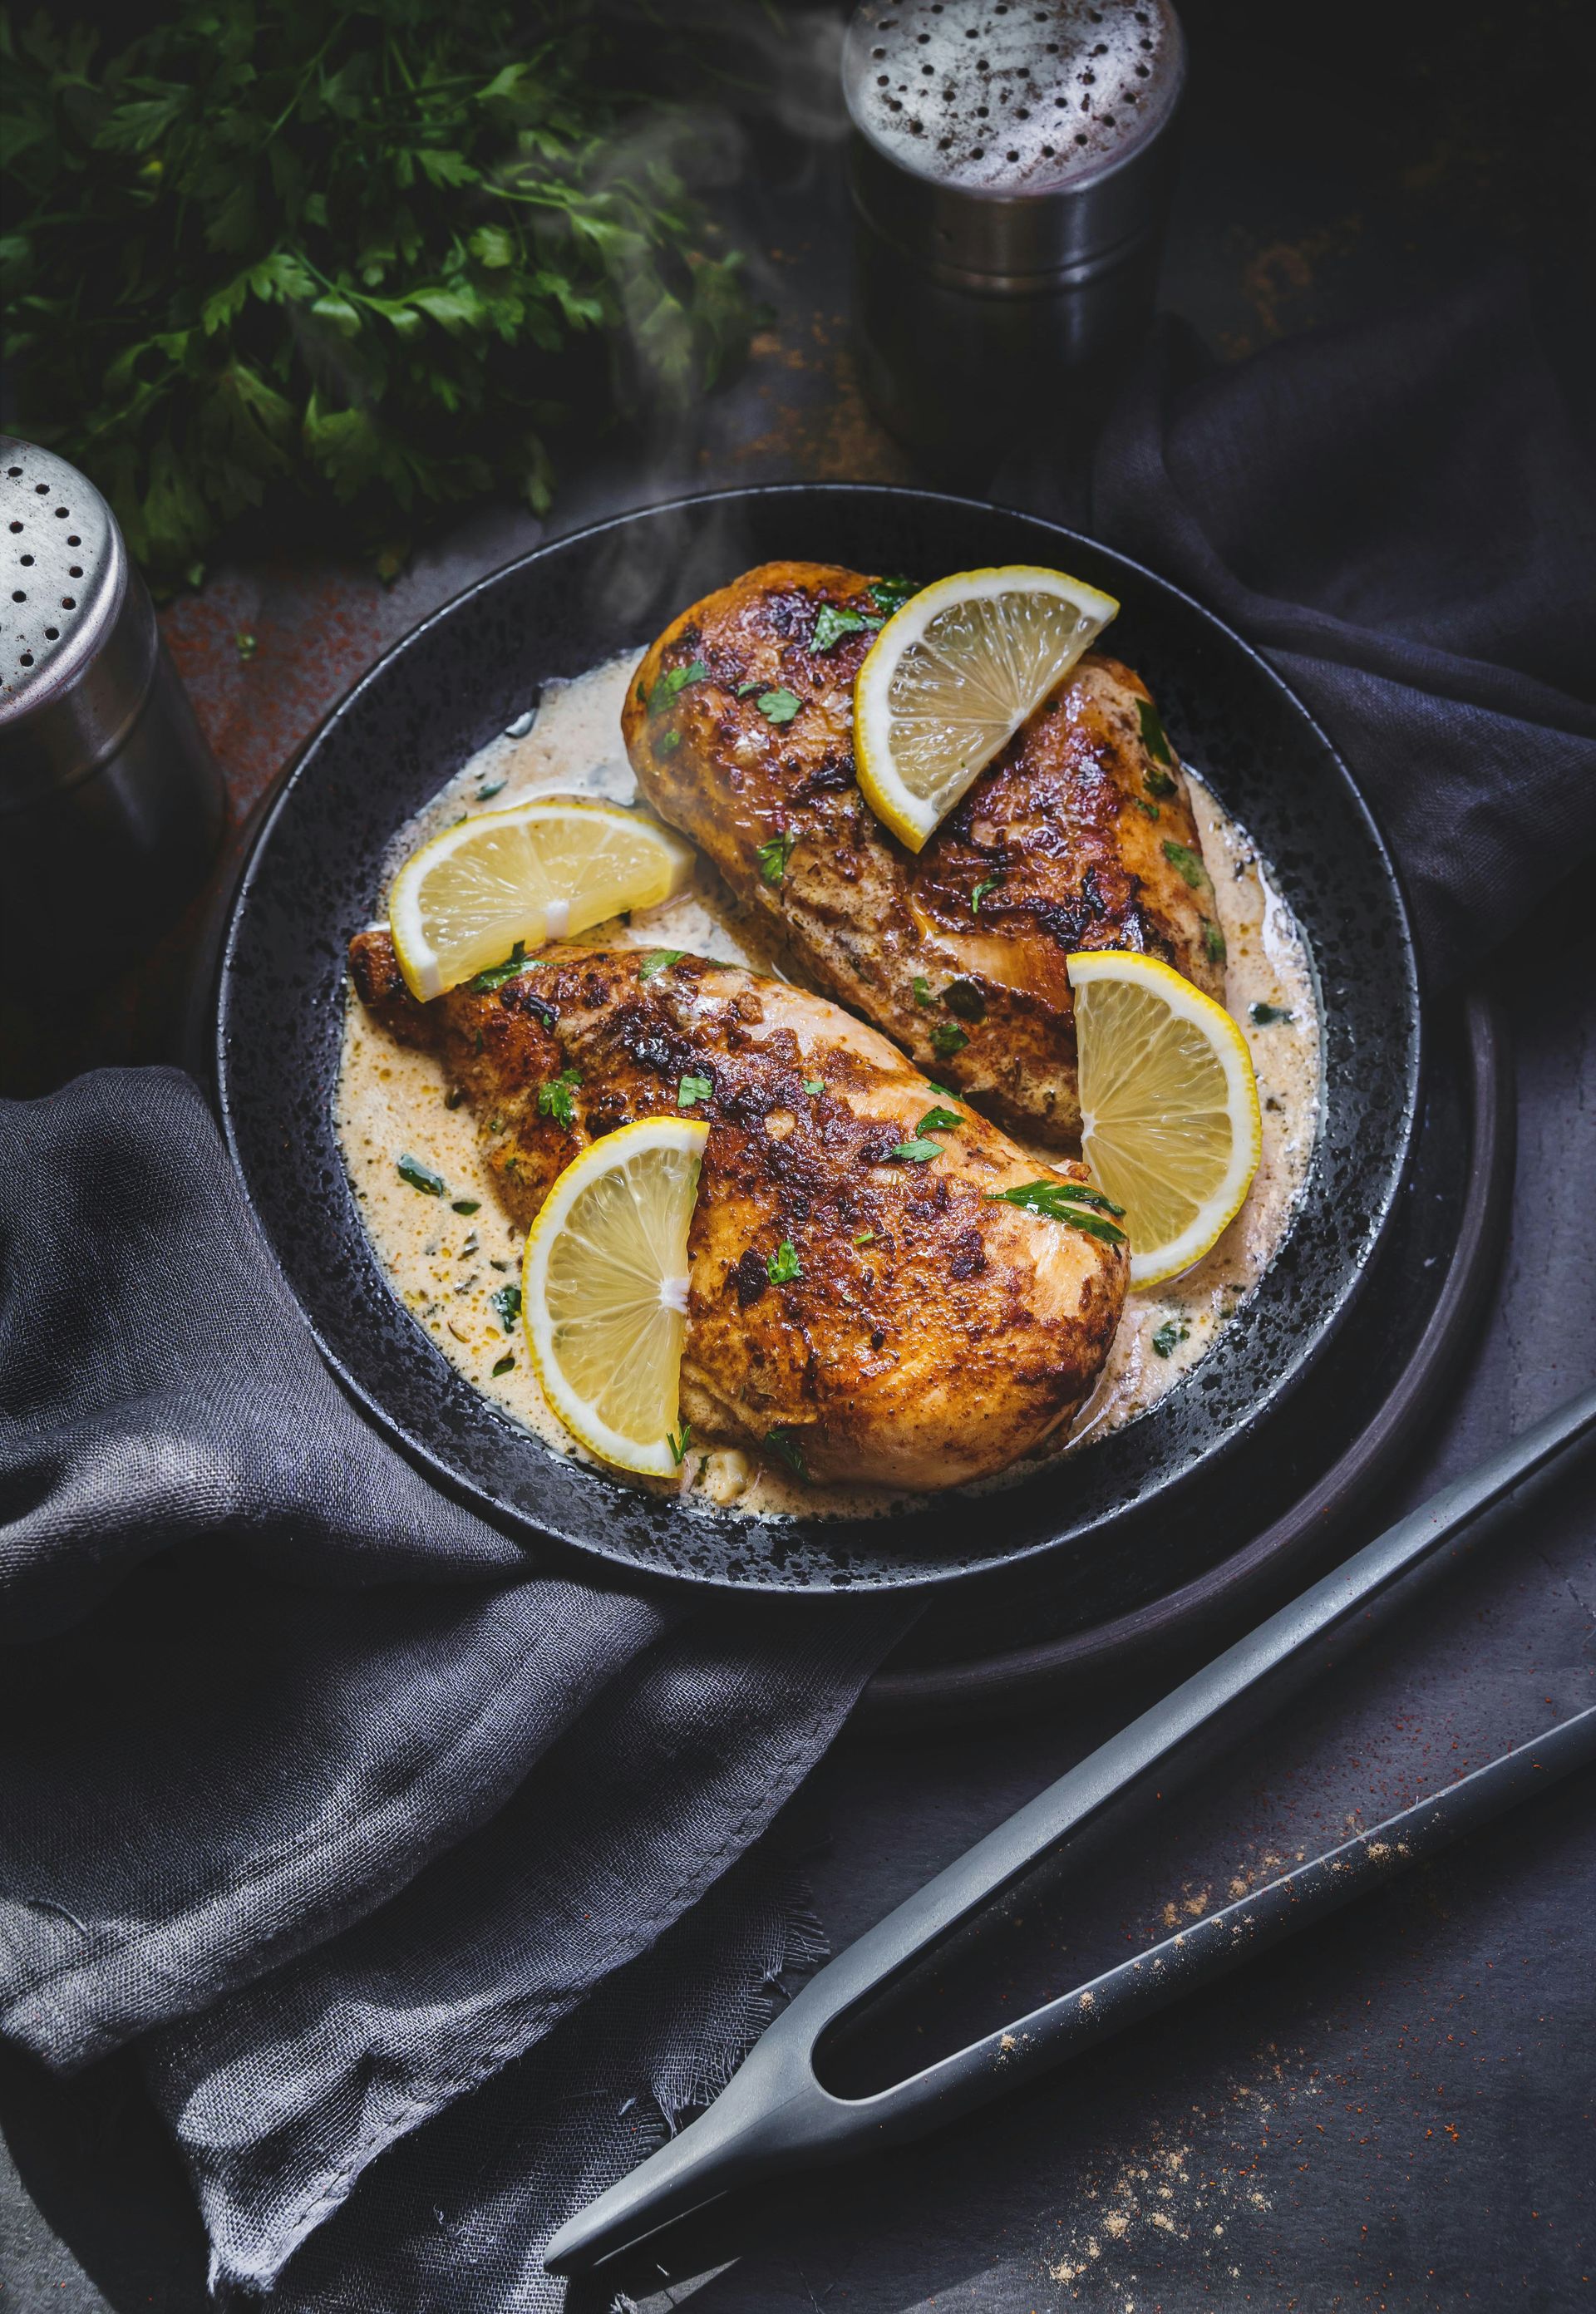
Chicken piccata is a pan sauce dish that demonstrates the advantage of a cast iron skillet for building flavor through fond — the browned bits that stick to the bottom of the pan after searing and dissolve into a sauce.
Pound boneless, skinless chicken breasts to an even thickness of about half an inch, or use thin-cut chicken cutlets. Season with salt and pepper, then dredge lightly in flour, shaking off excess. The flour coating promotes browning and helps the sauce cling to the chicken later.
Heat the cast iron skillet over medium-high heat with oil. Sear the chicken for three to four minutes per side until golden. Remove to a plate. The pan should have a layer of browned bits on the bottom. Don't skip this searing step; the fond is the foundation of the sauce.
In the same pan, sauté sliced shallots or garlic briefly, then deglaze with dry white wine, scraping up all the fond from the bottom of the pan with a wooden spoon. Let the wine reduce by half. Add chicken stock, the juice of one to two lemons, and a generous handful of capers. Simmer until the sauce reduces and concentrates — about four minutes. Off the heat, swirl in cold butter cut into small pieces, which emulsifies into the sauce and gives it a silky texture. Return the chicken to the pan and spoon the sauce over it.
The finished dish is sour, briny, and savory, with a sauce that should be bright and slightly syrupy. Fresh parsley over the top and a side of pasta or mashed potatoes rounds out the plate.
Credit: alleksana / Pexels
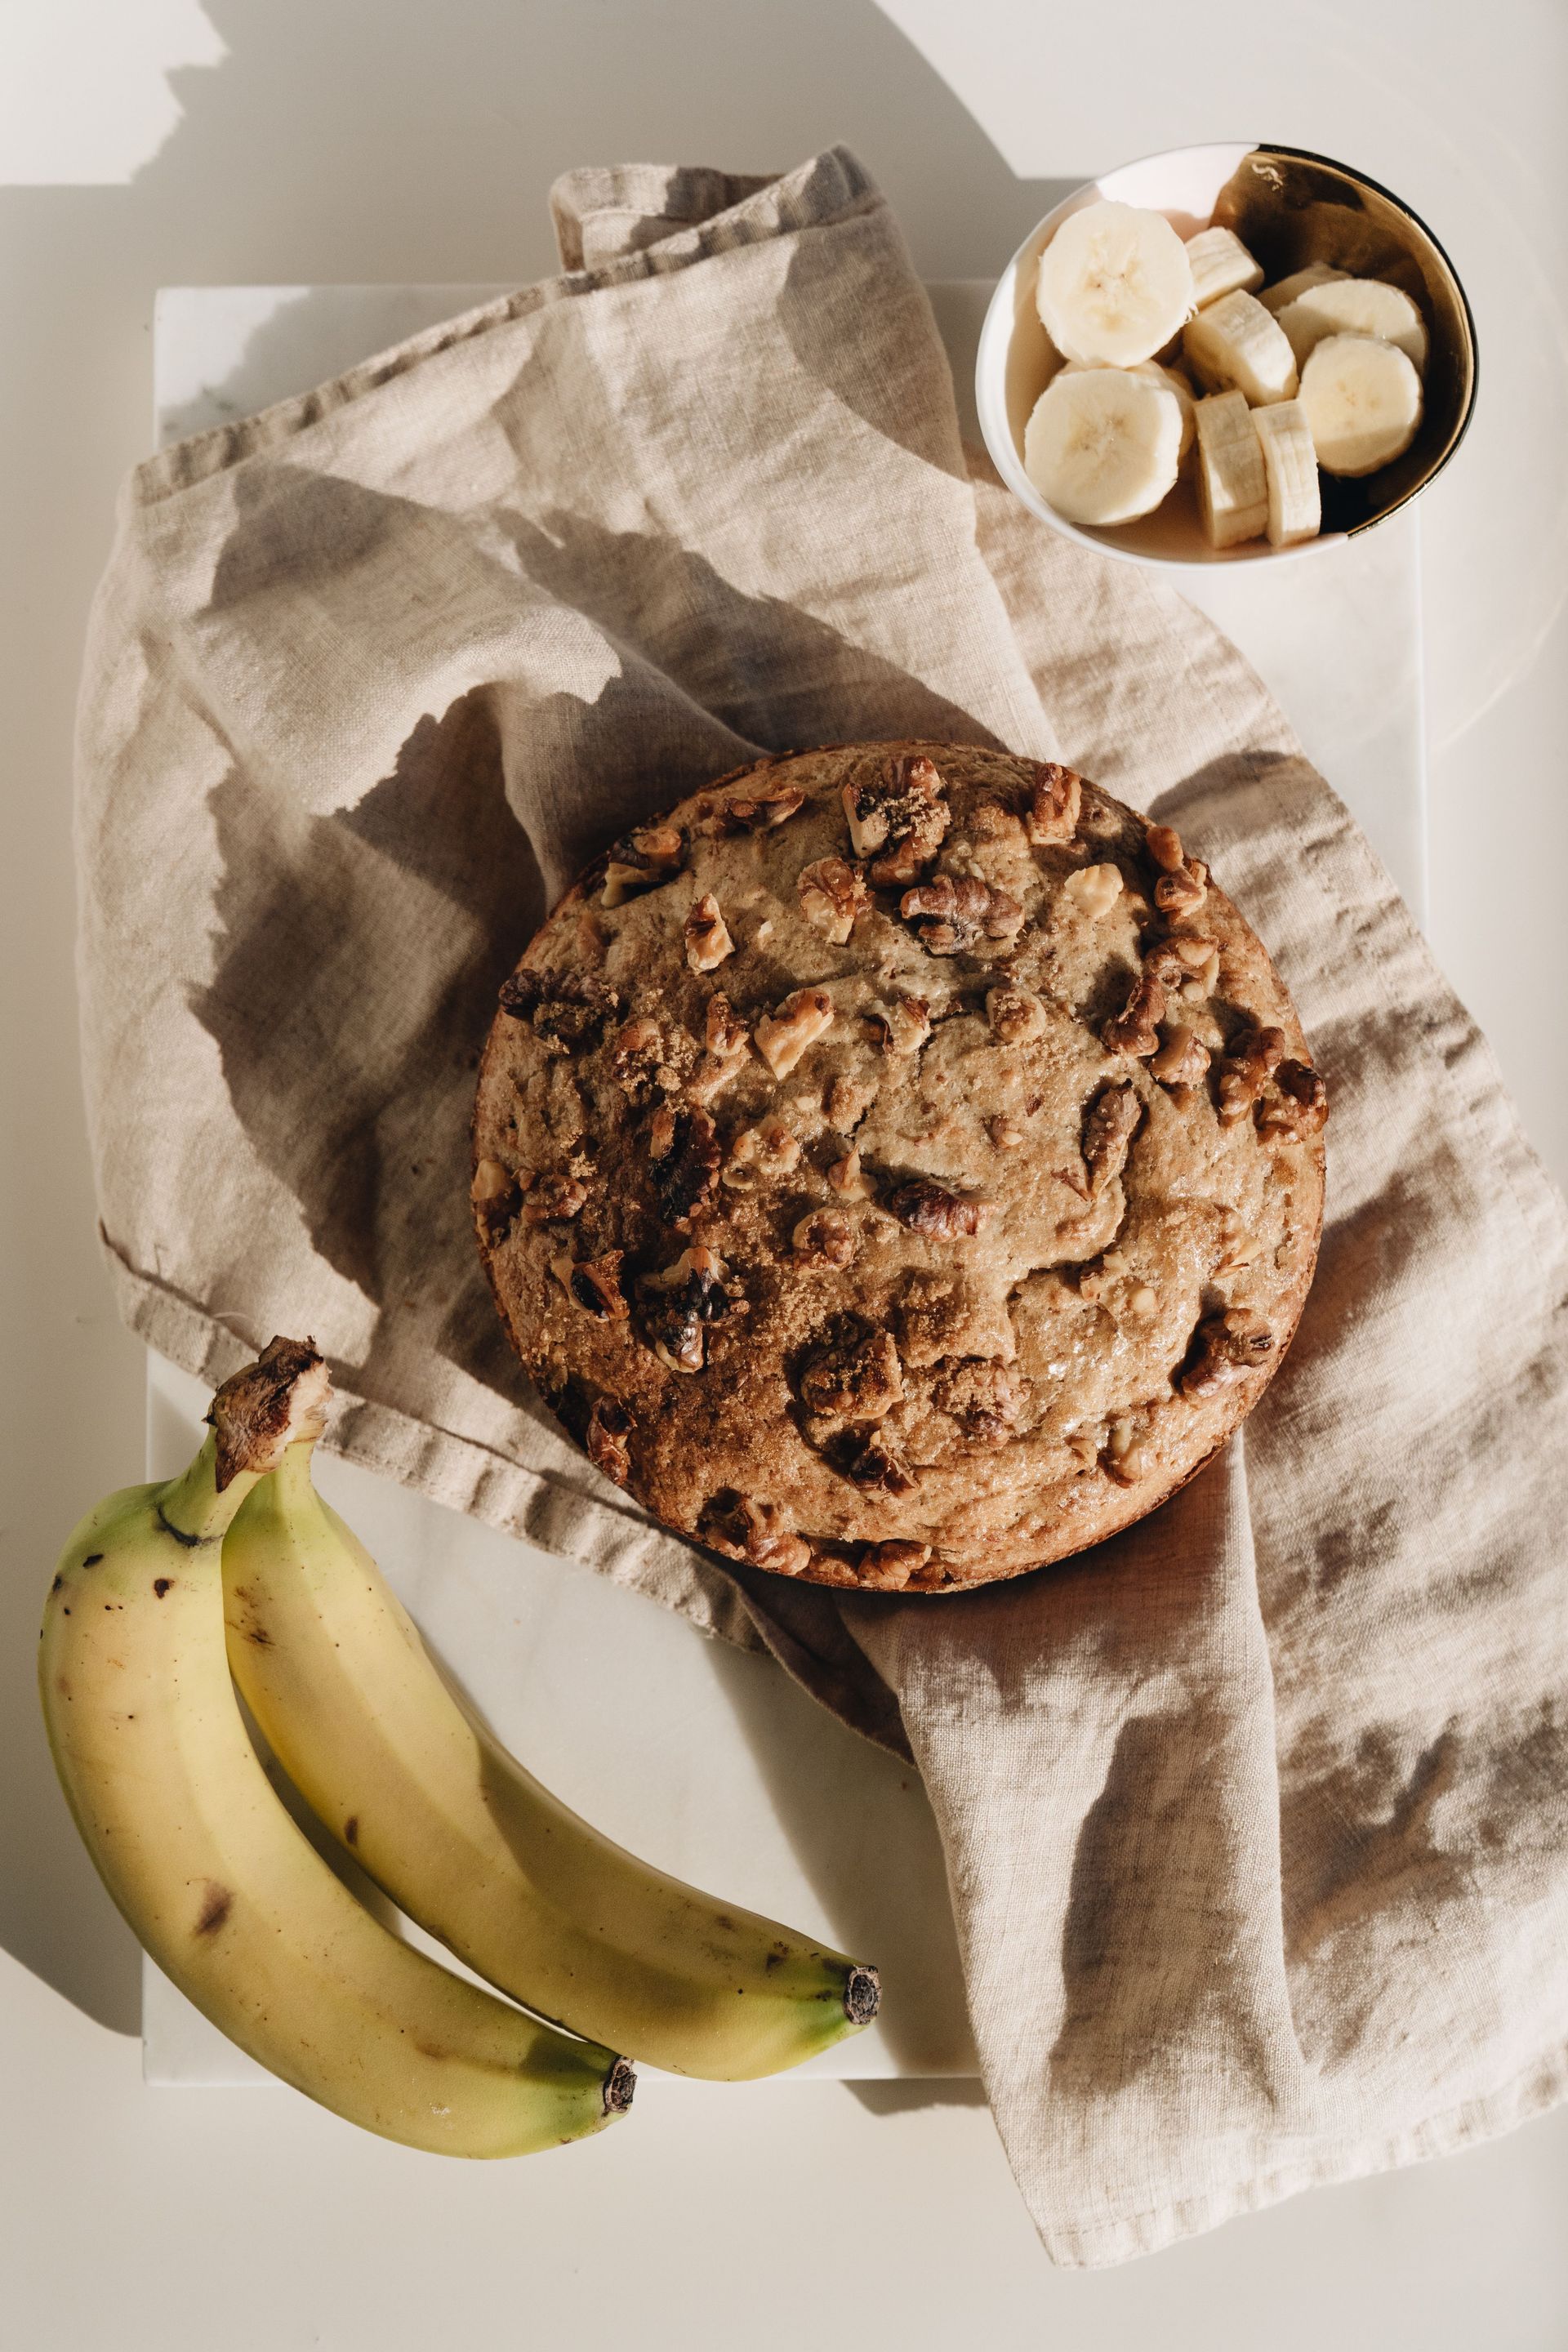
Skillet banana bread is a variation that produces a result closer to a thick, cakey pancake than a traditional loaf: a golden, crispy bottom and edges from contact with the hot pan, and a moist, dense interior.
The batter is the same as standard banana bread: very ripe bananas mashed to a smooth paste, butter, sugar, eggs, vanilla, flour, baking soda, salt, and whatever add-ins you prefer — walnuts, chocolate chips, or both. The bananas should be fully ripe to the point of being almost entirely black on the outside; the more ripe, the sweeter and more flavorful the bread. Underripe bananas produce a less flavorful result that no recipe technique can fully compensate for.
Melt butter in the cast iron skillet over medium heat until the foam subsides and the butter begins to smell nutty and turn light golden. Pour in the batter over the browned butter and smooth the top.
Cook on the stovetop over low heat for five minutes to set the bottom crust, then transfer to a 350°F oven and bake for 25 to 30 minutes until a toothpick inserted in the center comes out clean. The cast iron conducts enough heat to the bottom of the batter that the bottom can scorch if the stovetop heat is too high, so keep it low.
Let the bread cool in the pan for 10 minutes before inverting onto a plate. The underside will be golden-brown and slightly caramelized from the browned butter — the most flavorful part. Serve warm, cut into wedges or slices. It doesn't keep as well as a loaf because the crust softens as it cools, so it's best eaten the day it's made.
Credit: Canva Images
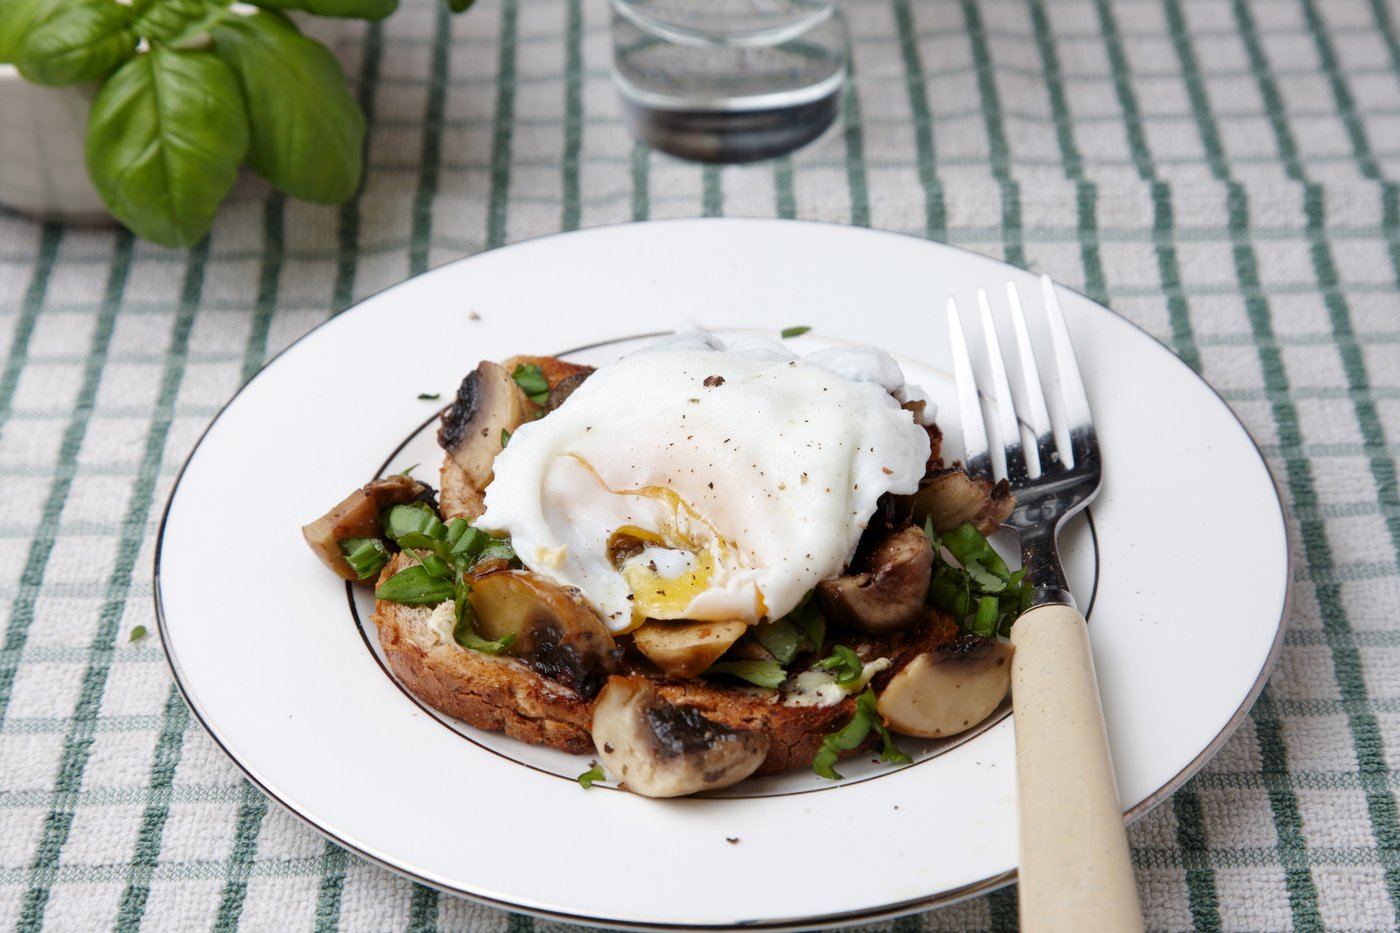
Properly sautéed mushrooms require high heat and patience — two things cast iron supports well. The pan gets genuinely hot and stays hot when the mushrooms go in, which means they brown rather than steam, a distinction that is everything in terms of flavor and texture.
Use a mix of mushrooms for more complexity: cremini and shiitake as the base, with oyster mushrooms or maitake added if available. Tear or slice them into pieces large enough to have some texture when cooked; very finely sliced mushrooms become almost indistinguishable from each other once cooked down.
The critical rule: don't crowd the pan. Mushrooms contain a very high proportion of water by weight, and when they're crowded they release that water simultaneously, flooding the pan and turning the mushrooms gray and watery instead of golden and meaty. Cook in batches if necessary, giving the mushrooms room to breathe. Heat the cast iron to high, add oil, and don't stir for the first two minutes. Resist the urge to move them; let the bottom surface caramelize before tossing.
Season with salt only after the mushrooms have browned — salt draws moisture out, which counteracts the drying process needed for browning. Add butter and thyme after the mushrooms are colored, reduce heat, and add minced garlic for the last 90 seconds.
Deglaze with a splash of sherry, white wine, or Worcestershire sauce. Serve over thick-cut toasted bread — sourdough or a good white tin loaf — with a poached or fried egg on top if desired, or with a shaving of Parmesan and fresh herbs to finish. The mushrooms are also excellent as a pasta sauce, tossed with butter pasta and a handful of Parmesan.

Credit: Canva Images
This is a savory variation of skillet cornbread that adds heat from fresh or pickled jalapeños and depth from sharp cheddar cheese mixed directly into the batter. The technique is the same — a very hot skillet is essential — but the result is more complex and works better as an accompaniment to chili, barbecue, or braised meats than the plain version.
Dice two to three jalapeños, or use a combination of fresh and pickled for more layered heat and acidity. Remove seeds for a milder result or leave them in for more heat. Shred about a cup of sharp cheddar — pre-shredded cheese has added starches that affect melting, so shredding from a block produces a better result.
Prepare the same base batter as standard cornbread: cornmeal, flour, eggs, buttermilk, baking powder, salt, and fat. Fold in the jalapeños and most of the cheese, reserving a small handful to scatter over the top. Preheat the cast iron skillet and the oven to 425°F simultaneously. Melt bacon drippings or butter in the hot skillet, swirl to coat, and pour in the batter immediately. Scatter the reserved cheese on top.
Bake for 20 to 25 minutes until the top is golden and the edges are beginning to pull away from the sides of the pan. The jalapeño-cheddar version benefits from a slightly longer rest before cutting — about eight minutes — because the cheese in the batter needs time to set or the interior will be too molten to slice cleanly.
Serve cut in wedges. It keeps well at room temperature for two days and can be reheated in a dry cast iron skillet for two minutes per side to revive the crust.
Credit: Kevin Kay Agno / Pexels
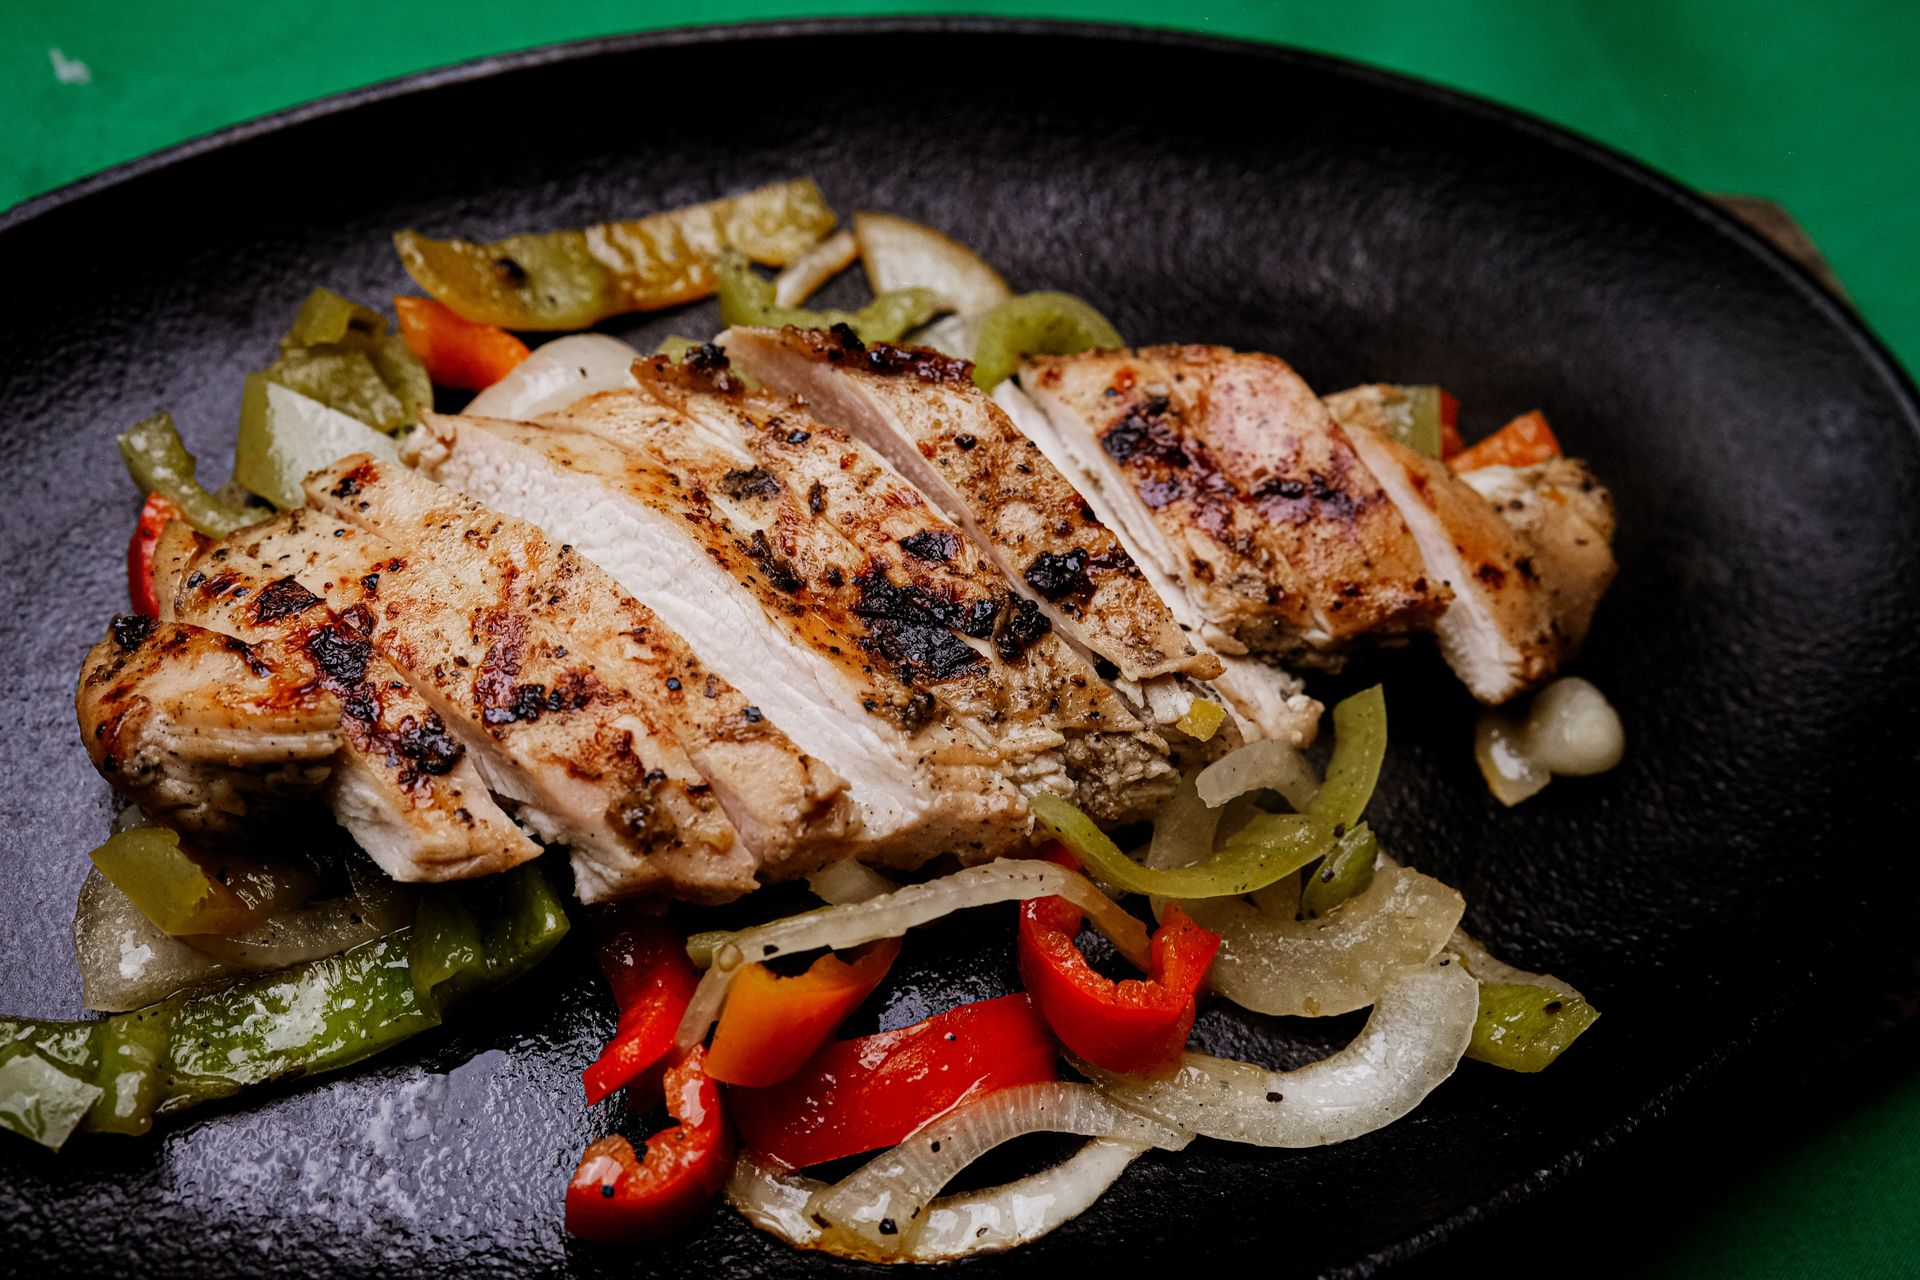
Cast iron fajitas use the skillet's high heat to char the vegetables and protein quickly, producing the blistered edges and smoky flavor that give fajitas their character. The same pan that sears the beef or chicken can serve as the serving vessel.
Marinate flank steak or chicken thighs in a mixture of lime juice, garlic, cumin, smoked paprika, chili powder, salt, and a little oil for at least two hours. Slice onion and bell peppers — a mix of colors for visual appeal — into strips.
The cooking sequence matters. Cook the protein first to get a proper sear. Heat the cast iron skillet to very high heat, add oil, and cook the steak or chicken on one side without moving until deeply browned — three to four minutes — then flip and finish. Remove and rest the protein while you cook the vegetables.
In the same pan, still over high heat, add the sliced onions and peppers. They should sizzle aggressively the moment they hit the pan. Let them sit without stirring for two minutes to get some char on the edges, then toss and repeat. The vegetables should be softened but still have some bite and visible browning. Season with salt, a squeeze of lime, and any remaining marinade drizzled over the top.
Slice the rested protein thinly against the grain and return it to the pan, tossing everything together. Serve directly from the cast iron with warm tortillas, guacamole, salsa, sour cream, and shredded cheese alongside. The pan retains heat long enough to keep the fajitas warm during serving.
Credit: Canva Images
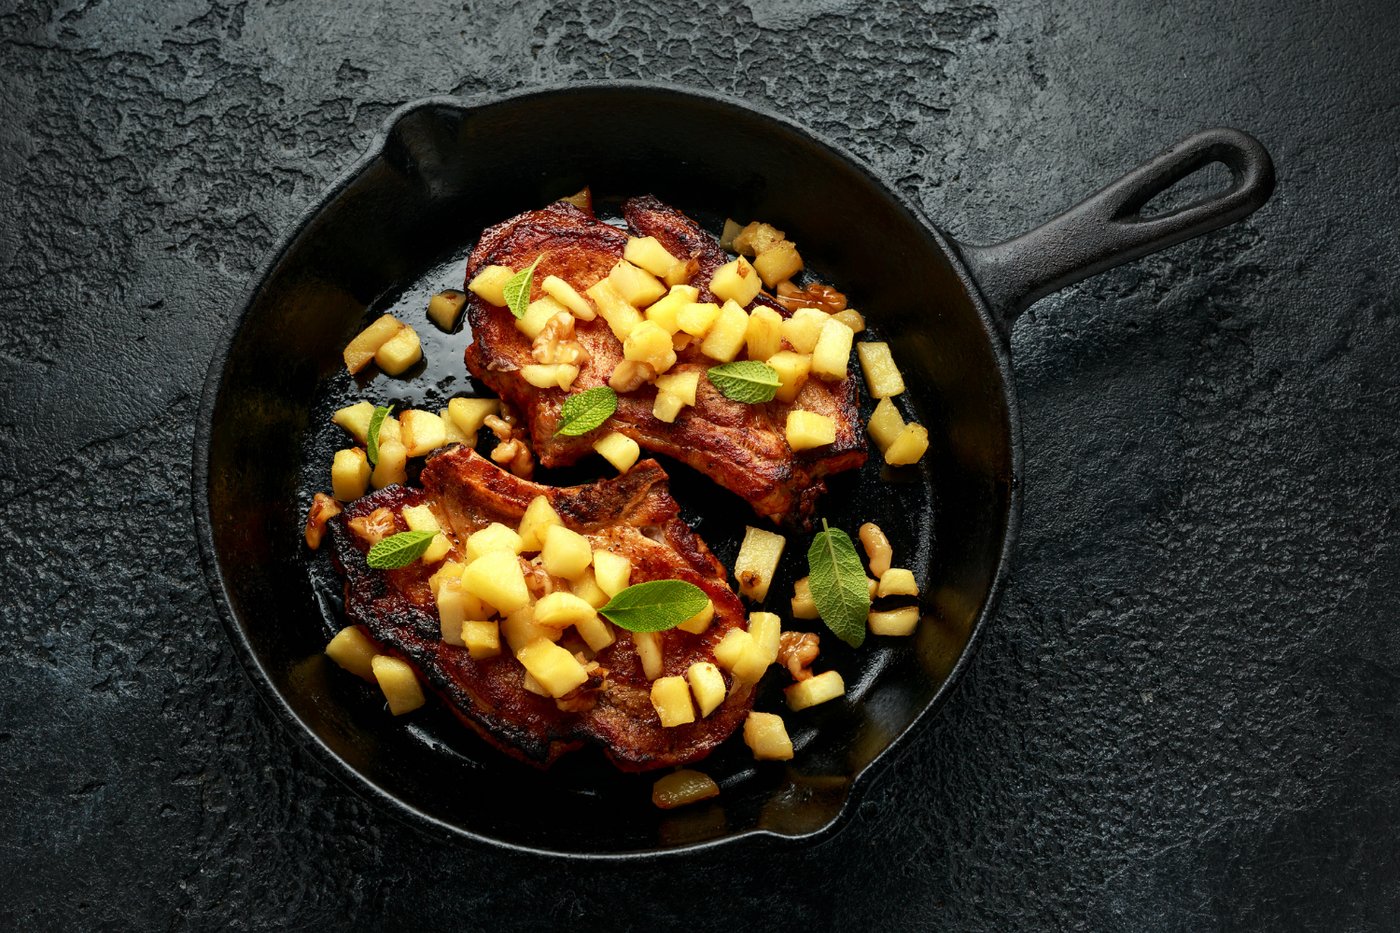
Bone-in pork chops seared in cast iron and finished with an apple and sage pan sauce is a combination of flavors that requires little more than the pan itself and a few pantry staples. The cast iron sears the chops with a proper crust and then supports the reduction of a sauce in the same vessel.
Choose bone-in rib chops at least an inch thick. Thin pork chops cook too quickly and turn dry before a crust develops. Pat dry, season with salt and pepper, and if time allows, let them sit uncovered in the refrigerator overnight — the dry surface browns faster and more evenly.
Heat the skillet over medium-high heat with oil. Sear the chops for three to four minutes without moving until the surface releases easily and has a deep golden crust. Flip and sear the other side for another two to three minutes, then sear the fat cap by holding the chop vertically against the pan with tongs for one minute. Transfer to a 400°F oven to finish, about eight to 12 minutes depending on thickness, until the internal temperature reaches 140°F. Rest for five minutes.
While the chops rest, build the pan sauce: discard all but a tablespoon of fat from the skillet. Add sliced shallots and cook briefly, then add sliced apple — a tart variety like Granny Smith or Braeburn. Cook until softened and beginning to caramelize, about five minutes. Deglaze with apple cider and a splash of apple cider vinegar. Let reduce by half, then swirl in butter and fresh sage leaves. Season and pour over the rested chops. The sauce is sweet, tart, and savory, and cuts through the richness of the pork cleanly.
Credit: Alberta Studios / Pexels
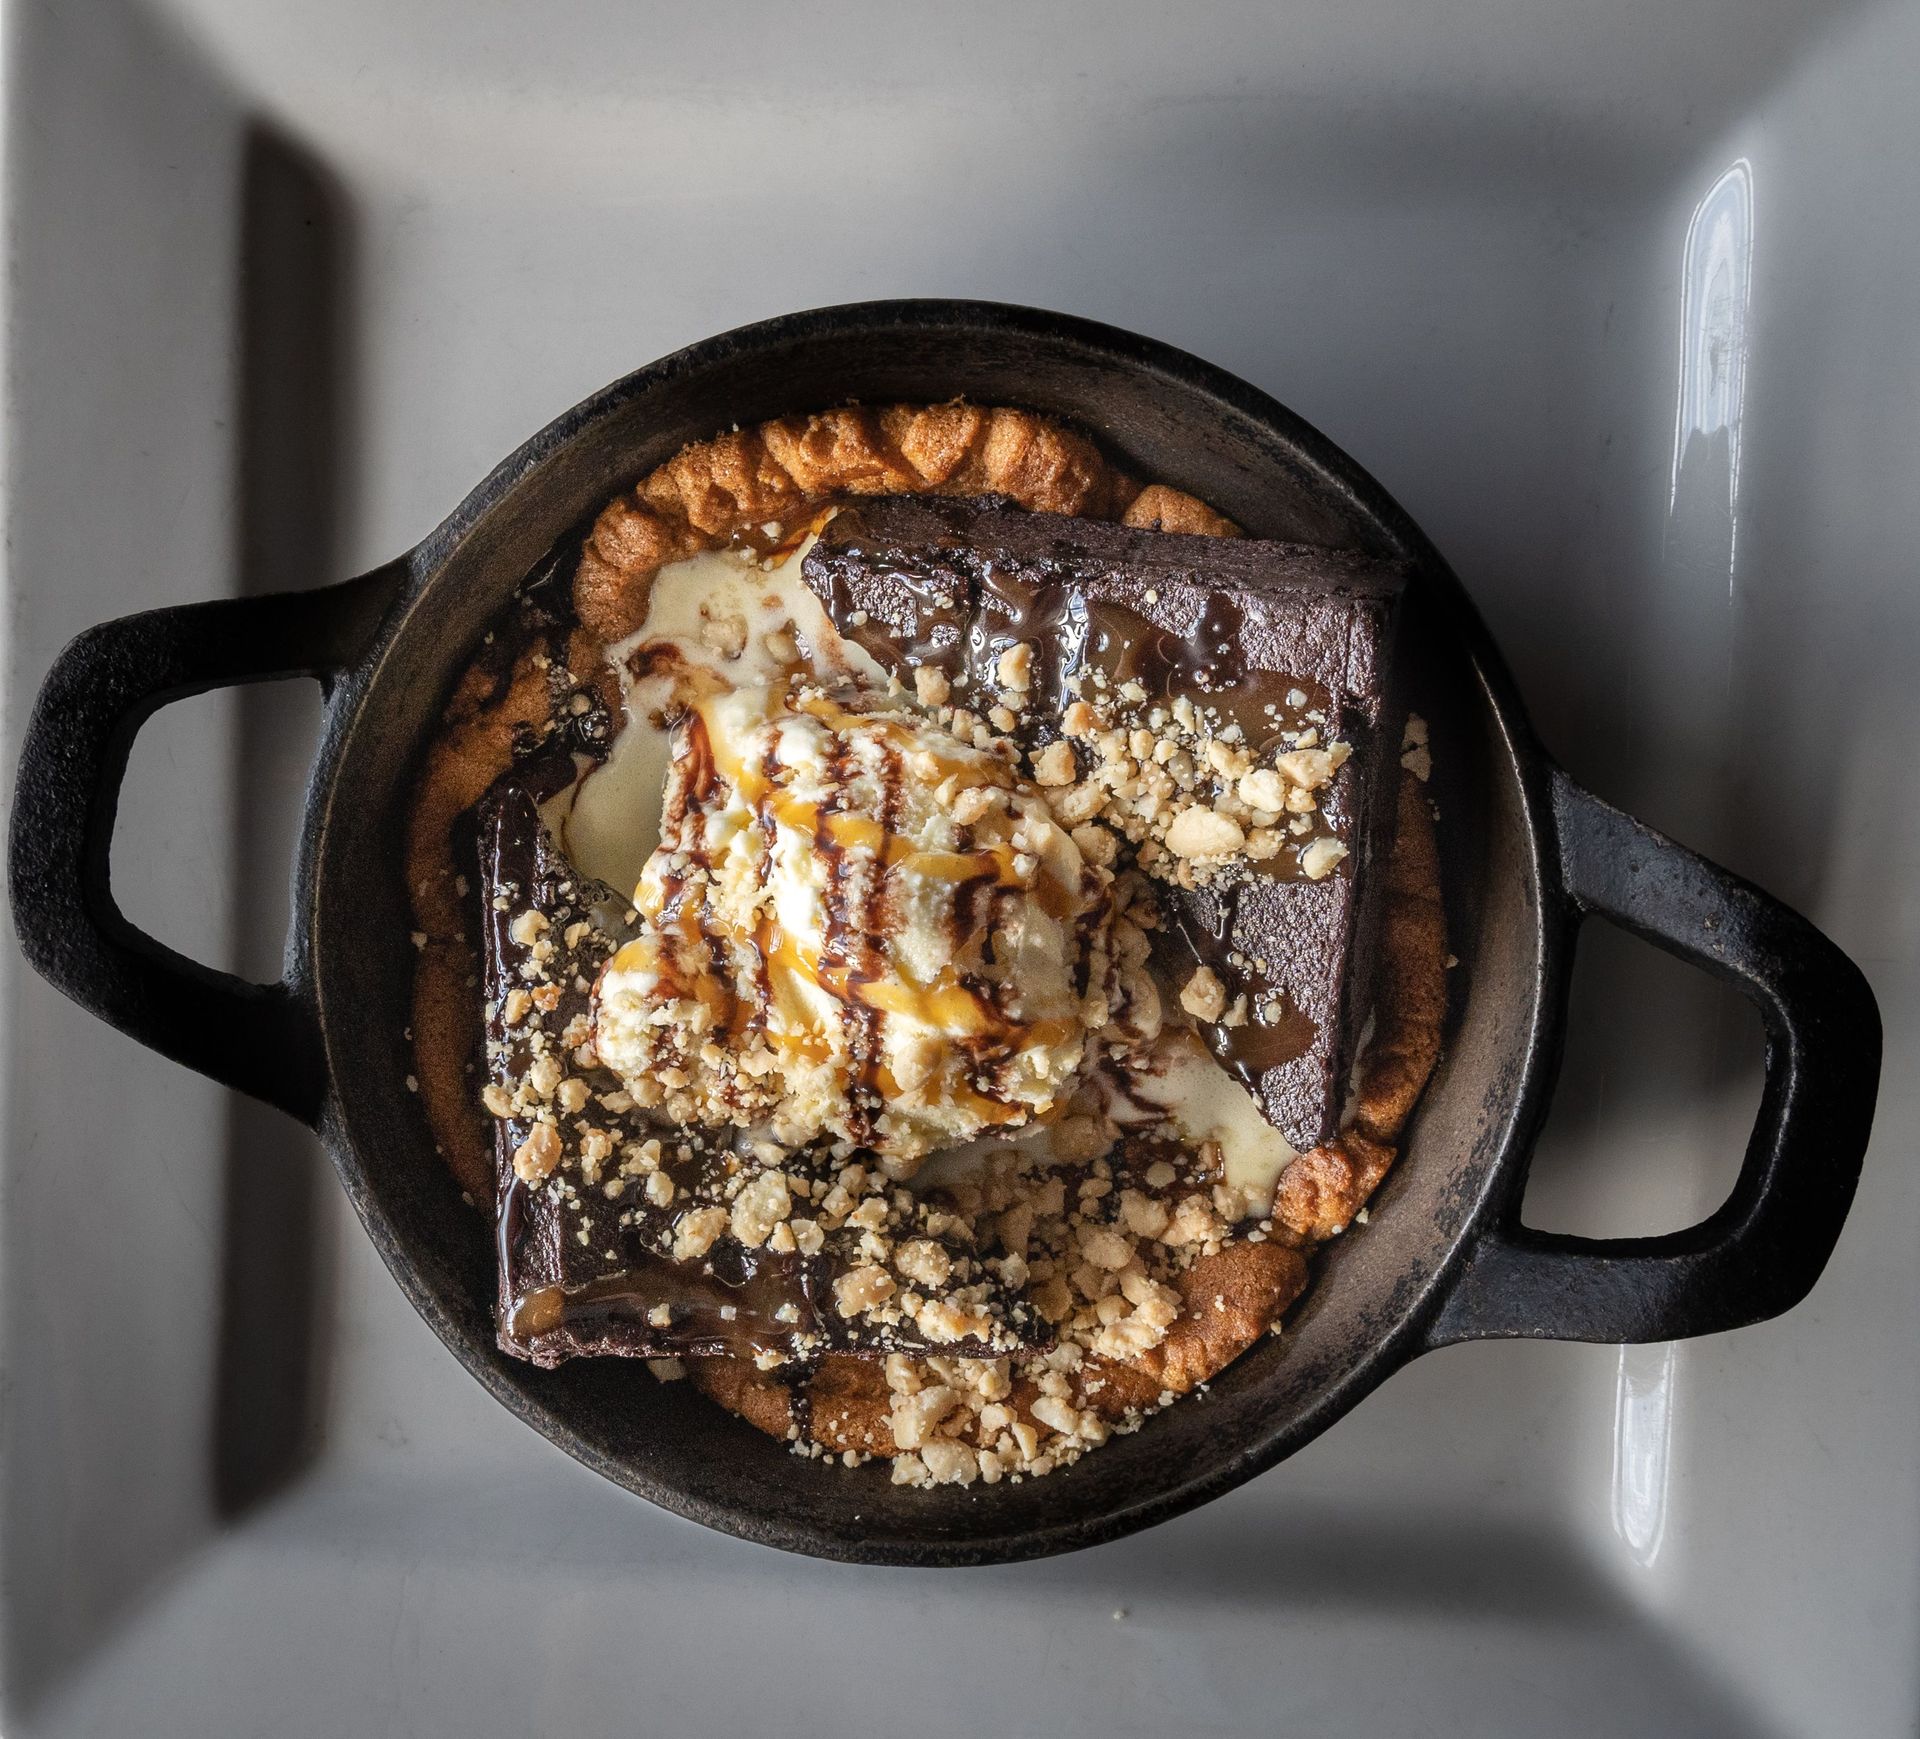
Brownies baked in cast iron have a different texture than those baked in a metal or glass pan: the direct heat from the cast iron creates a thicker, crispier crust on the bottom and sides, while the interior remains fudgy and dense. The pan also gives the edges a chewiness that's distinct from the more common cakey edge you get in a standard brownie pan.
Use a fudgy brownie recipe rather than a cakey one. The difference is in the fat-to-flour ratio: fudgy brownies have more butter and chocolate relative to flour, which keeps the interior dense and moist. A basic formula: melt butter and bittersweet chocolate together, whisk in sugar and eggs, fold in flour and salt. Less flour means less structure, which means a more yielding interior.
The key addition for cast iron is to melt the butter in the skillet itself before mixing it into the batter. As with the banana bread and skillet cookie, browned butter adds a nuttiness that deepens the chocolate flavor. Let the batter rest for five minutes after mixing so the flour hydrates fully and the batter thickens slightly.
Pour the batter into the greased, room-temperature skillet — not a hot one — and bake at 325°F for 25 to 30 minutes. Lower-and-slower baking prevents the edges from overcooking before the center is done, which is a risk with cast iron given the amount of direct heat the bottom and sides receive. The brownies are done when the edges are set and pulling away slightly from the sides and the center barely jiggles when the pan is moved.
Cool completely in the pan before cutting. Warm brownies are nearly impossible to cut cleanly, and the texture firms up and becomes more satisfying as they cool.
Credit: Canva Images
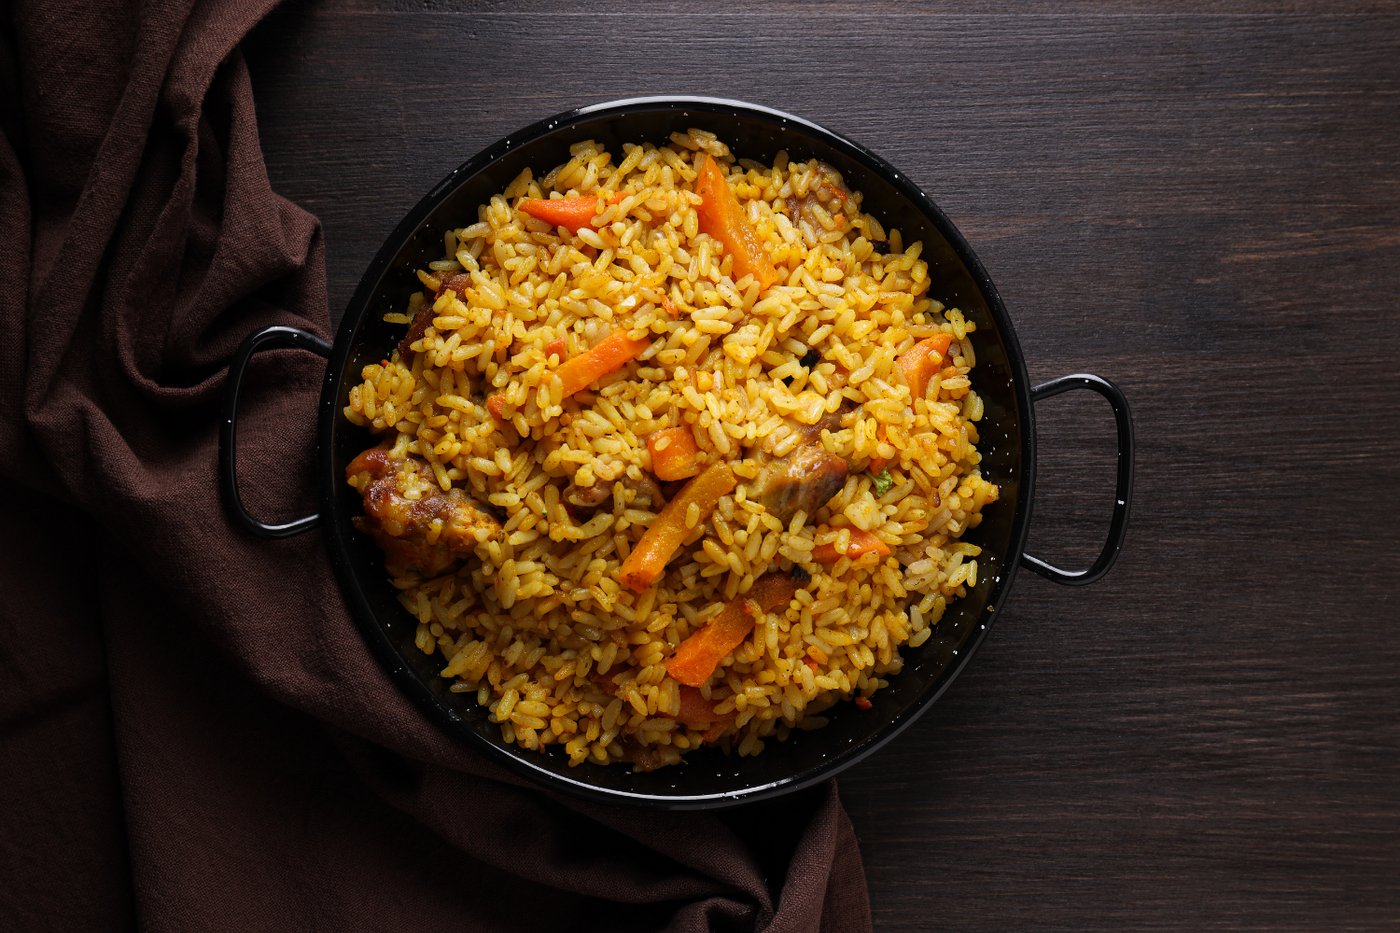
A rice pilaf made in cast iron starts on the stovetop and can finish there or in the oven, using the pan's heat retention to cook the rice evenly with a light golden crust at the bottom. This bottom crust — called socorrat in some traditions or tahdig in Persian cooking — is often the most sought-after part of the dish.
Toast long-grain white rice in the skillet with butter or olive oil and diced onion over medium heat until the rice turns opaque and begins to smell nutty. This toasting step coats each grain with fat, which keeps the grains separate during cooking and adds flavor. Add garlic, and any aromatics — toasted cumin seeds, a bay leaf, a cinnamon stick — and cook for one minute.
Add hot chicken or vegetable stock in a ratio of roughly 1.5:1 (liquid to rice), season with salt, bring to a boil, then reduce heat to the lowest possible setting and cover tightly. Cook for 18 minutes without lifting the lid. The steam inside the pan is what cooks the rice; opening the lid lets it escape and results in unevenly cooked rice.
After 18 minutes, remove from heat and let the rice rest, covered, for 10 minutes. The residual heat of the cast iron continues cooking the rice gently. When you lift the lid, the top should be fluffy and the bottom, where the rice has been in direct contact with the pan, should have a lightly golden, slightly crispy crust. Fold that crust up into the rice when serving, distributing the crunchy bits throughout.
Stir in fresh herbs, lemon zest, toasted pine nuts, or a handful of dried fruit before serving.
