A complete guide to desk-friendly stretches that relieve tension, restore mobility, and counteract the physical toll of prolonged sitting
Credit: Canva Images
Sitting for hours on end reshapes the body in ways most people don't notice until something hurts. The hip flexors — a group of muscles at the front of the hip that connect the torso to the legs — shorten and tighten when held in a bent position for long periods. The chest muscles contract while the upper back weakens. The deep stabilizing muscles of the core, no longer needed to hold the body upright, gradually switch off. Over time, the cumulative effect of desk work isn't just stiffness. It's a progressive shift in how the body holds itself and moves.
The spine bears particular costs. Sitting places more compressive load on the lumbar discs than standing, especially when posture degrades — which it does, for almost everyone, within 20 minutes of sitting down regardless of how good the chair is. The head drifts forward toward the screen. The shoulders round. The thoracic spine, the mid-back segment responsible for rotation and extension, stiffens into a fixed curve that persists even when the person stands up and walks away.
None of this is irreversible. The body responds to movement. Muscles that have shortened will lengthen again with consistent, targeted stretching. Joints that have lost range of motion will recover it. The patterns that develop over years of desk work can be addressed, though it takes more than a few occasional stretches done at random. What helps most is deliberate attention to the specific structures that desk work stresses: hip flexors, thoracic spine, pectoral muscles, neck extensors, hamstrings, and the deep rotators of the hip.
The 25 stretches in this list address all of those areas. Some can be done at a desk without leaving a chair. Others require a small amount of floor space and two to three minutes. None require equipment, special clothing, or prior experience with yoga or stretching. Each is described with enough detail to do it correctly on the first attempt, including what to feel, what to avoid, and how long to hold it. The list draws on standard practices in physical therapy and sports medicine. It's organized roughly from seated to standing to floor-based, so it can be used as a full sequence or dipped into selectively throughout the workday.
Credit: Canva Images
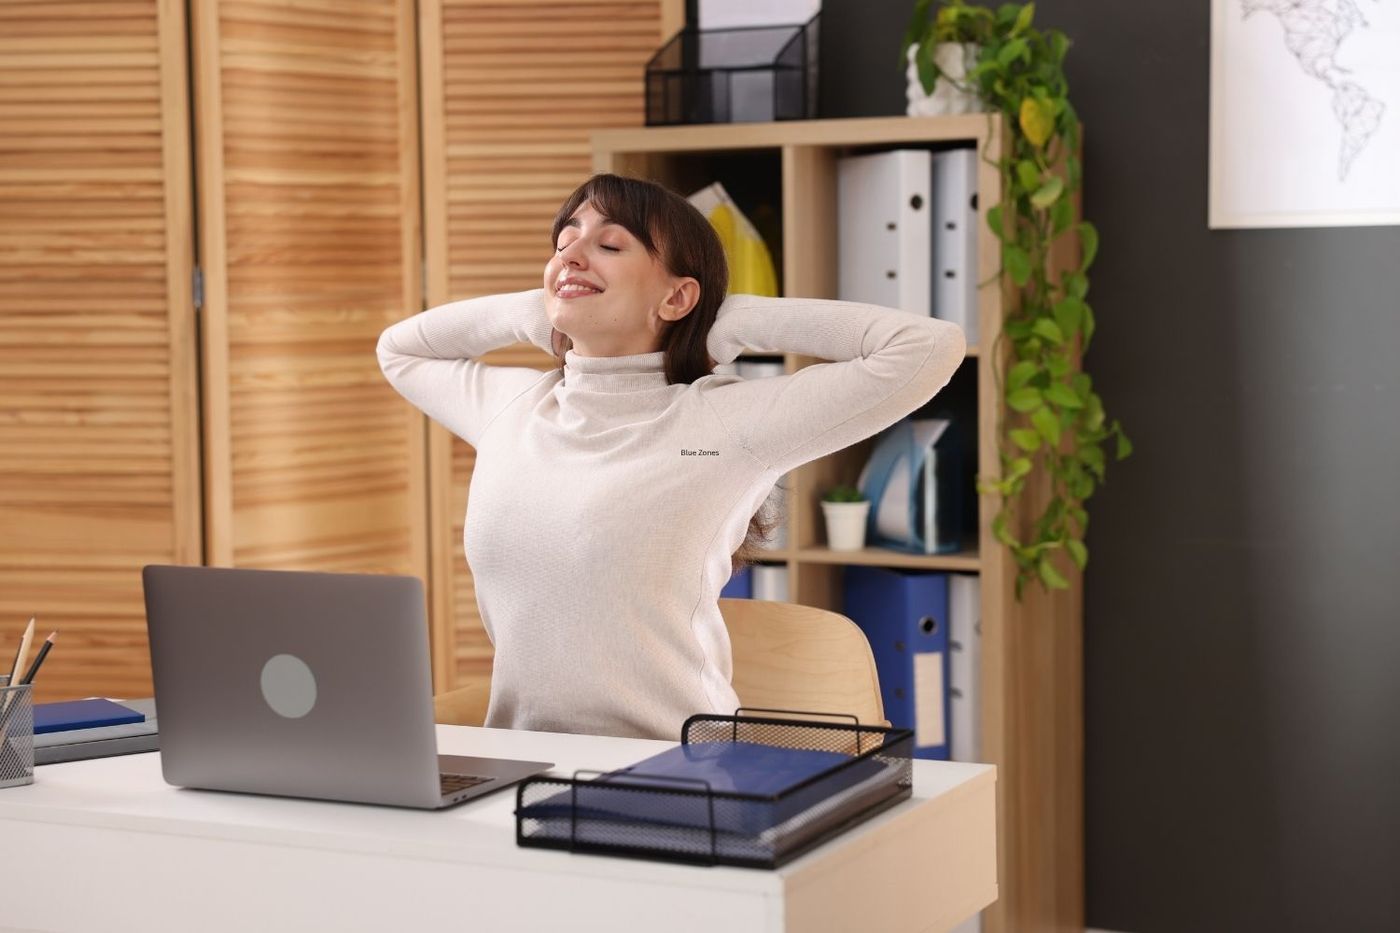
The chest muscles — specifically the pectoralis major and the smaller pectoralis minor beneath it — pull the shoulders forward whenever they are chronically shortened. After hours at a keyboard, they often are. A seated chest opener is one of the fastest ways to address this without leaving a chair.
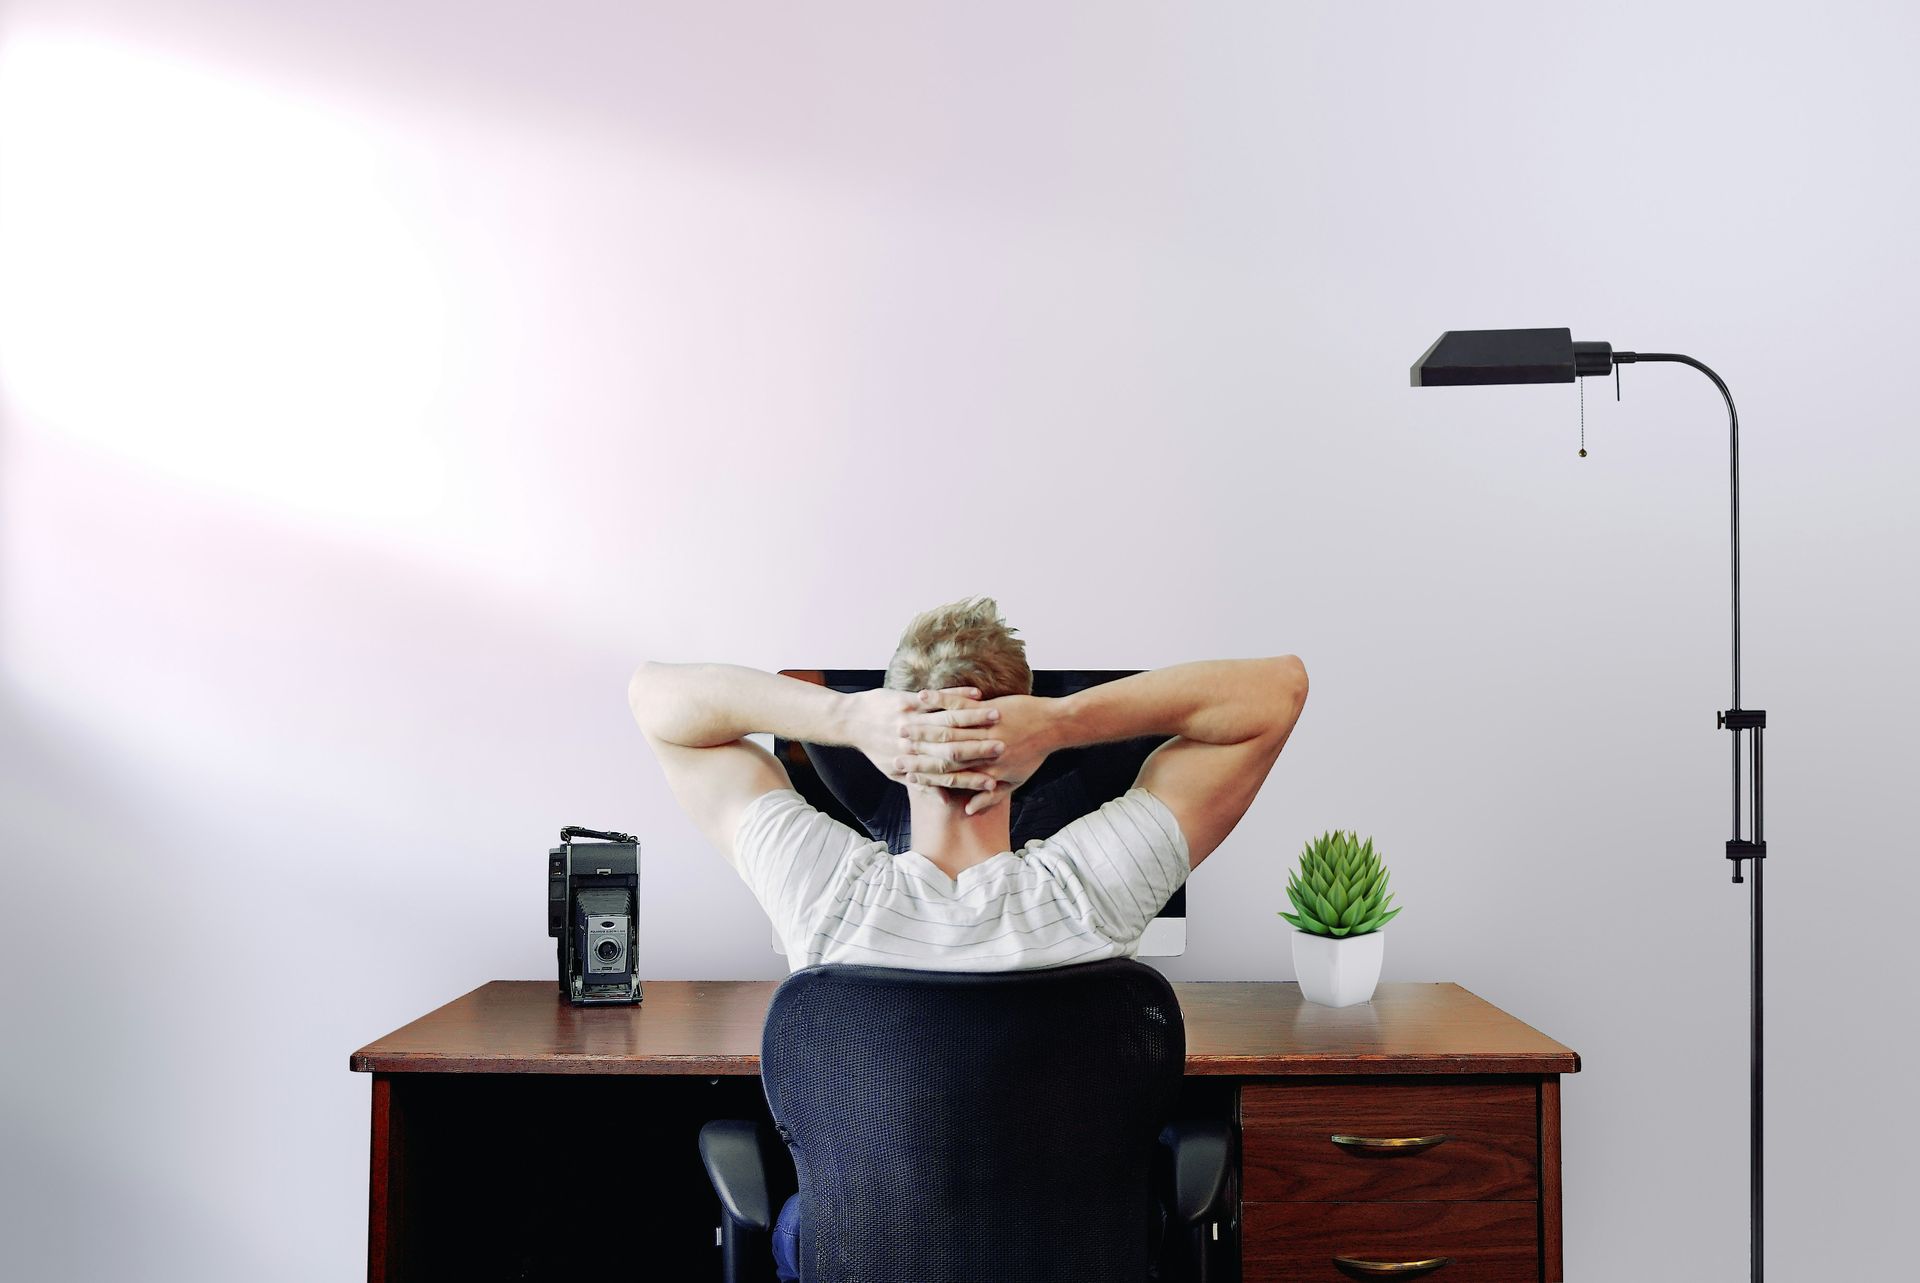
Sit near the front edge of your seat with both feet flat on the floor. Interlace your fingers behind your head, or if that's uncomfortable, place both hands lightly behind your ears. Your elbows should point out to the sides. From there, gently draw the elbows back and allow the chest to lift and open toward the ceiling. Don't force the movement — let gravity and the weight of your arms do most of the work. Hold this position for 20 to 30 seconds while breathing slowly and steadily.
The sensation should be a mild stretch across the front of the chest and possibly into the front of the shoulders. If you feel pinching in the neck or shoulders, back off slightly and let the head stay neutral rather than tipping it back. Some people find it helpful to look slightly upward at a diagonal, which encourages the thoracic spine — the mid-back — to extend rather than just letting the lumbar arch take over. That distinction matters. Most desk workers are already somewhat overextended in the lower back. The goal here is to open the upper and mid back, not increase lumbar curve.
Repeat this stretch two or three times in a session. Between repetitions, bring the elbows forward, roll the shoulders gently in their sockets, and take a full breath before opening again. The transition in and out of the stretch is part of its value — it trains the body to move through the range rather than simply sitting at its end point.
This stretch can be done every hour without any disruption to a workday. Done consistently over days and weeks, it begins to shift the resting position of the shoulders — gradually pulling them back toward a more neutral alignment. That shift reduces the muscular effort required to maintain upright posture, which in turn reduces the fatigue and tension that accumulates across a long day at a desk.
Credit: Jason Strull / Unsplash
Forward head posture is among the most common postural changes associated with desk work. For every inch the head drifts forward of the shoulders, the effective load on the cervical spine approximately doubles. A head that weighs around 10 to 12 pounds at neutral can exert more than 40 pounds of force on the neck when held several inches forward — the position most people adopt when reading a screen.
The chin tuck corrects this directly. It retrains the deep cervical flexors, the small muscles at the front of the neck that are responsible for keeping the head aligned over the spine. These muscles weaken when the head is chronically protruded, and the chin tuck is one of the few stretches that both lengthens the overactive neck extensors at the back and reactivates the underused muscles at the front.
Sit upright with your back lightly supported. Look straight ahead at a neutral horizon — not down at a phone or up at the ceiling. Without moving your shoulders, draw your chin straight back as if making a double chin. The movement is purely horizontal, a retraction, not a downward nod. You should feel a mild lengthening at the base of the skull and upper neck. Hold for five seconds, then release.
Most physical therapists recommend performing this exercise in sets of 10 repetitions, two to three times per day. It's brief enough to do between emails or during a call. The key is that the movement stays horizontal. People often confuse this with tucking the chin downward, which stretches the upper trapezius but doesn't train the deep flexors or decompress the upper cervical joints in the same way.
Over time — typically several weeks with consistent practice — the chin tuck begins to shift the resting position of the head. The neck and upper trapezius feel less fatigued at the end of the day. Tension headaches that originate at the base of the skull, a common complaint among desk workers, often diminish as the cervical alignment improves.
Credit: Canva Images
The neck carries significant load in desk work, partly from the weight of the head and partly from the sustained, low-level muscle contractions required to hold the head still while focusing on a screen. The muscles along the sides of the neck — particularly the upper trapezius and the scalenes — accumulate tension throughout the day and rarely get a chance to lengthen unless deliberately stretched.
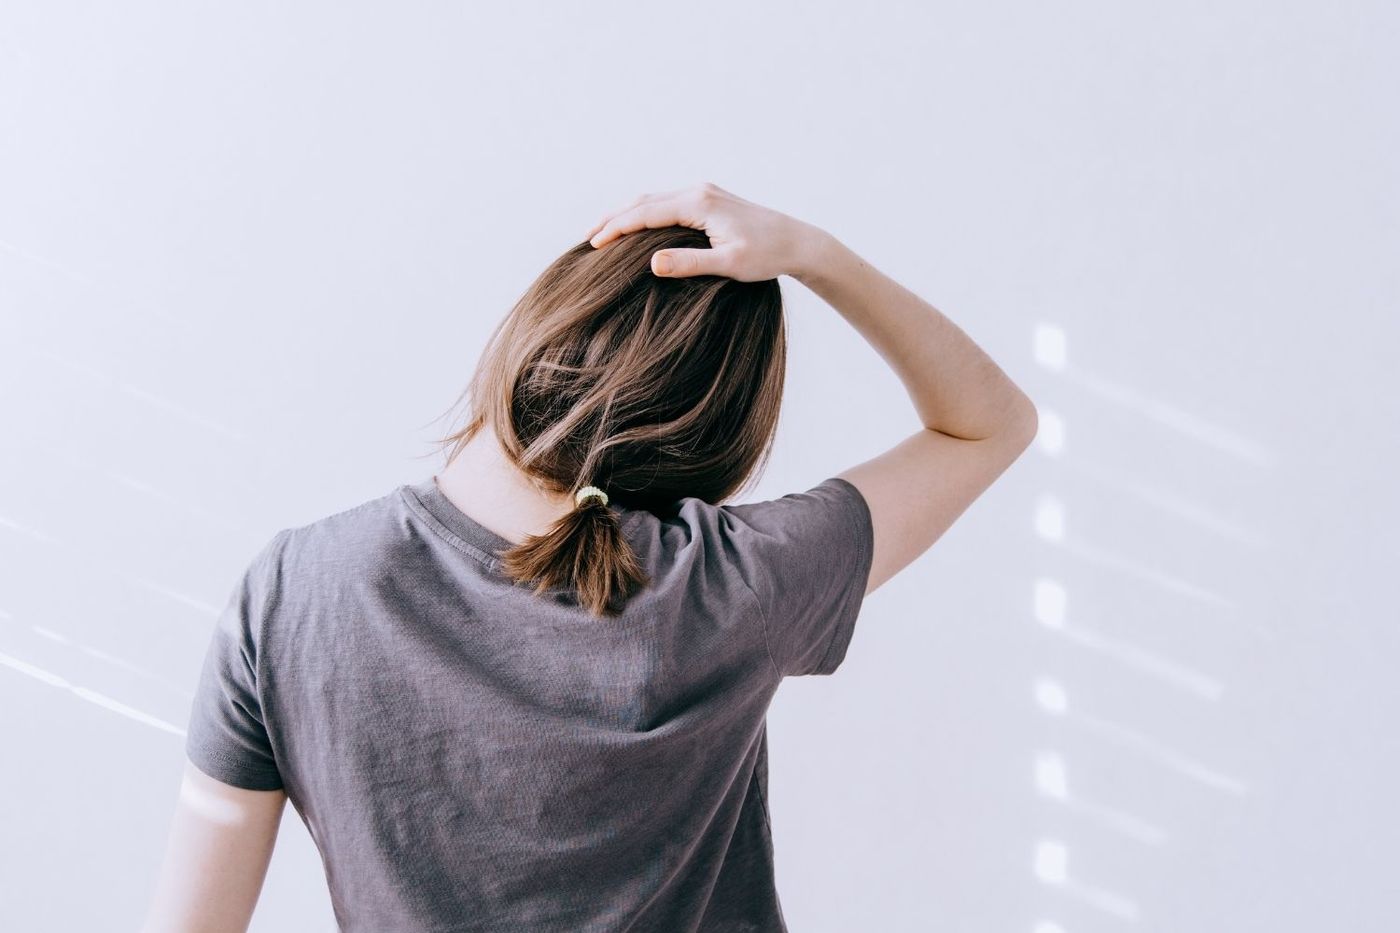
A seated neck side bend targets the lateral neck and the top of the shoulder in a controlled, gravity-assisted way. Sit upright with both feet flat on the floor. Place your right hand under your right thigh, either palm up or palm down — this anchors the shoulder and prevents it from rising during the stretch. Gently tilt your head to the left, as if trying to bring your left ear toward your left shoulder. Don't force it. The weight of the head alone is enough to create a meaningful stretch.
Hold for 20 to 30 seconds, breathing normally. You should feel a mild pulling sensation along the right side of the neck, from just below the ear down toward the collarbone and top of the shoulder. If the stretch feels too intense, reduce the angle of tilt rather than fighting through it. Release slowly and repeat on the other side.
A few things to avoid: rotating the head while bending it, which changes the target muscles and can compress the facet joints in the cervical spine; using the opposite hand to push the head farther — the body's weight is sufficient; and holding the breath, which creates tension in the neck that defeats the purpose.
This stretch is particularly useful for people who cradle a phone between their shoulder and ear, carry bags on one shoulder, or notice that tension accumulates consistently on one side of their neck more than the other. Even without those habits, most desk workers develop asymmetrical tightness in the lateral neck over the course of the day, and spending a few extra seconds on the tighter side helps restore balance.
Credit: www.kaboompics.com / Pexels
The upper trapezius is a large, triangular muscle that runs from the base of the skull and the cervical spine out to the tip of the shoulder and down to the mid-back. It's responsible for elevating the shoulder blade, rotating the scapula, and extending and laterally flexing the neck. In desk workers, it's almost universally overworked, because it engages continuously when the shoulders are elevated — even slightly — and most people hike their shoulders without realizing it when they type or use a mouse.
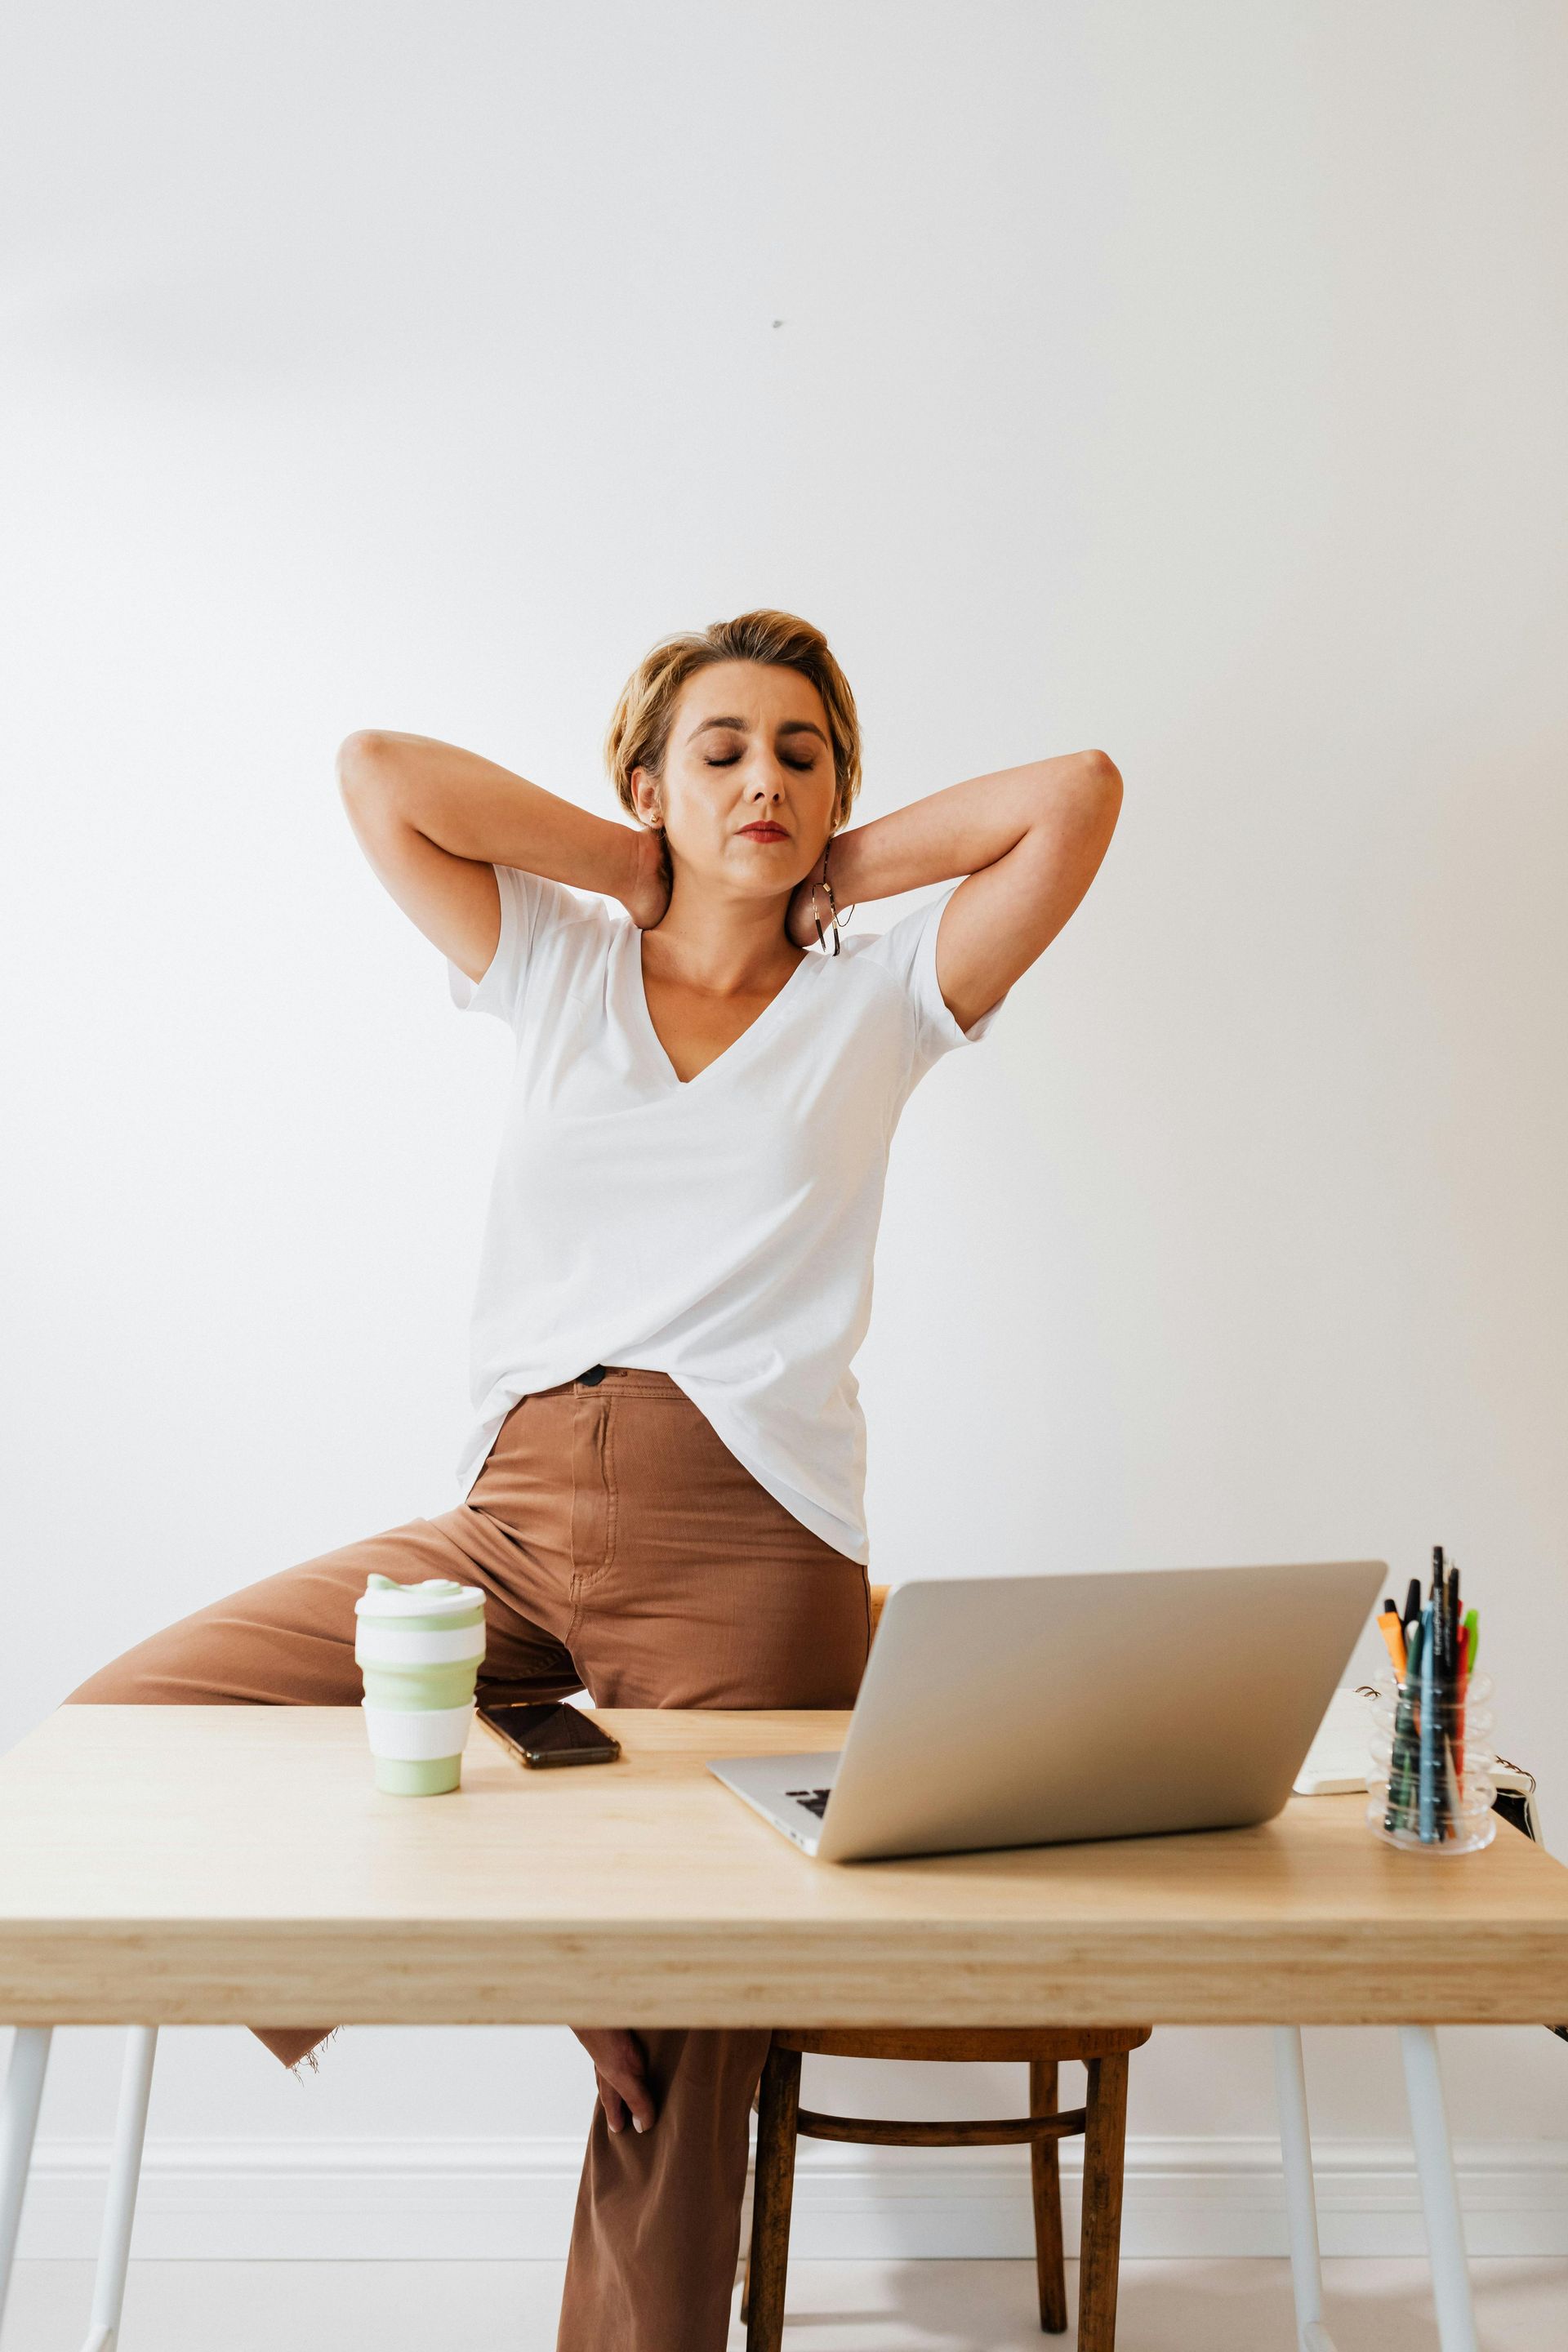
The upper trapezius stretch is more targeted than the neck side bend described earlier. Sit near the front edge of your chair. Reach your right arm down toward the floor on the right side of the body, either letting it hang or gently pulling it downward by gripping the underside of the seat. Tilt your head to the left and then add a slight rotation — turn your face about 30 degrees toward the left armpit. Hold for 30 to 45 seconds.
The combination of downward arm depression and rotated head tilt creates a stretch along the full length of the upper trapezius fiber, from the base of the skull diagonally down to the shoulder. It's a distinctly different sensation from a straight side bend and addresses a portion of the muscle that lateral bending alone doesn't fully reach.
Switch sides and repeat. If one side feels significantly tighter than the other, spend an extra repetition on that side rather than just matching the time. The goal is restoration of balance, not symmetry of effort. Breathing into the stretch helps — inhale to prepare, exhale slowly as you settle into the stretch's deepest position.
This stretch works best when combined with shoulder rolling and chest opening, because the upper trapezius doesn't operate in isolation. Freeing the pectoral muscles reduces the forward pull on the shoulder, which reduces the demand placed on the trapezius to counter that pull throughout the day.
Credit: Vi Nguyen / Pexels
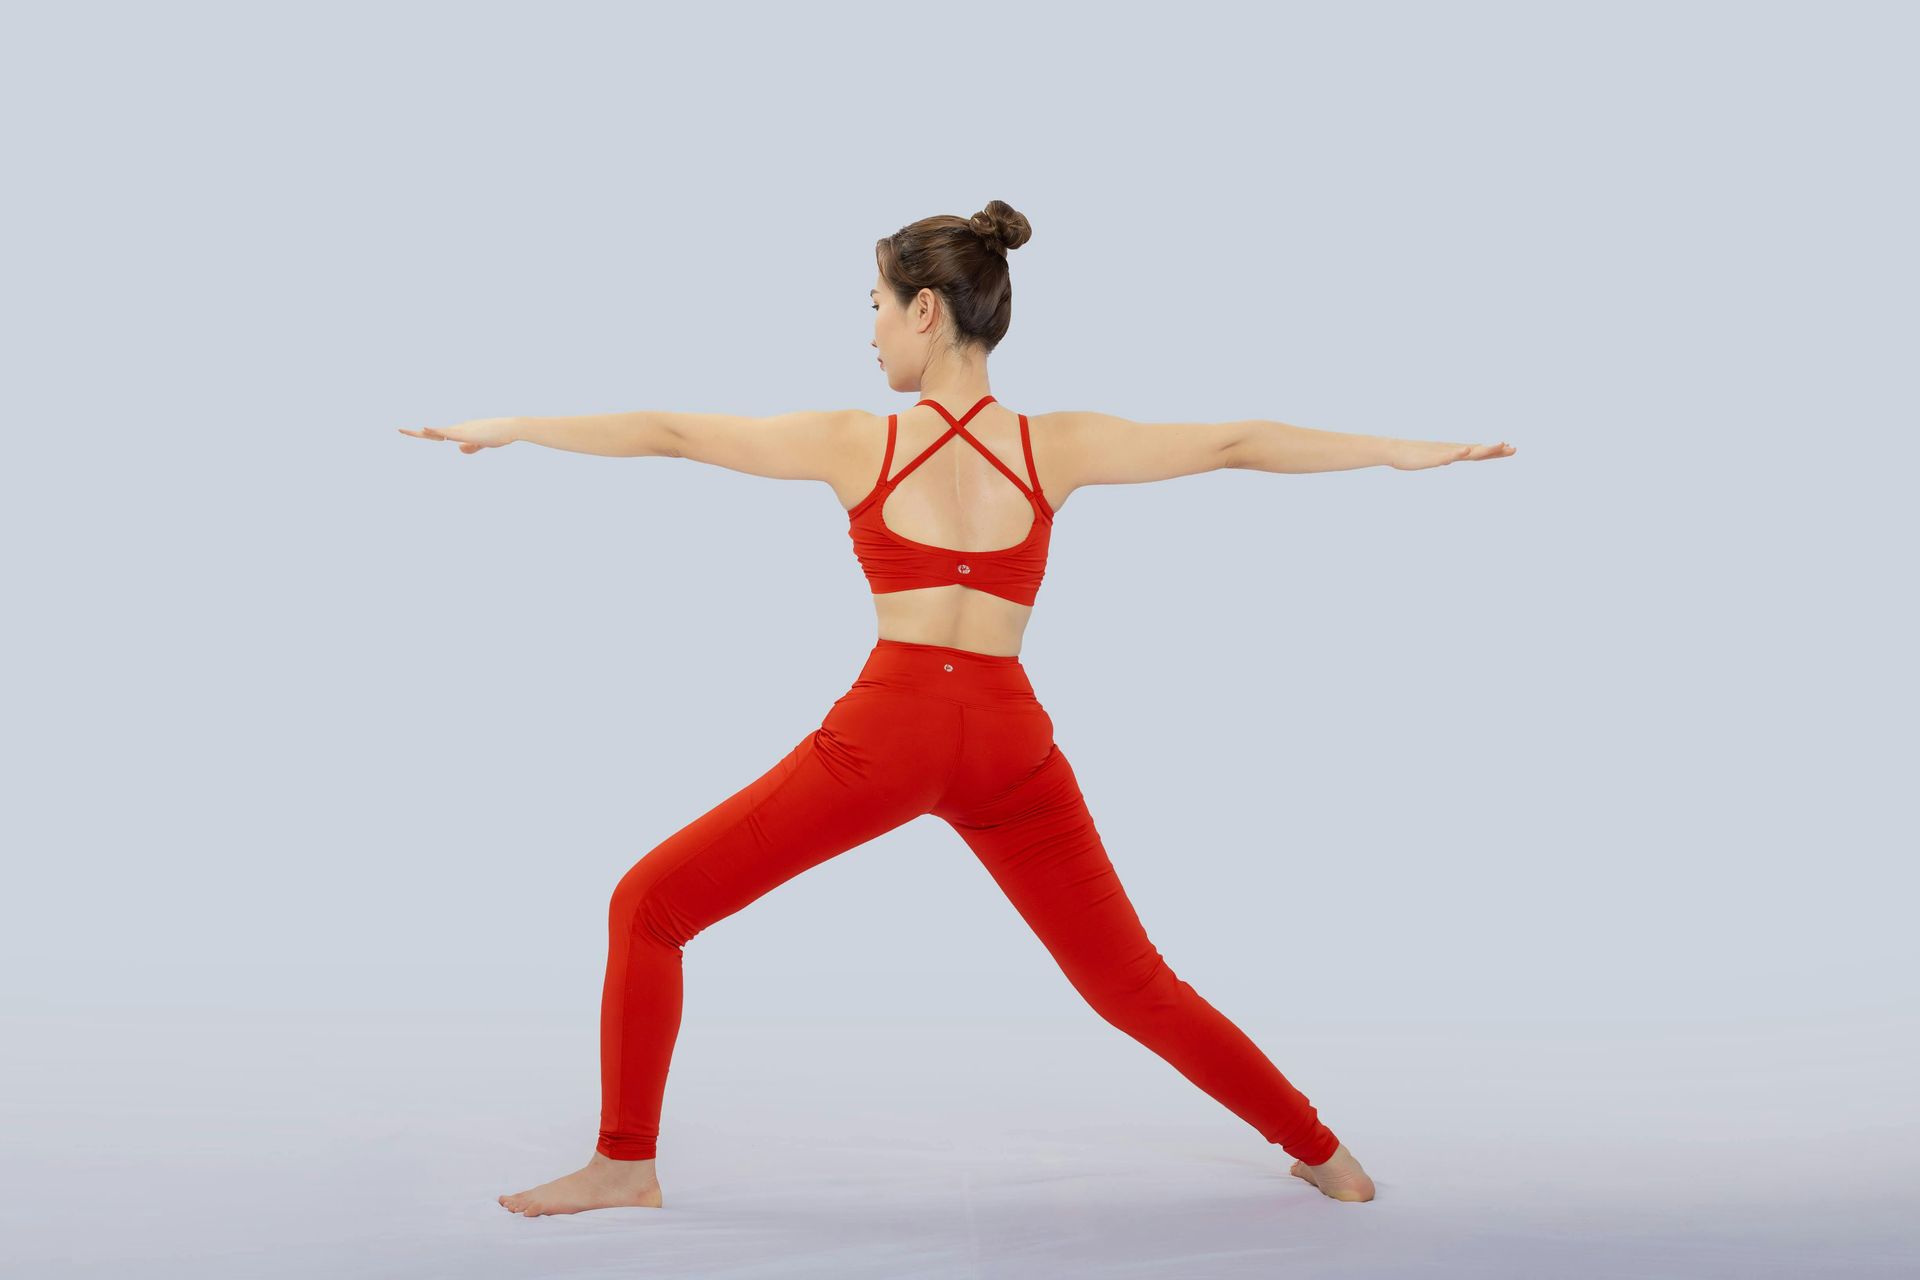
The doorway chest stretch is a standing version of the chest opener, and it allows a deeper and more sustained stretch than the seated version because both arms can be loaded against a fixed surface rather than relying on their own weight. It's one of the most effective stretches available for the pectoral muscles and the anterior shoulder capsule.
Stand in a doorway. Raise both arms to shoulder height and bend the elbows to 90 degrees, so your forearms are pointing upward and your upper arms are parallel to the floor — a goal-post position. Place your forearms and palms against the door frame on each side. Step one foot through the doorway and gently lean your body weight forward until you feel a stretch across the front of both shoulders and the chest. Hold for 30 to 45 seconds, breathing steadily.
You can also do this stretch with arms at different heights to target different portions of the pectoral muscle. With arms at shoulder height, the stretch emphasizes the sternocostal portion — the lower part of the pec major that attaches to the sternum. With arms raised overhead to about 120 degrees, the clavicular head — the upper portion — gets more emphasis. Spending 20 seconds in each arm position covers the full muscle.
The most common mistake is leaning too far forward too quickly. The stretch doesn't require extreme lean — a small shift in body weight creates substantial tension in the pectoral muscles. Pushing further than a mild-to-moderate stretch sensation can irritate the anterior shoulder joint capsule, which is not the goal.
This stretch is best performed once or twice per day as part of a longer movement break rather than done repeatedly throughout the day at maximum depth. The pectoral muscles respond to sustained, moderate stretching rather than aggressive repeated pulling.
Credit: Canva Images
The thoracic spine — the 12 vertebrae of the mid-back, between the neck and the lower back — is designed to both flex and extend, but desk work pushes it almost exclusively into flexion. Over time, the thoracic spine stiffens in a flexed position, which affects shoulder mobility, breathing capacity, and the ability to stand fully upright. Thoracic extension is the movement most lost to desk work, and it is one of the hardest to recover.
A chair-back extension is a simple way to address thoracic mobility without getting on the floor. Sit toward the back of a chair with a firm backrest — not a soft, yielding office chair back, but something solid like a dining chair. Position your upper back against the top edge of the chair's backrest, at approximately the level of your shoulder blades. Interlace your fingers behind your head and gently allow your upper back to arc over the chair edge, so your chest rises toward the ceiling and your head falls slightly back.
Hold this position for 20 to 30 seconds. You may feel or even hear small pops as the thoracic joints release — this is the same mechanism as a back crack and is generally harmless. The sensation should be a release of stiffness, not a sharp pain. If any position feels sharp or painful, stop and reassess.
Because the thoracic spine has multiple segments, you can slide up or down the chair back slightly between repetitions to address different levels. Most desk workers have the greatest restriction in the mid-thoracic region, around T4 to T7. Spending two or three 20-second holds at different heights is more effective than one long hold at a single point.
This is one of the more powerful stretches in this list because thoracic mobility influences so many other movement patterns. Improved extension here typically reduces compensatory strain in both the neck and the lower back.
Credit: Anastasia Shuraeva / Pexels
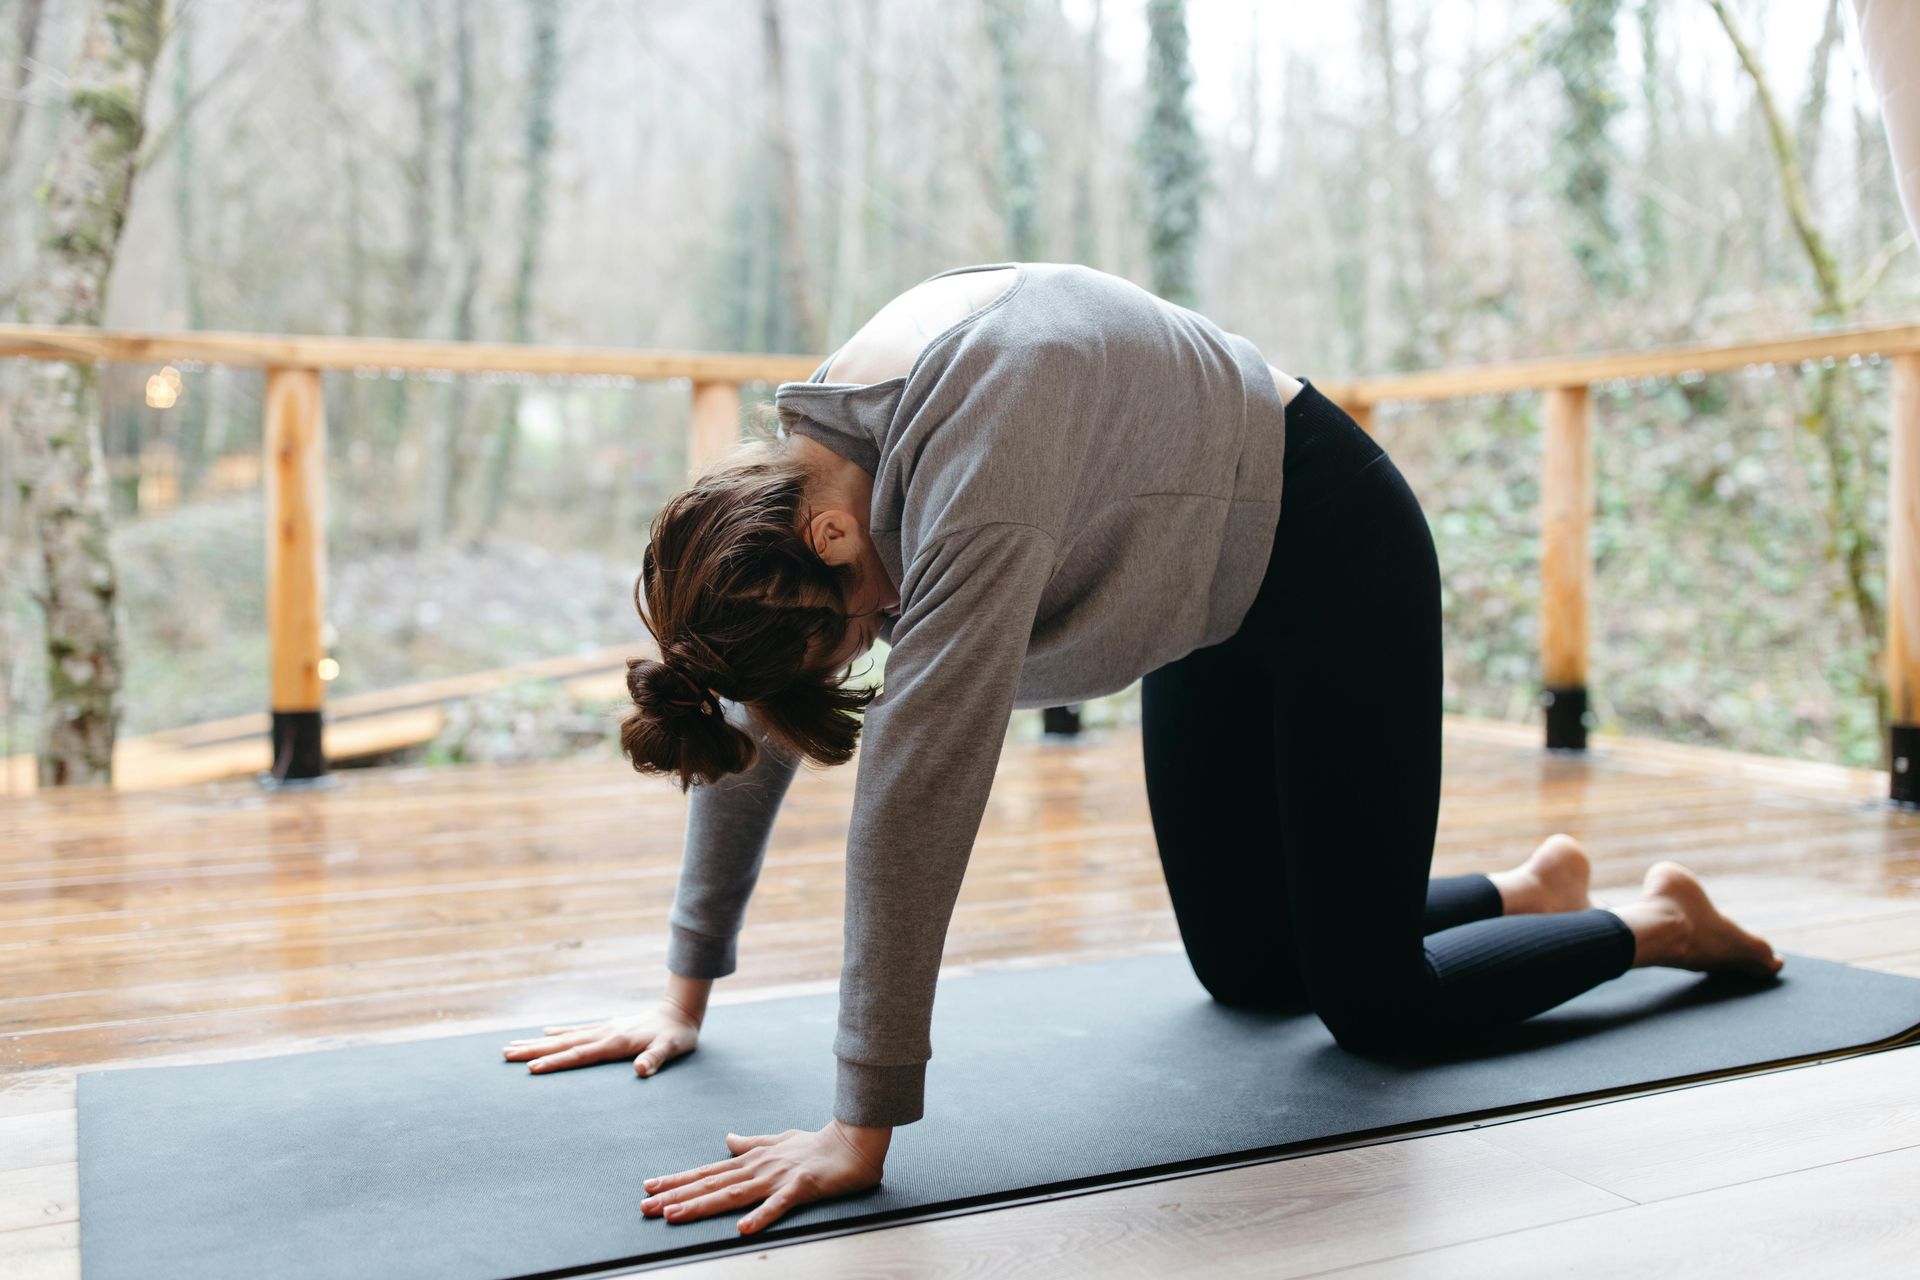
Cat-cow is a movement sequence borrowed from yoga, but its value isn't philosophical — it's mechanical. The spine, like any jointed structure, benefits from moving through its full range rather than being held in one position. Cat-cow systematically takes the entire spinal column from full flexion to full extension in a slow, controlled rhythm, lubricating the facet joints, mobilizing the intervertebral discs, and activating the deep spinal stabilizers in a low-load environment.
Start on hands and knees on the floor, with wrists directly below shoulders and knees directly below hips. On an exhale, round the entire spine upward — tuck the pelvis, pull the navel toward the spine, drop the head, and press the floor away with both hands. This is the "cat" position: a full spinal flexion. Hold it briefly at the top of the curve.
Then, on an inhale, reverse the motion. Let the belly drop toward the floor, lift the tailbone and the chest simultaneously, and allow the neck to extend so the gaze lifts gently toward the ceiling. This is the "cow" position: full spinal extension. Move between the two positions slowly — about five seconds in each direction — for eight to 10 repetitions.
The value is in the full, deliberate range of motion, not in achieving any particular depth in either position. People with tight thoracic spines may find that the extension portion (cow) doesn't produce much movement in the mid-back at first — most of the arch happens in the lumbar spine instead. That's a diagnostic indicator of thoracic restriction rather than a reason to push harder. Over time, as the thoracic joints mobilize, the movement distributes more evenly.
Cat-cow is a safe starting point for floor-based movement because it's low-impact, self-paced, and requires no flexibility to perform. It's particularly useful as a warm-up before the deeper stretches that follow.
Credit: MART PRODUCTION / Pexels
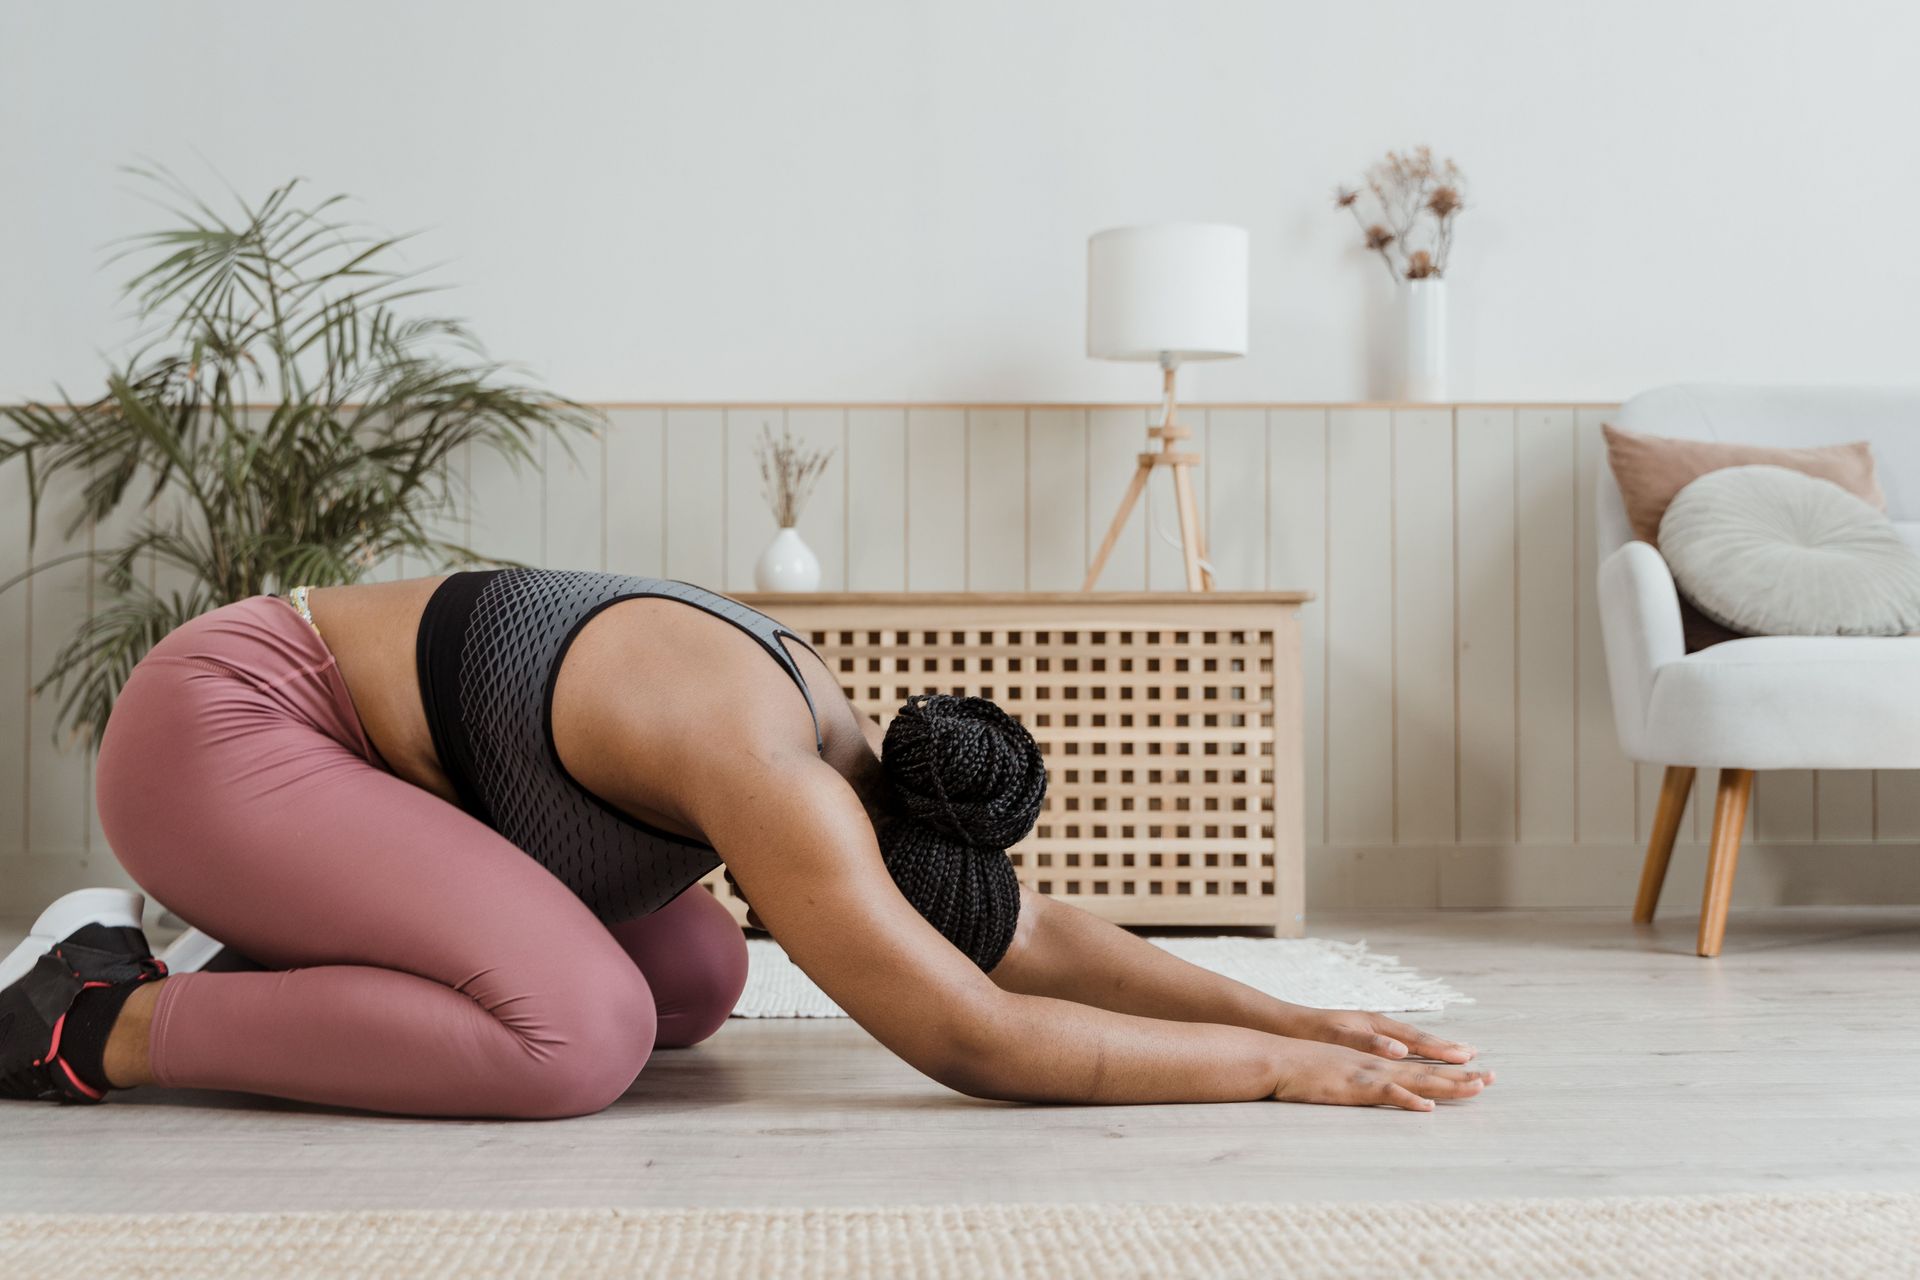
Child's pose is a resting stretch that simultaneously addresses the lower back, hips, and thoracic spine in a single position. It's passive — the body's own weight creates the stretch rather than any muscular effort — which makes it a good option for people who carry a lot of tension and find that active stretching produces more bracing than release.
Kneel on the floor and sit back toward your heels. If your hips don't reach your heels comfortably, place a folded blanket or a firm pillow between your thighs and calves to close that gap. Extend both arms forward along the floor and allow your torso to drop toward the ground. Let your forehead rest on the floor or a folded arm.
Hold for 60 to 90 seconds. The stretch targets the lumbar spine in a decompressed flexion position — the opposite of the compressive load that sitting places on it. The hips flex fully, which stretches the glutes and the posterior hip capsule. If the arms are fully extended, there's also a gentle stretch through the lats and the thoracic region.
For a lateral variation that addresses the side body — the obliques, the serratus, and the quadratus lumborum, a deep lower-back muscle that often becomes chronically tight in desk workers — walk both arms to the right while keeping the hips centered. Hold for 30 seconds, then walk them to the left.
Child's pose can be held longer than most stretches without risk. Three minutes in this position is not excessive. It's one of the few stretches where duration is consistently rewarded — the longer the hold, the more the posterior musculature releases, particularly the thoracolumbar fascia, the dense connective tissue sheet that covers the lower back.
Credit: Anna Rosar / Unsplash
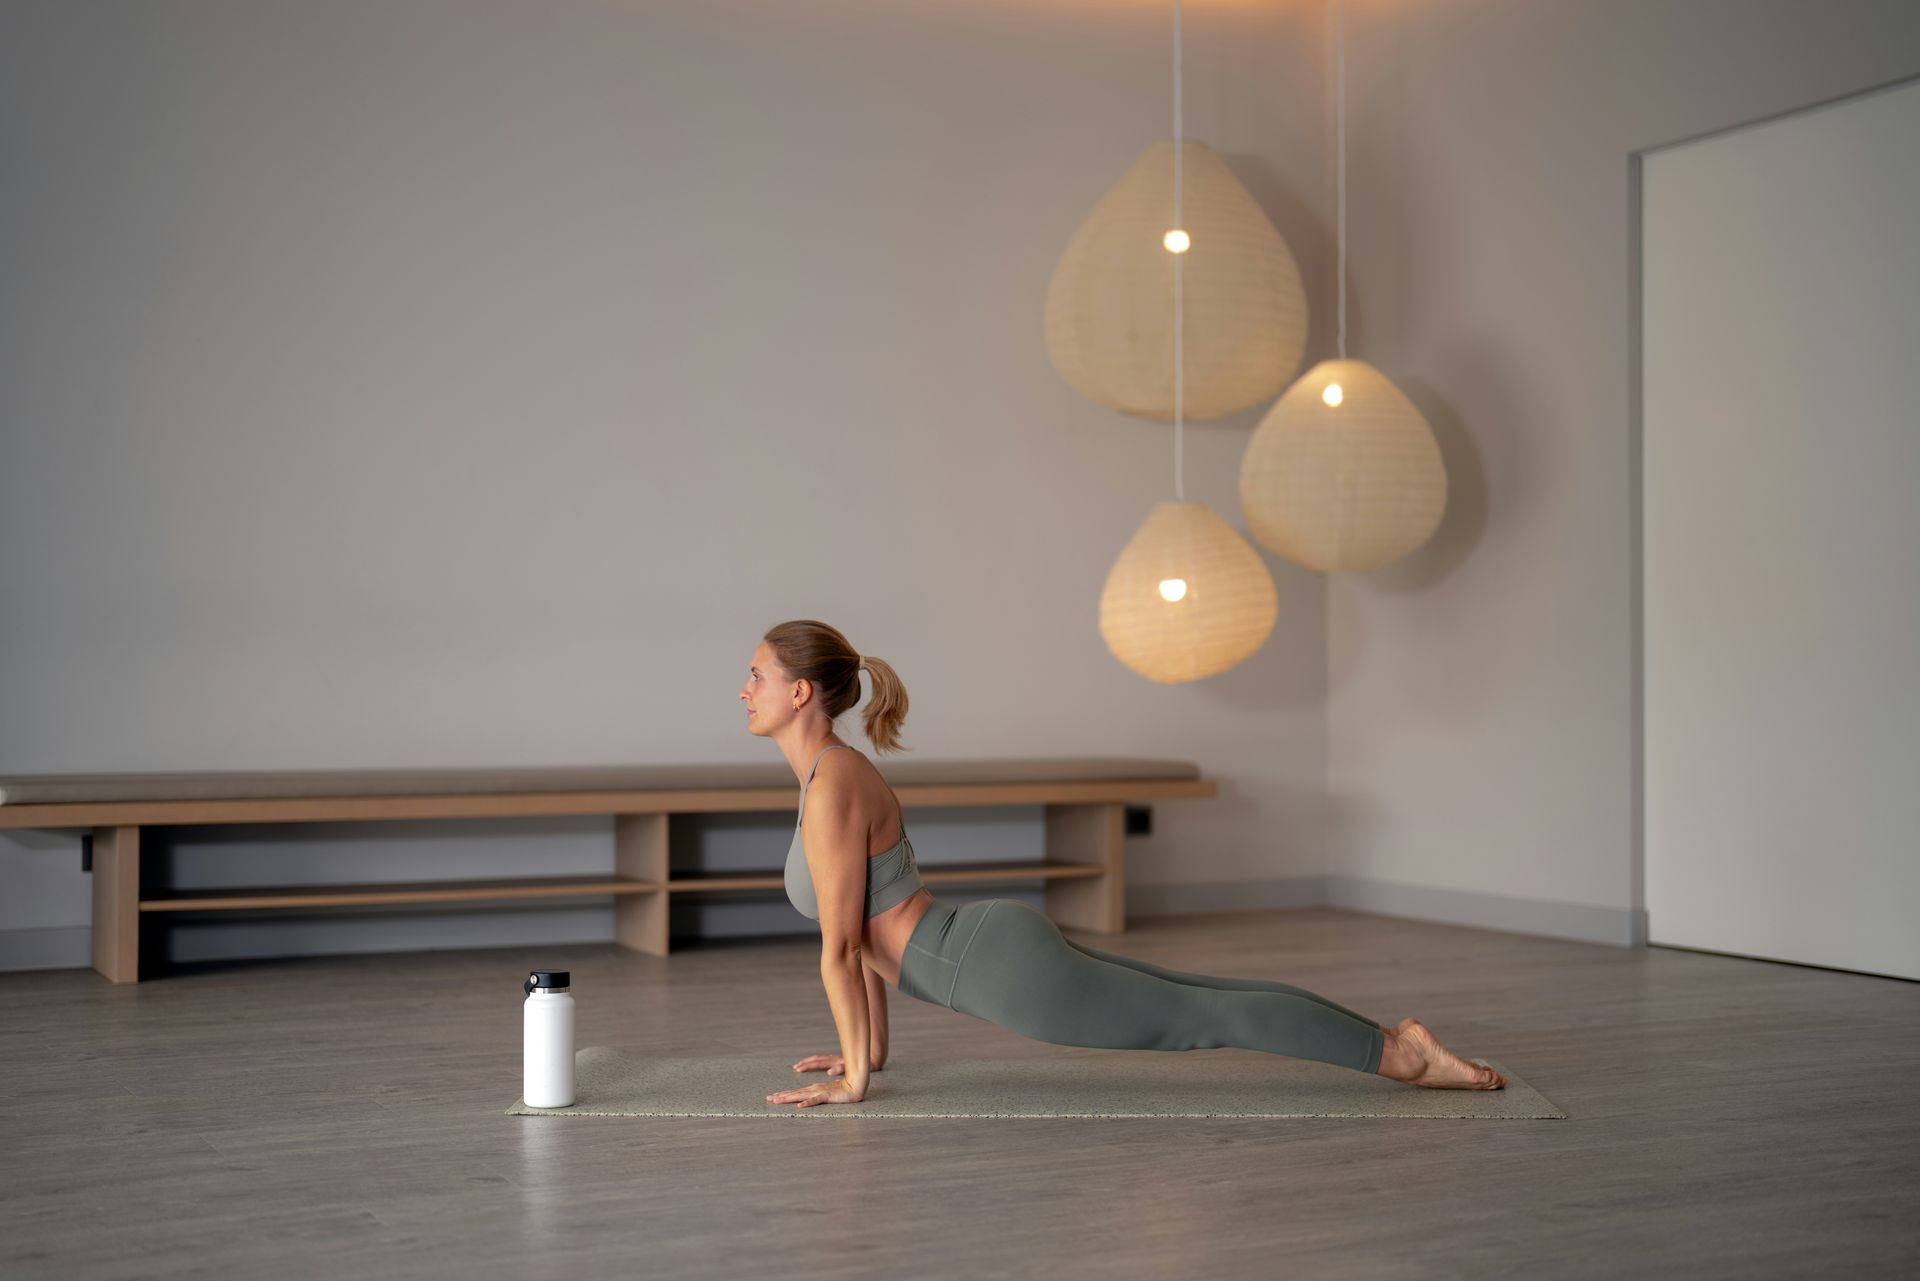
The hip flexors are the most chronically shortened muscles in desk workers' bodies. The iliopsoas — a group of two muscles, the iliacus and the psoas major, that together connect the lumbar spine and pelvis to the femur — is held in a shortened position for as long as a person is seated. Hold a muscle in a shortened position for enough hours per day over enough years, and it adapts to that shorter length as its default.
Short, tight hip flexors have wide-ranging effects. They pull the pelvis into an anterior tilt — a forward tipping — which increases the lumbar lordosis and places more compressive load on the lower spinal joints. They limit hip extension during walking, which forces the body to compensate by over-extending the lower back. They contribute to a pattern of lower back pain that is remarkably common among people who sit for a living.
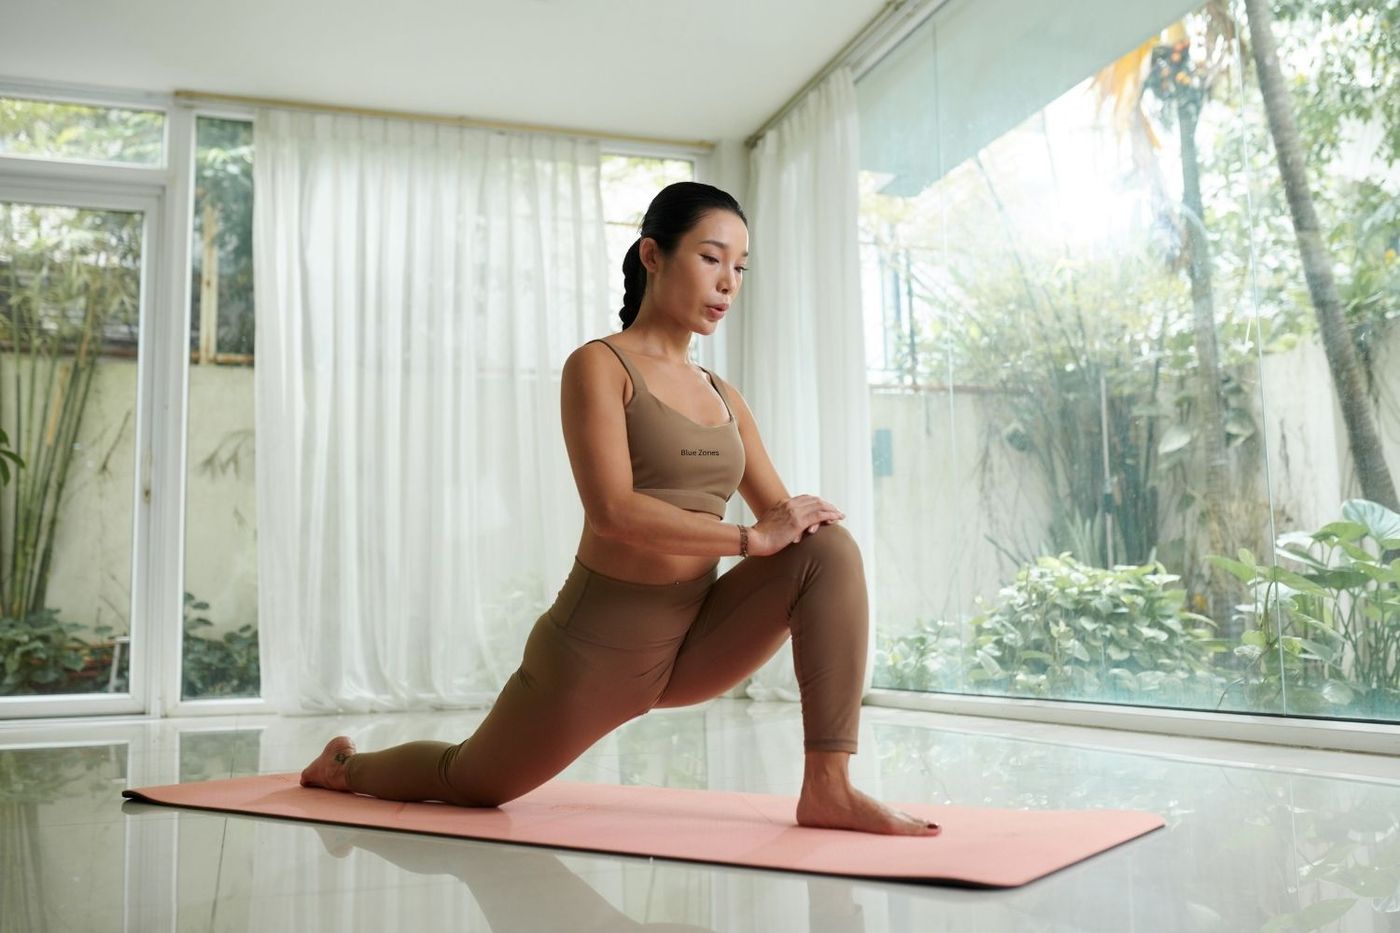
The kneeling lunge stretch targets the hip flexors directly. Kneel on the floor with one knee down and the opposite foot forward. Shift your weight forward until you feel a stretch at the front of the hip of the kneeling leg — not in the knee itself, but higher, at the crease between the thigh and the pelvis. Keep the torso upright. Don't allow the lower back to arch excessively as you shift forward — if it does, engage the abdominals lightly to hold the pelvis in a neutral tilt.
Hold for 30 to 45 seconds per side. The hip flexors respond to sustained stretching. Brief holds of 10 seconds produce minimal lasting change. Two to three repetitions per side, held for at least 30 seconds each, are more effective.
To deepen the stretch, raise the arm on the same side as the kneeling knee overhead. This lengthens the psoas along its full course from the lumbar spine through the pelvis.
Credit: Ivan S / Pexels
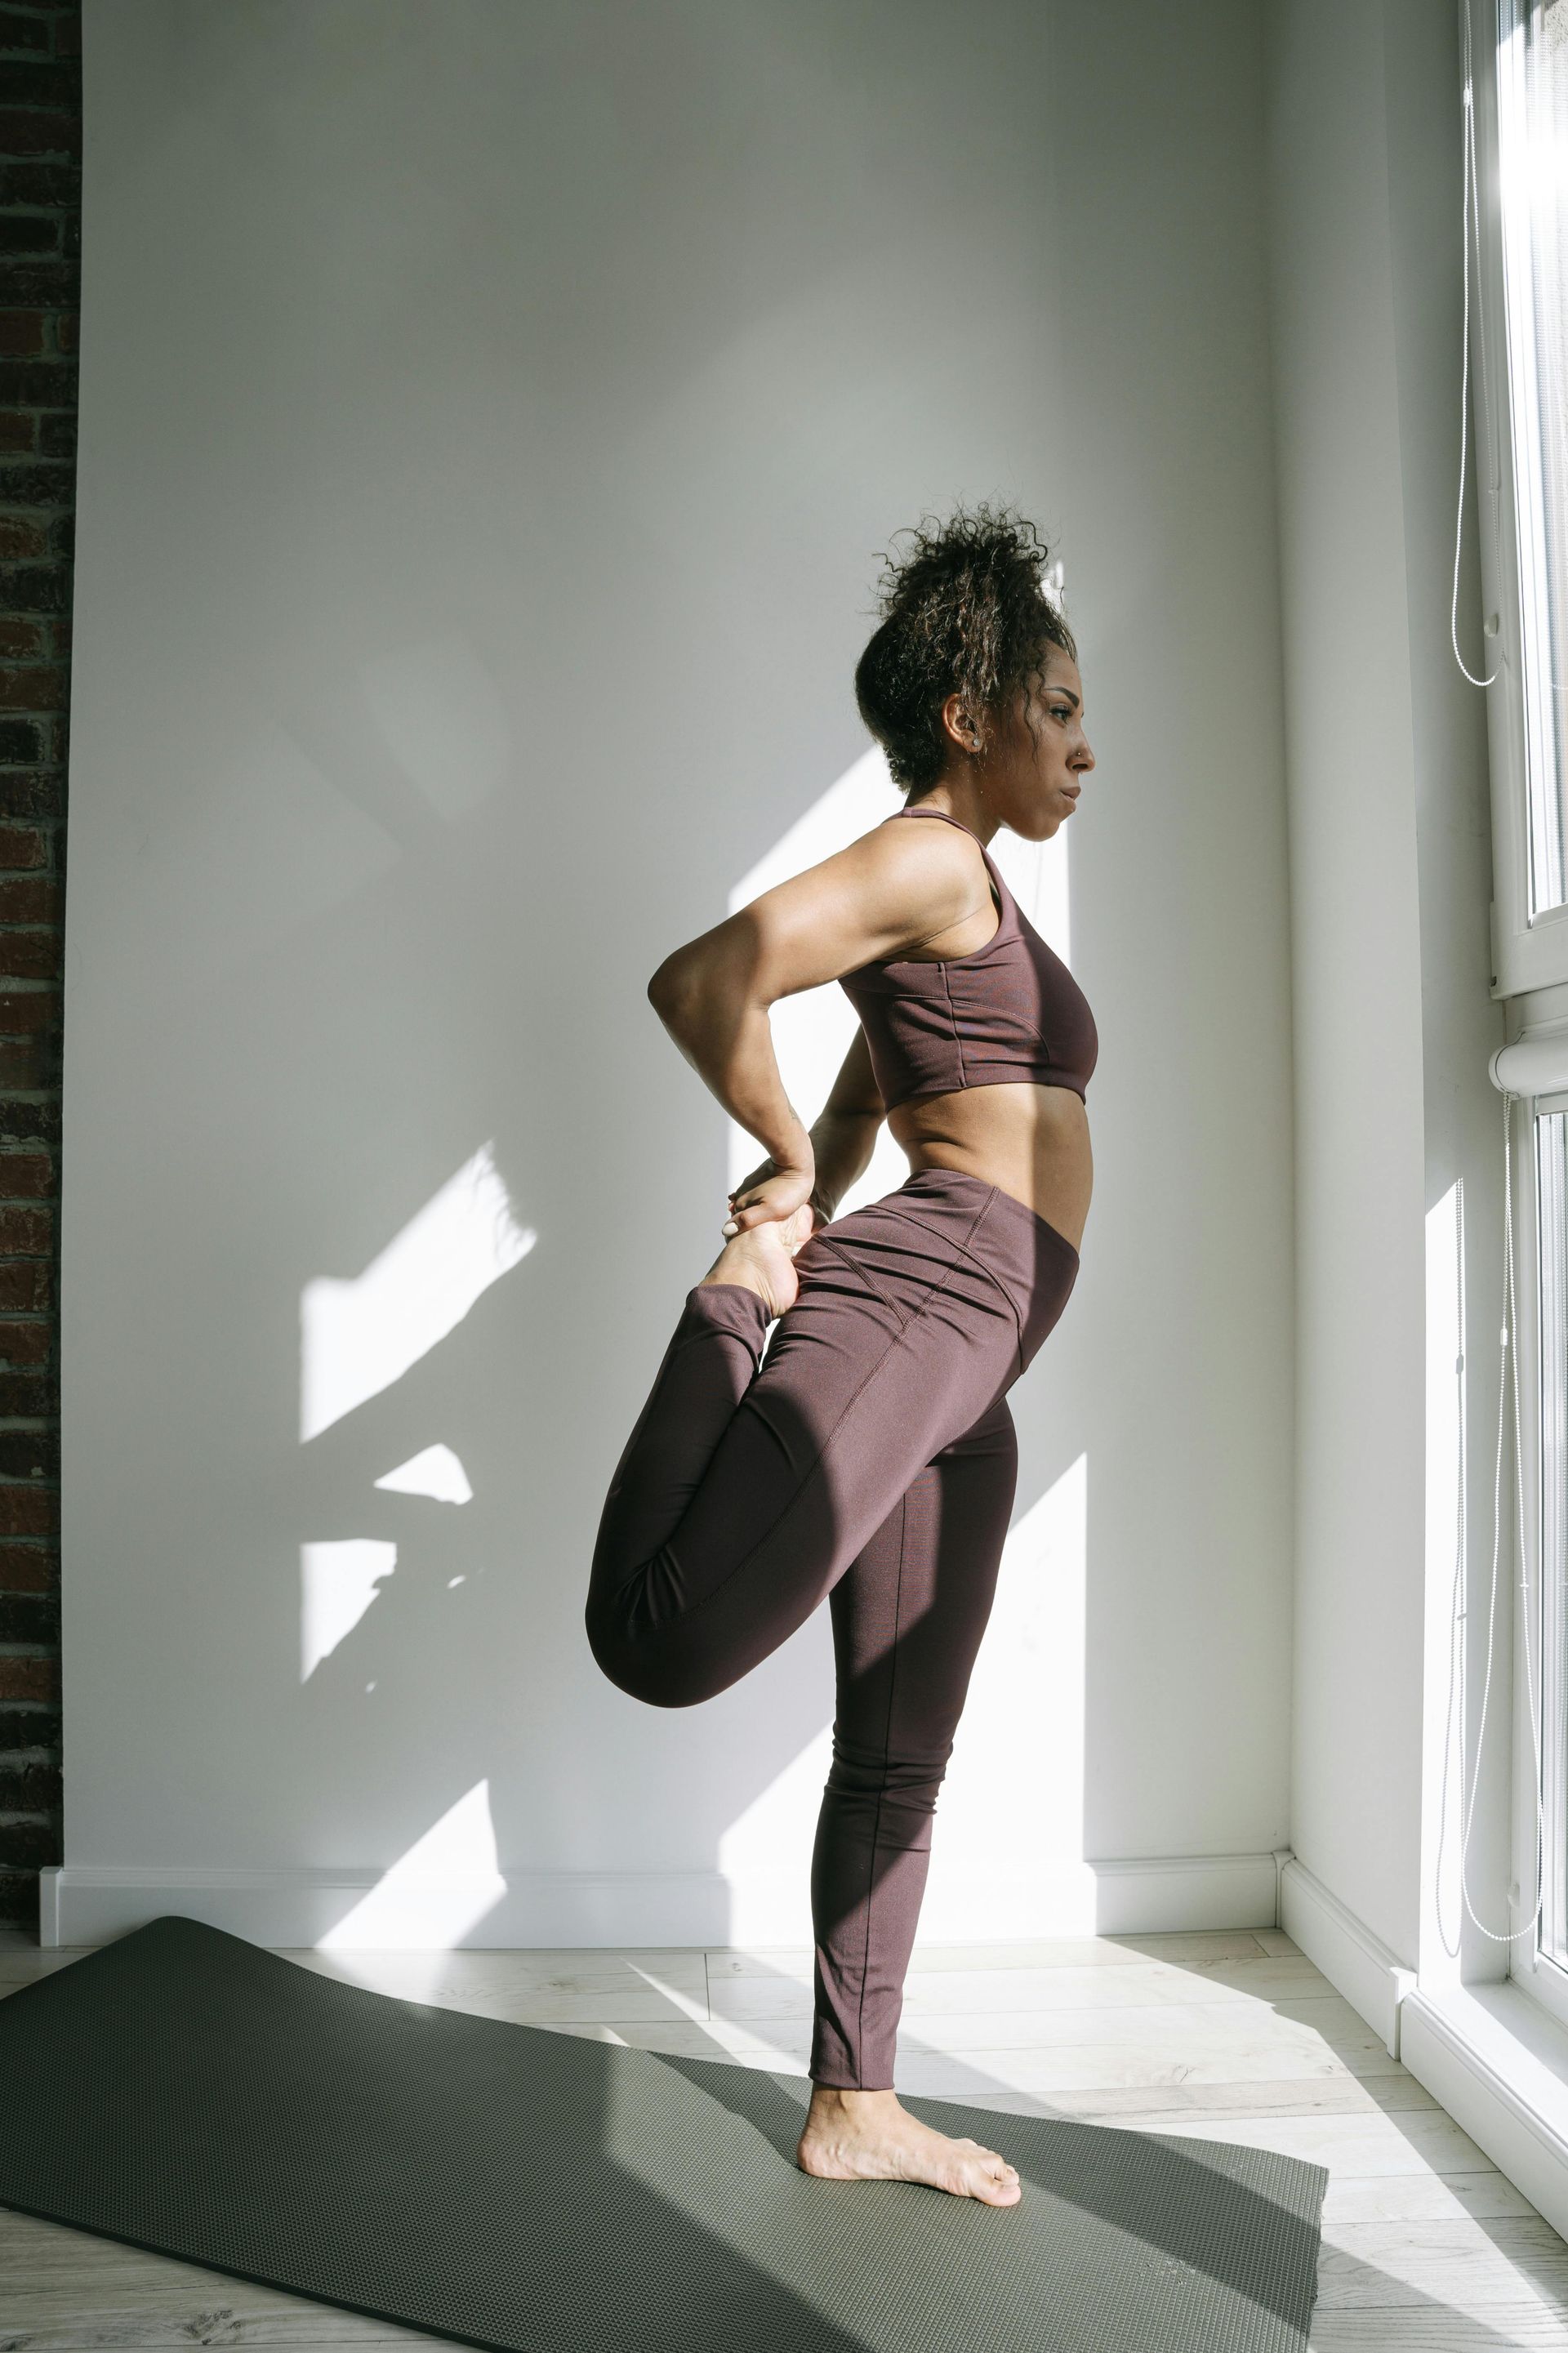
The quadriceps — the four muscles at the front of the thigh — connect the pelvis and femur to the shinbone via the kneecap. When desk workers stand up after prolonged sitting, the quads are often the first structure to feel stiff or resistant. Like the hip flexors, they spend a long period shortened in the seated position and benefit from regular lengthening.
Stand near a wall or chair for balance. Bend one knee and bring your heel toward your glutes. Grasp the ankle or the top of the foot with the same-side hand. Stand tall — resist the urge to lean forward, which takes load off the quad stretch and shifts it to the lower back. If you can't reach your ankle without leaning, loop a strap, belt, or towel around the ankle and hold both ends.
Hold for 30 seconds per side. The sensation should be along the front of the thigh, from above the knee up toward the hip. If you feel pinching in the knee, reduce the bend angle slightly and focus on pulling the femur back rather than the heel toward the glutes.
For an additional hip flexor component, contract the glute of the standing leg while performing the stretch. This tilts the pelvis posteriorly — tucking it slightly — which adds tension to the rectus femoris, the only one of the four quad muscles that crosses both the hip and the knee. The rectus femoris plays a significant role in anterior pelvic tilt and is worth targeting specifically.
Done consistently, the standing quad stretch contributes to better posture when walking and standing, because the quads and hip flexors work together to determine how the pelvis positions itself in an upright posture.
Credit: Alex Shaw / Unsplash
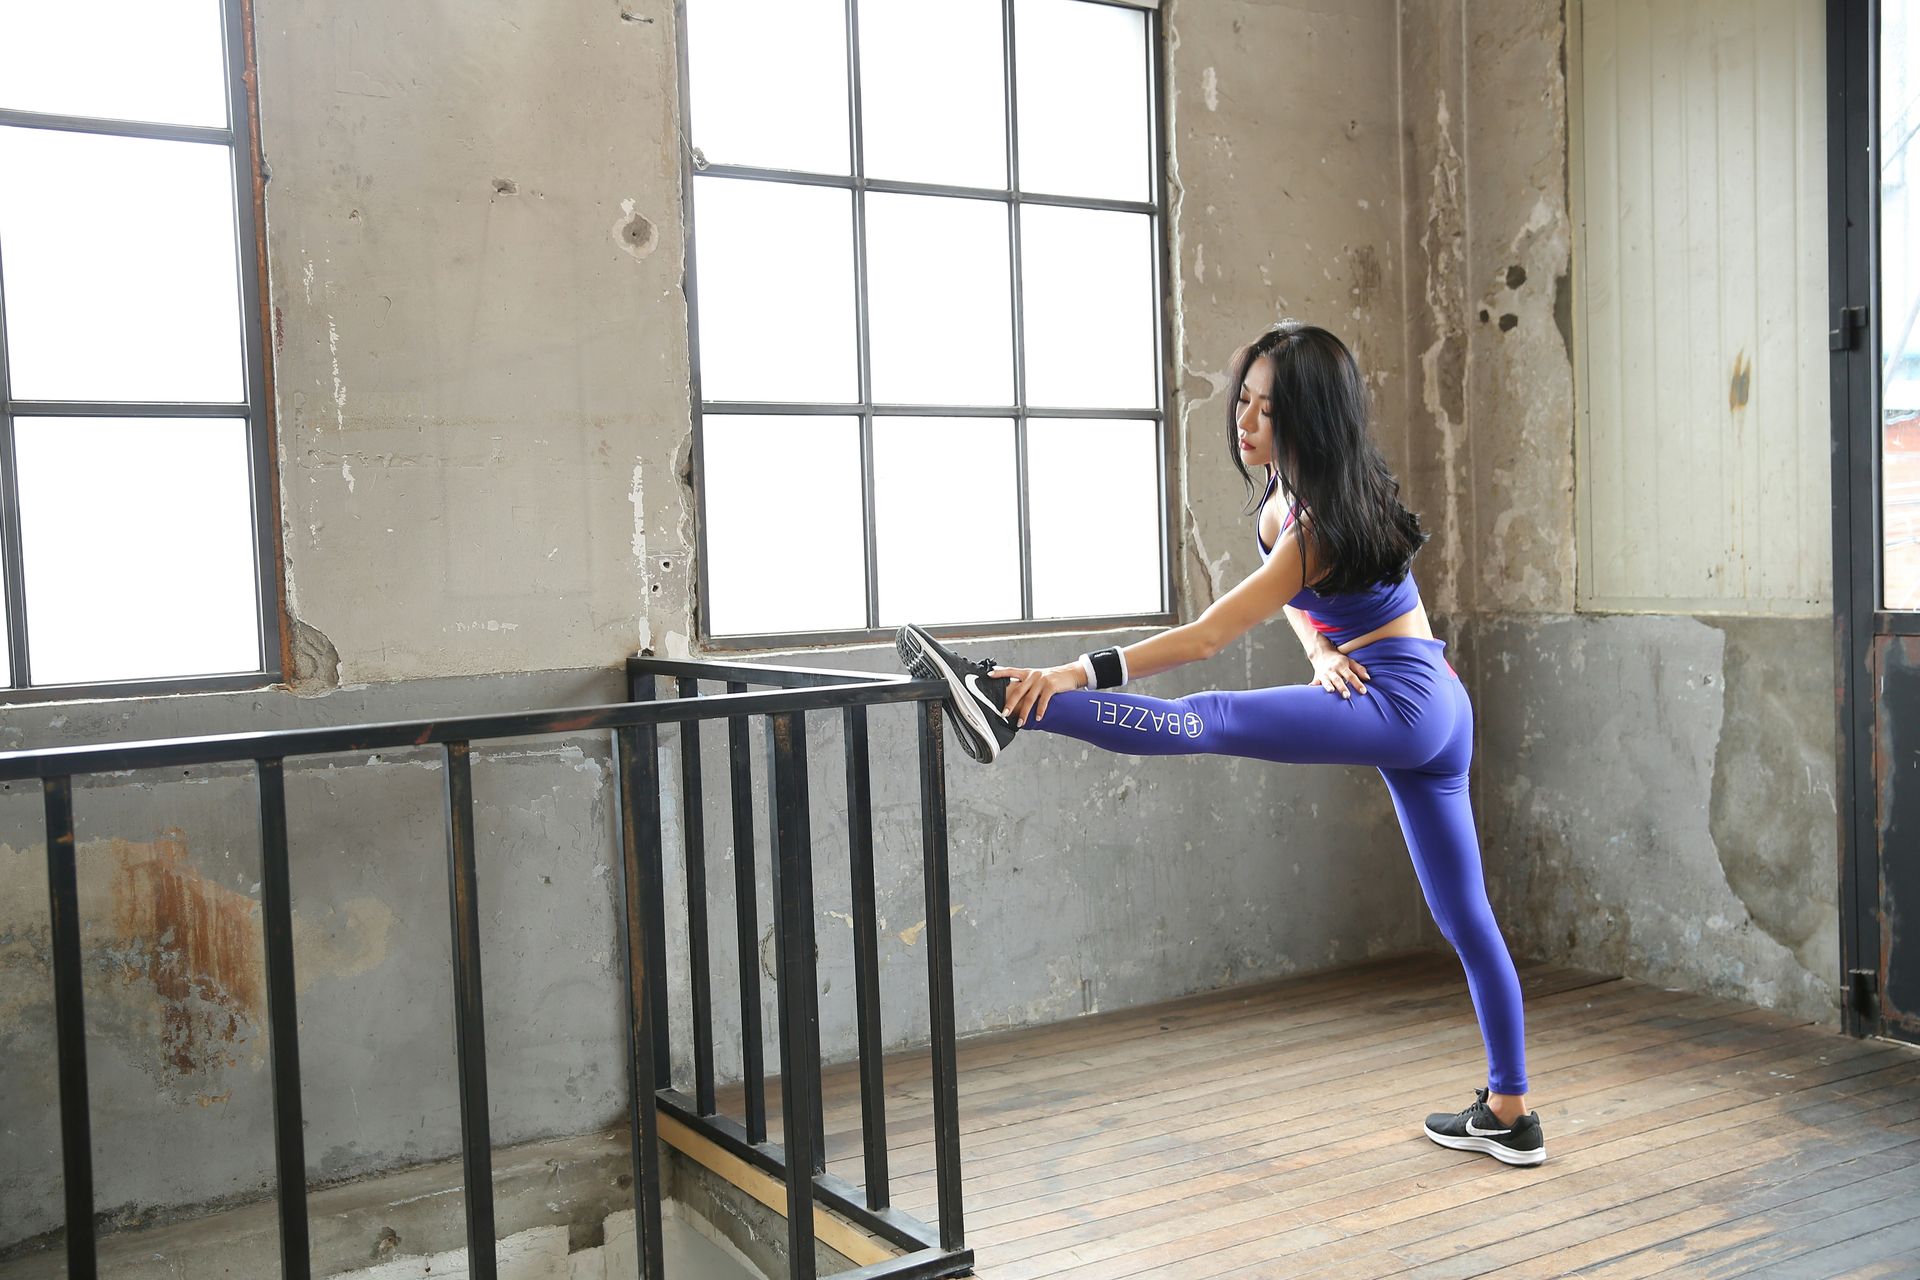
The hamstrings — three muscles at the back of the thigh — have a different relationship to desk work than the hip flexors do. Rather than shortening from being held in a shortened position, they often become tight as a protective response to anterior pelvic tilt. When the pelvis tips forward (as it does when hip flexors are short), the hamstrings are placed on stretch, and they respond by increasing their resting tension to prevent being overpowered.
A standing hamstring stretch can be done at a desk with minimal setup. Stand facing a low surface — a desk edge, a windowsill, or a chair seat. Extend one leg and place the heel on the surface, keeping that leg straight. Stand tall and hinge forward from the hips — not by rounding the lower back, but by keeping the spine long and tipping the pelvis anteriorly as you fold. The stretch should be felt in the back of the extended leg's thigh, not in the lower back.
Hold for 30 to 45 seconds per side. The height of the surface determines the intensity — a lower surface creates a gentler stretch, a higher surface a more demanding one. Start lower and raise the height as the hamstrings become more flexible over time.
People with very tight hamstrings sometimes find this stretch produces sensation behind the knee rather than in the thigh belly. This often indicates that the sciatic nerve, which runs along the back of the leg, is being stretched as much as the muscle. If this is the case, slightly bend the knee of the raised leg, which removes neural tension and allows the hamstring to stretch in isolation.
Credit: Canva Images
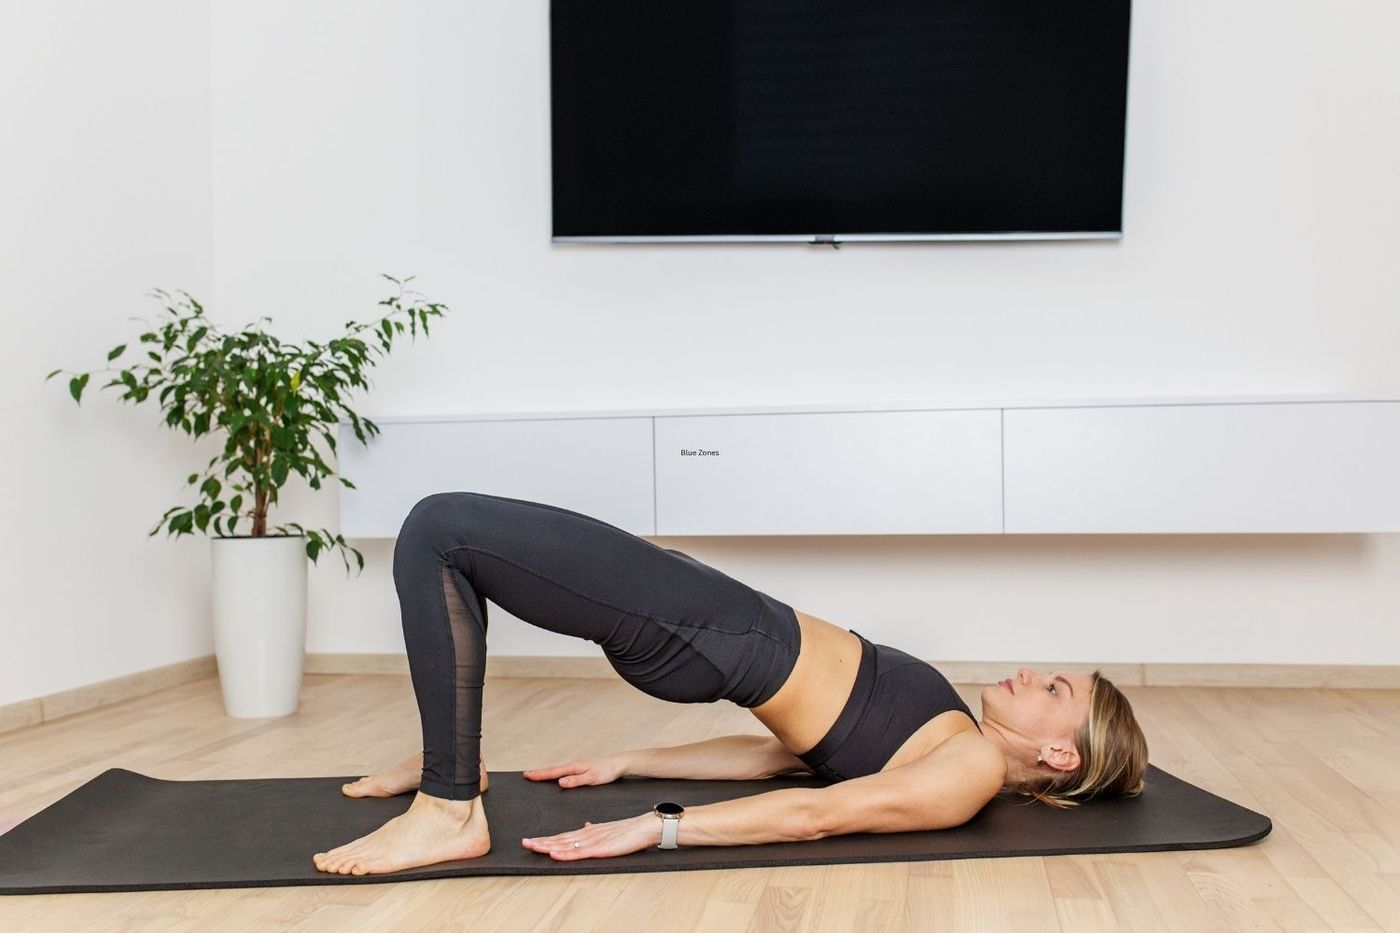
The glute bridge is technically a strengthening exercise, but it also stretches the hip flexors through the mechanism of reciprocal inhibition — when the glutes contract, the opposing hip flexors must release. For desk workers, this dual action is especially valuable because the glutes and hip flexors are frequently in a state of imbalance: the hip flexors chronically short and overactive, the glutes chronically lengthened and underactive.
Lie on your back on the floor with knees bent and feet flat, hip-width apart. Press through the heels to lift the hips toward the ceiling until the body forms a straight line from knees to shoulders. Squeeze the glutes at the top. Hold for two to three seconds, then lower slowly.
Perform 10 to 15 repetitions at a controlled pace. The focus should be on feeling the glutes doing the work — if you feel it primarily in the hamstrings or lower back, adjust by walking the feet slightly closer to your body, which changes the joint angle and shifts load toward the glutes.
A single-leg variation increases the challenge and is useful for identifying and correcting side-to-side imbalances. Extend one leg straight while performing the bridge on the other side. The pelvis should stay level throughout — if it drops to one side, the supporting glute and hip abductors are not producing adequate force.
The glute bridge also improves hip extension, which is the movement most compromised by desk work. Restoring active hip extension — the ability to drive the hip behind the body during walking — reduces compensatory lumbar extension and improves the entire gait pattern, with benefits that extend well beyond the time spent at a desk.
Credit: Canva Images
The spinal twist is one of the most widely used stretches for addressing thoracolumbar stiffness, and for good reason. It takes the lumbar and thoracic spine into rotation — a movement pattern that is almost entirely absent from sedentary desk work. Rotation helps restore the mobility of the facet joints, moves fluid through the intervertebral discs, and releases tension in the paraspinal muscles that line the spine.
Lie on your back with both legs extended. Draw the right knee toward your chest, then guide it across the body to the left, allowing it to drop toward the floor on the left side. Extend the right arm out to the right side at shoulder height, with the palm facing up. Turn your head gently to the right, or keep it neutral if that feels more comfortable.
Hold for 45 to 60 seconds. The right shoulder should stay in contact with the floor, or as close to it as your thoracic rotation allows. Don't force the shoulder down — let gravity work over time. The stretch should be felt through the right side of the mid-back and lower back, and possibly through the outer right hip.
Repeat on the other side. Most people have more restriction in one direction than the other. Spend an extra 20 to 30 seconds on the stiffer side.
This stretch is most effective when done slowly and with full, relaxed breathing. Breath cycles have a real effect on spinal mobility — on the exhale, the body naturally releases into a slightly deeper position, so consciously exhaling into the twist for several breath cycles can produce a measurably greater range of motion than holding with a tense breath.
Credit: Canva Images
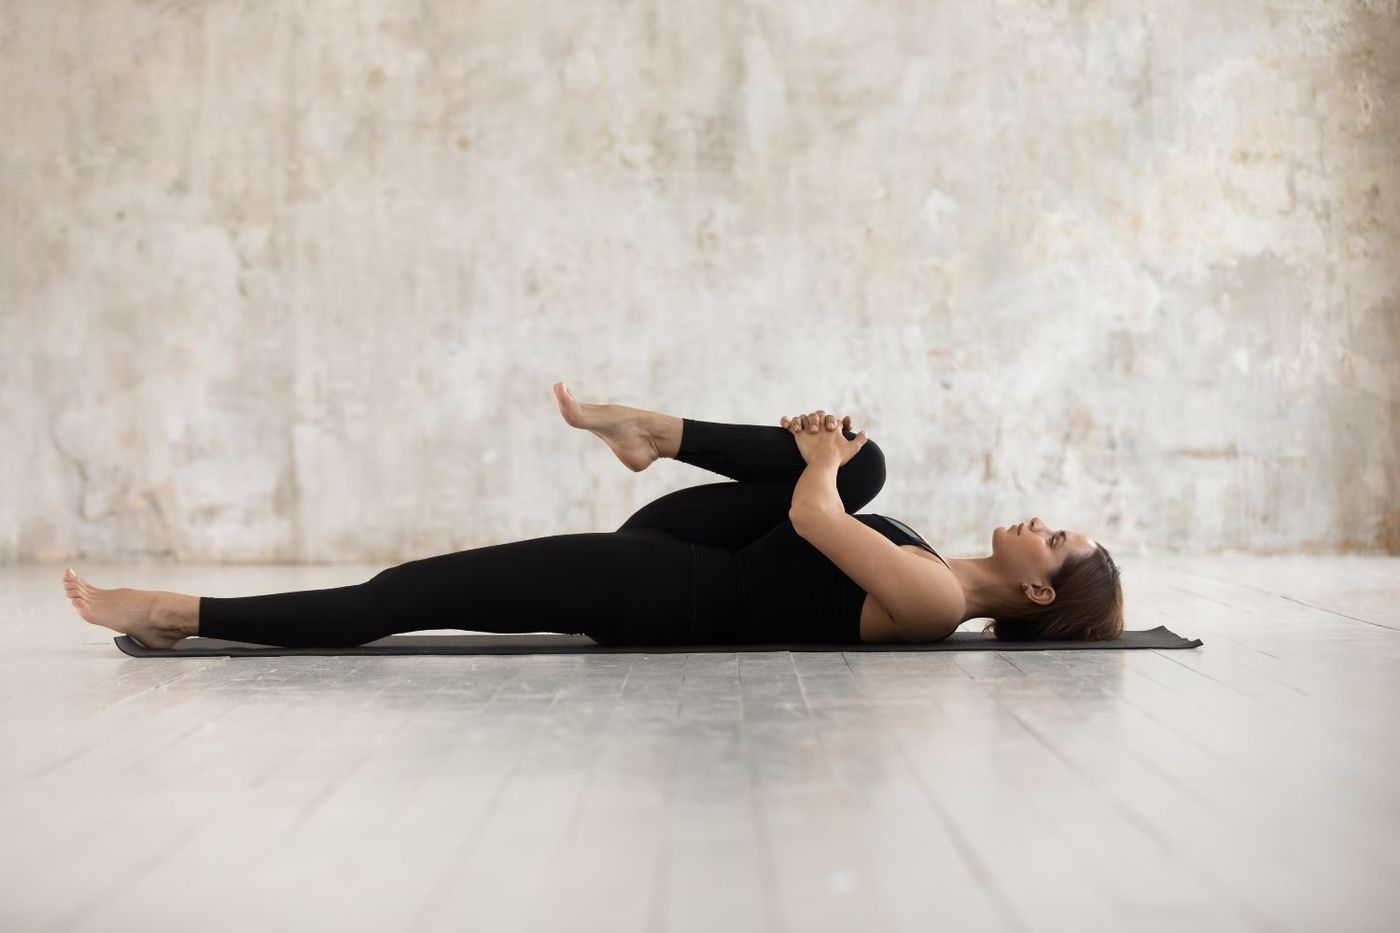
The kneeling lunge, covered earlier, is an effective hip flexor stretch. This supine version offers a different mechanical approach — one that many physical therapists use for clients with lower back involvement, because it eliminates the spinal loading that comes from being upright and allows the psoas to release against gravity rather than against body weight.
Lie on your back on a firm surface. Draw both knees toward your chest to flatten the lower back. Then lower one leg toward the floor, keeping it relatively straight or with a soft bend in the knee. Hold the opposite knee close to the chest to maintain a flat lumbar spine — this is essential. If the lower back arches away from the floor as the leg descends, you've gone further than your current hip flexor length allows. Lower the leg only as far as you can while keeping the back flat.
Hold for 45 to 60 seconds per side. The sensation should be in the front of the hip of the lowered leg, not in the lower back. Because the position controls pelvic movement, this stretch is often more specific than the kneeling lunge for people who tend to arch through the lower back to compensate for tight hip flexors.
After the hold, draw both knees back to your chest briefly before switching sides. This transition protects the lower back between repetitions and maintains the flat lumbar position that makes this stretch effective.
For people who experience significant lower back discomfort after prolonged sitting, this stretch — done for two minutes per side before standing up from a very long sitting session — can noticeably reduce the stiffness and aching that follows.
Credit: ROMAN ODINTSOV / Pexels
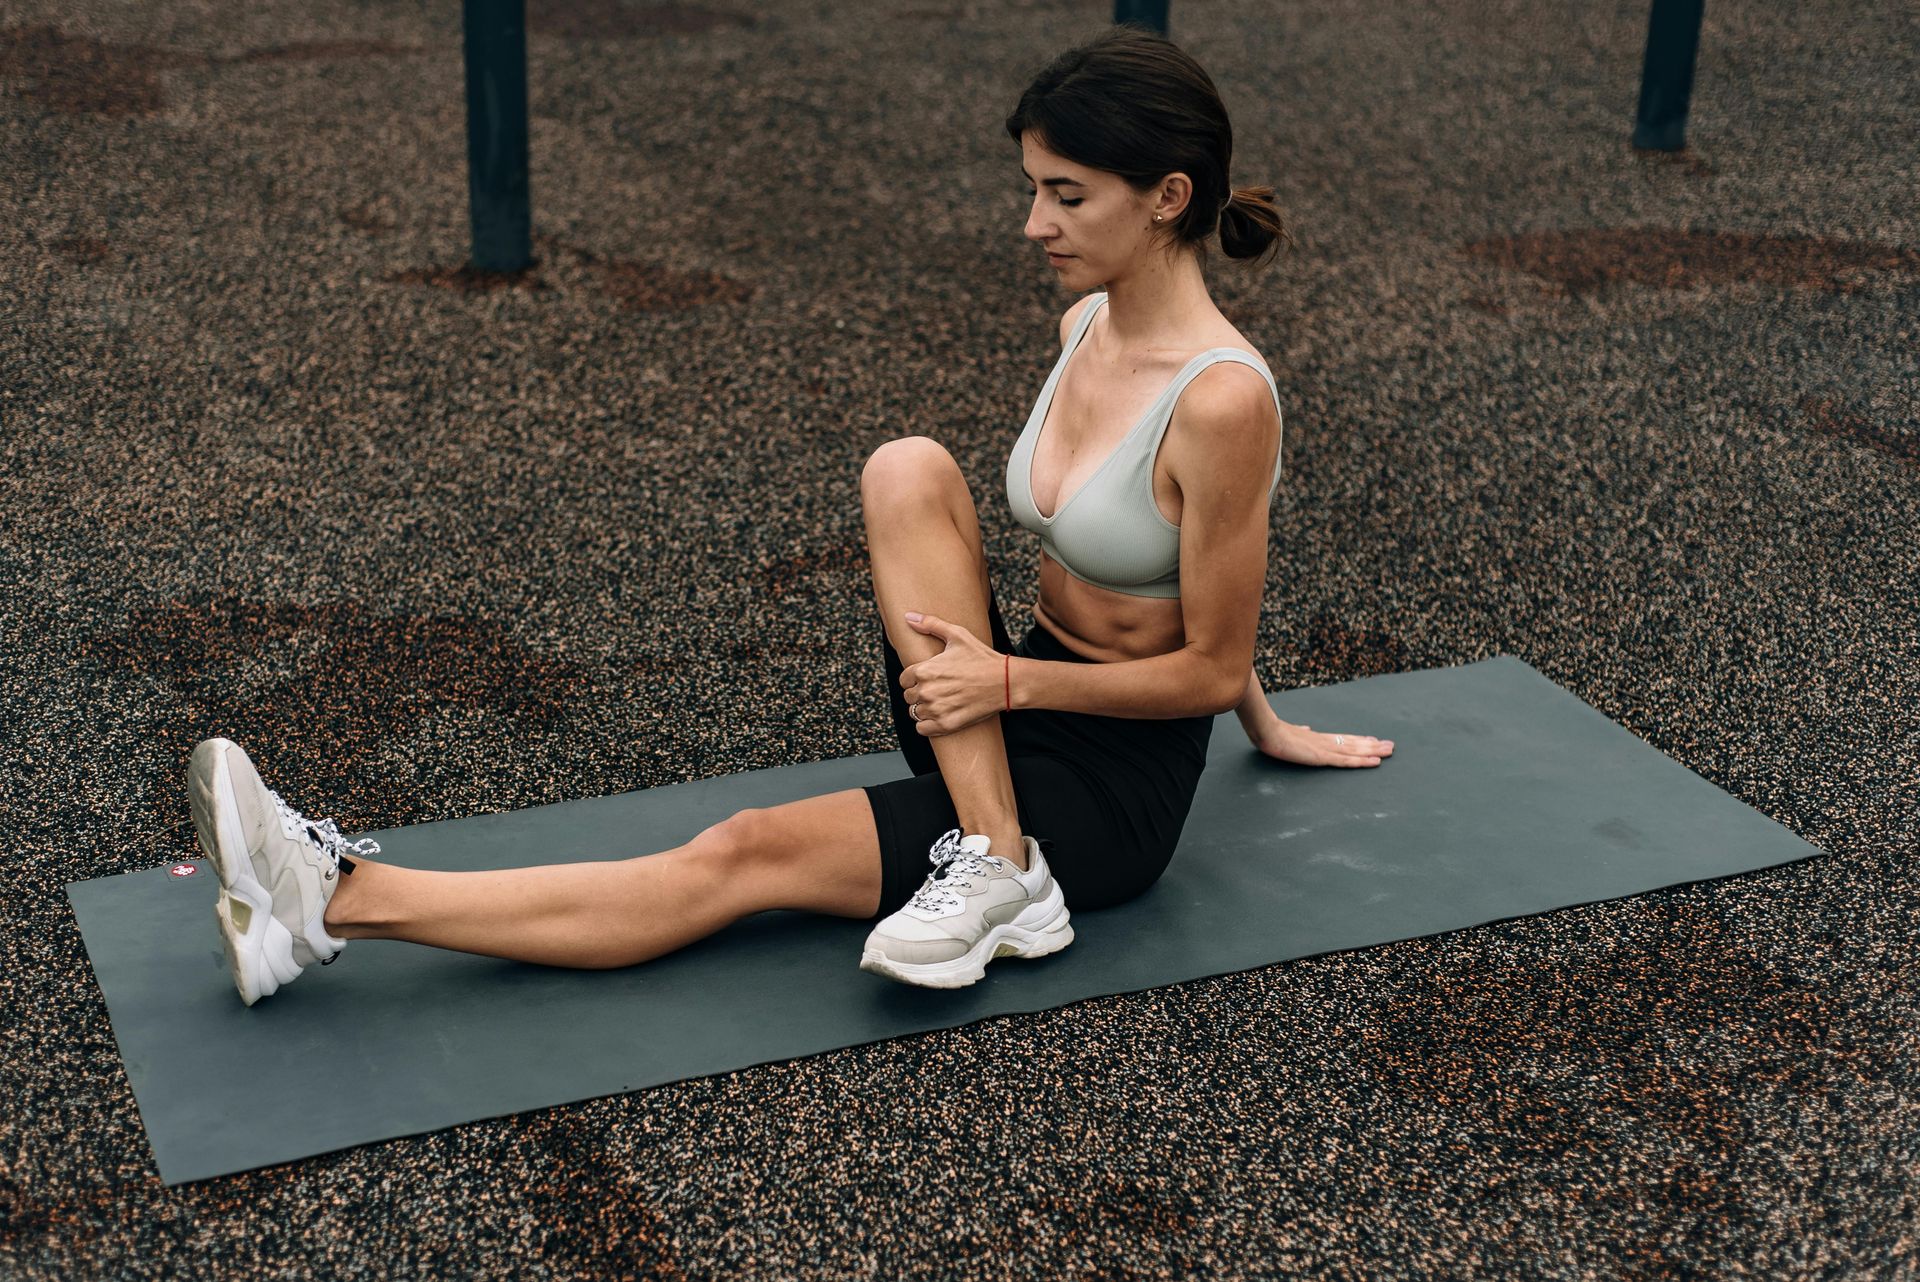
The 90-90 stretch is a floor-based position that simultaneously addresses both hip internal rotation on the front leg and hip external rotation on the back leg. This makes it one of the most comprehensive hip mobility exercises available. Most hip stretches focus on a single plane — flexion, extension, or external rotation. The 90-90 works all three simultaneously, making it time-efficient and well-suited to the hip restrictions that develop from prolonged sitting.
Sit on the floor and arrange the legs so both hips are bent at 90 degrees, but in different directions. The front leg is externally rotated — shin in front of the body, knee at 90 degrees to the side. The back leg is internally rotated — shin behind the body, knee pointing to the side. Both shins should form a rough 90-degree angle to the respective thighs.
Sit upright with both hips on the floor, or as close as possible. For the first minute, simply hold the position and breathe. Then hinge forward over the front shin, keeping the spine long — this deepens the external rotation stretch of the front hip. Hold for 30 seconds.
To address the back hip, lean back slightly and rotate your torso toward the back leg. This loads the internal rotation stretch. Hold for 30 seconds.
Switch sides and repeat. Most people find one side significantly more comfortable than the other. The uncomfortable side usually reflects restricted hip rotation in that direction — typically internal rotation on the dominant side or external rotation on the less mobile side.
The 90-90 requires more hip mobility than some of the simpler stretches in this list. It's worth persisting with even if the initial position feels restricted — over weeks of consistent practice, the range available to both hips expands noticeably.
Credit: Canva Images
Blood pools in the lower legs during prolonged sitting. The calf muscles normally act as a circulatory pump — their contractions squeeze venous blood upward toward the heart with each step. During extended sitting, they're still, and circulation slows. Swollen ankles, numb feet, and the heavy-leg feeling that arrives after long stretches at a desk are all consequences of this circulatory stagnation.
Ankle circles are simple but effective at restoring mobility to the ankle joint and activating the calf pump. Lift one foot slightly off the floor and rotate the ankle in slow, full circles — five to eight rotations clockwise, then counterclockwise. Repeat on the other side. The movement should be large and deliberate, taking the ankle through its full available range. This mobilizes the subtalar and talocrural joints, which stiffen during immobility.
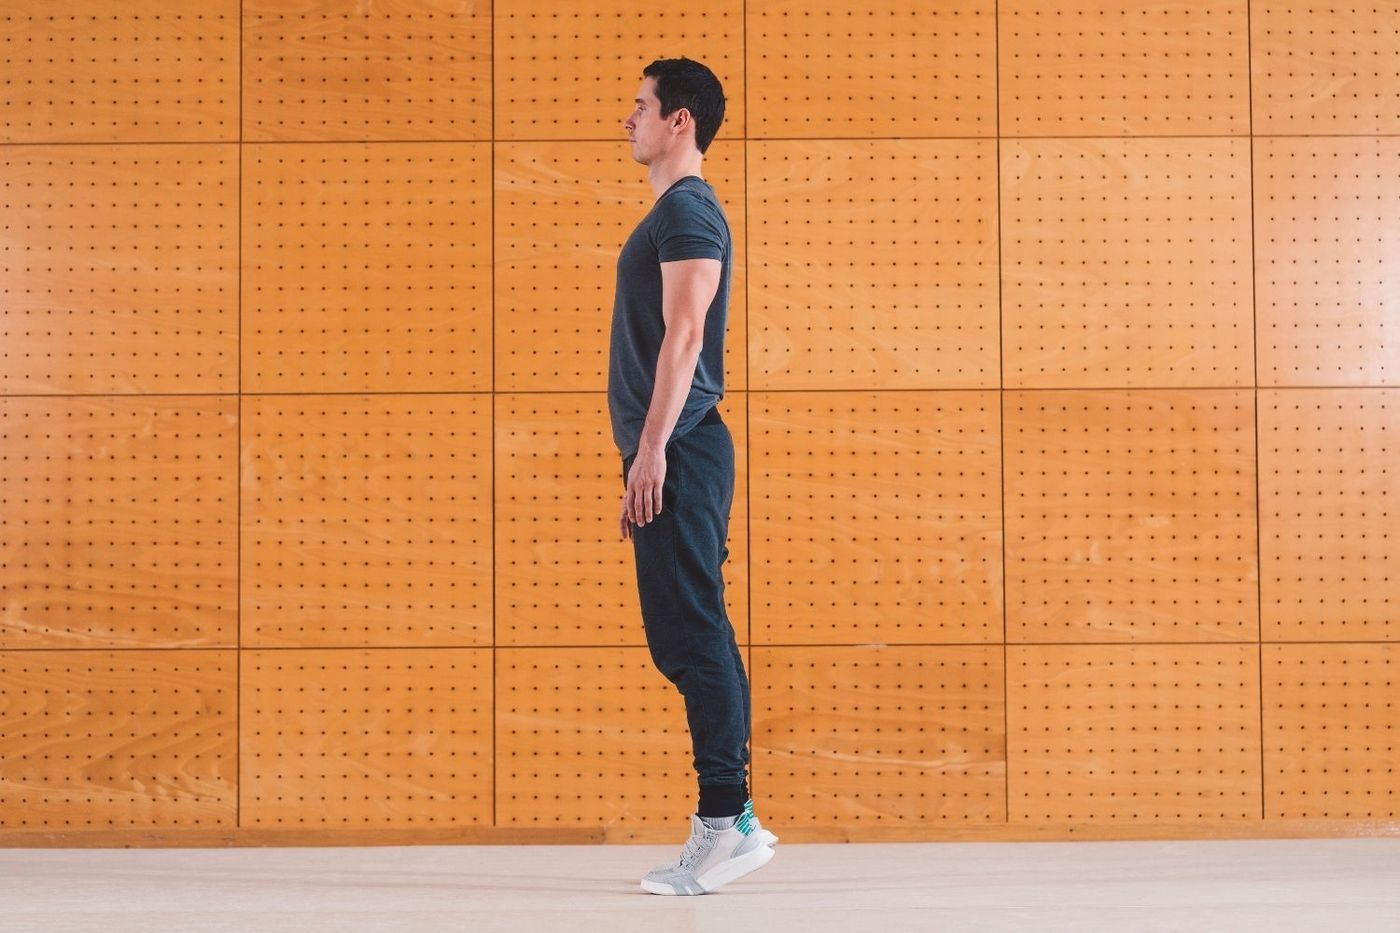
Calf raises address the pump function directly. Stand with both feet flat on the floor, or with the balls of the feet on a slightly raised edge for a greater range. Rise slowly onto the toes, hold for one to two seconds, then lower with control. The emphasis should be on the lowering phase — resisting the descent slowly — which produces the greatest muscular demand and the most effective pump action.
Do 15 to 20 repetitions, twice per hour if possible, or whenever the legs begin to feel heavy. For people in seated roles for eight or more hours, this simple intervention contributes meaningfully to circulation and can reduce the end-of-day fatigue that accumulates in the lower legs.
This stretch-and-activation pair is particularly relevant for people who travel frequently by air, where inactivity and cabin pressure combine to make circulatory stagnation in the lower legs more pronounced.
-1920x2880.jpg)
Credit: Vlada Karpovich / Pexels
The standing forward fold is a full posterior chain stretch — one position that simultaneously addresses the hamstrings, calves, gluteal muscles, lower back, and, if the arms are clasped behind the back, the shoulders and chest as well. It works largely through the body's own weight rather than any active muscular effort.
Stand with feet hip-width apart. Bend the knees slightly — not deeply, but just enough to take the full load off the hamstrings and lower back at the beginning. Fold forward from the hips, allowing the torso to drop toward the floor. Let the arms hang, or grasp opposite elbows overhead. Relax the neck completely — the head should be heavy, not held.
Hold for 30 to 60 seconds. After the initial hold, slowly begin to straighten the knees — only as far as the hamstrings allow without forcing. Each exhale, the body may drop slightly further. Over the course of a minute, significant release can occur in the hamstrings and the thoracolumbar fascia, the connective tissue of the lower back.
To come up, bend the knees and roll slowly through the spine — vertebra by vertebra — rather than snapping up from the hips. Rising too quickly can cause dizziness, particularly in people who are dehydrated or who haven't moved for a long time.
For a dynamic variation, sway gently side to side in the folded position, which selectively loads each hamstring alternately and helps release the paraspinal muscles asymmetrically. This is particularly useful for people who carry chronic tension more on one side of the lower back than the other.
Credit: Canva Images
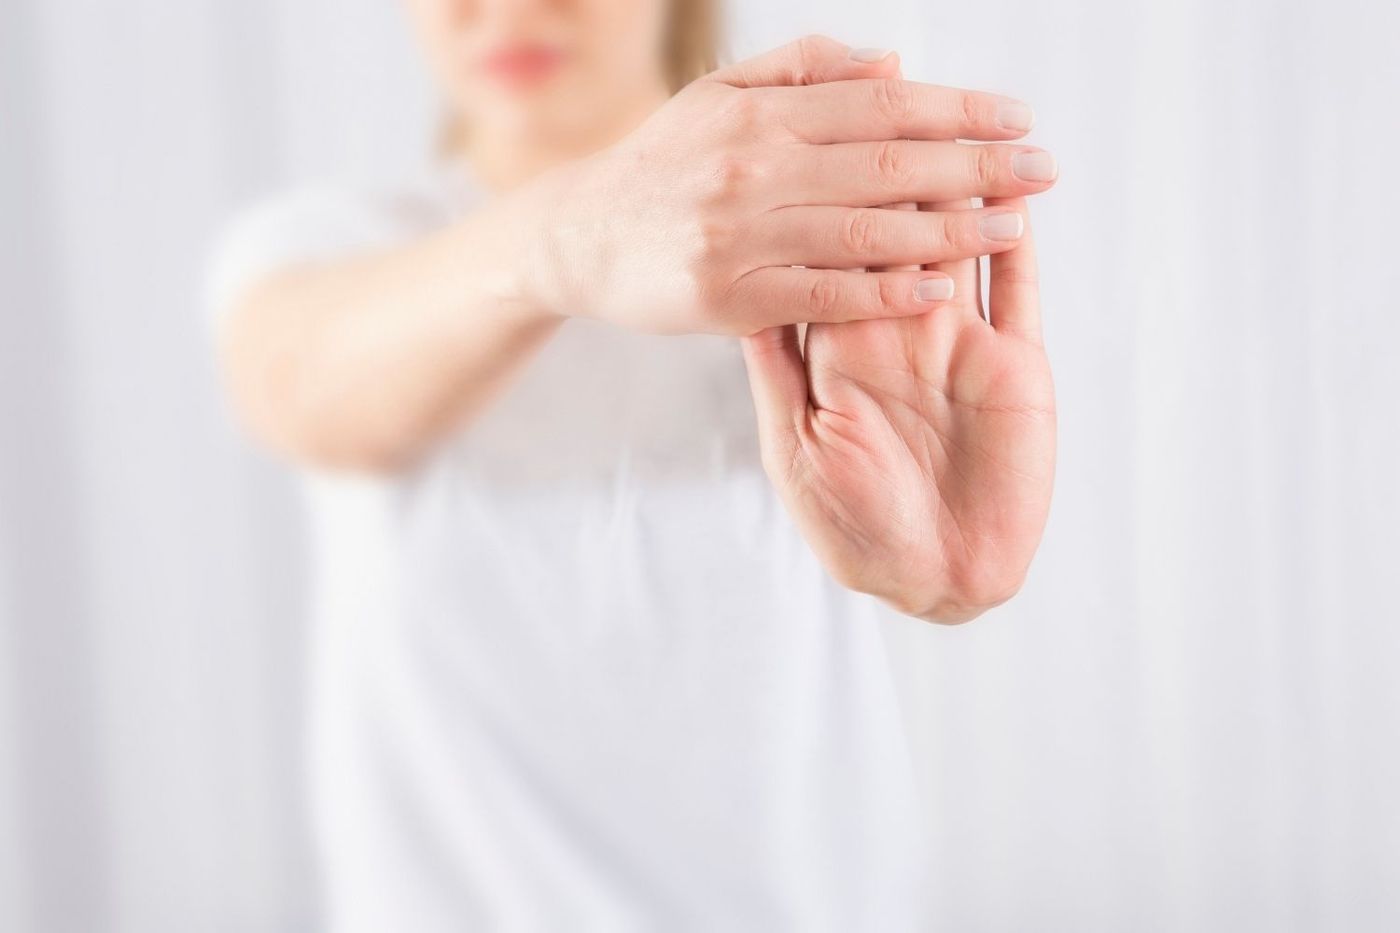
The forearm flexors are among the most overworked muscles in the desk worker's body, yet they're among the least frequently stretched. Every keystroke and mouse click engages these muscles. Over a typical eight-hour workday, that's tens of thousands of small contractions. The cumulative effect is forearm tightness, reduced grip comfort, and in more advanced cases, the early warning signs of repetitive strain injury.
Extend one arm straight in front of you with the elbow locked. With the opposite hand, gently bend the wrist back so the fingers point toward the ceiling and the palm faces forward. Apply only mild pressure — enough to feel a stretch along the underside of the forearm, from the palm to the inner elbow. Hold for 20 to 30 seconds.
Then reverse the direction: bend the wrist downward so the fingers point toward the floor, and use the opposite hand to press gently on the back of the hand. This stretches the forearm extensors — the muscles on top of the forearm, which, while less heavily loaded in typing, contribute to the overall tension pattern.
Both stretches should be held at a mild intensity. The forearm muscles are in close proximity to a dense network of tendons, nerves, and blood vessels. Aggressive stretching of this area is more likely to irritate than to help. Consistent moderate holds, done two to three times per day, produce better outcomes than infrequent deep stretching.
Shaking out the hands between repetitions — letting them hang loosely and flicking the fingers — helps release held tension and improve circulation in the hands. This is especially valuable after periods of intensive typing.
Credit: Loren Castillo / Pexels
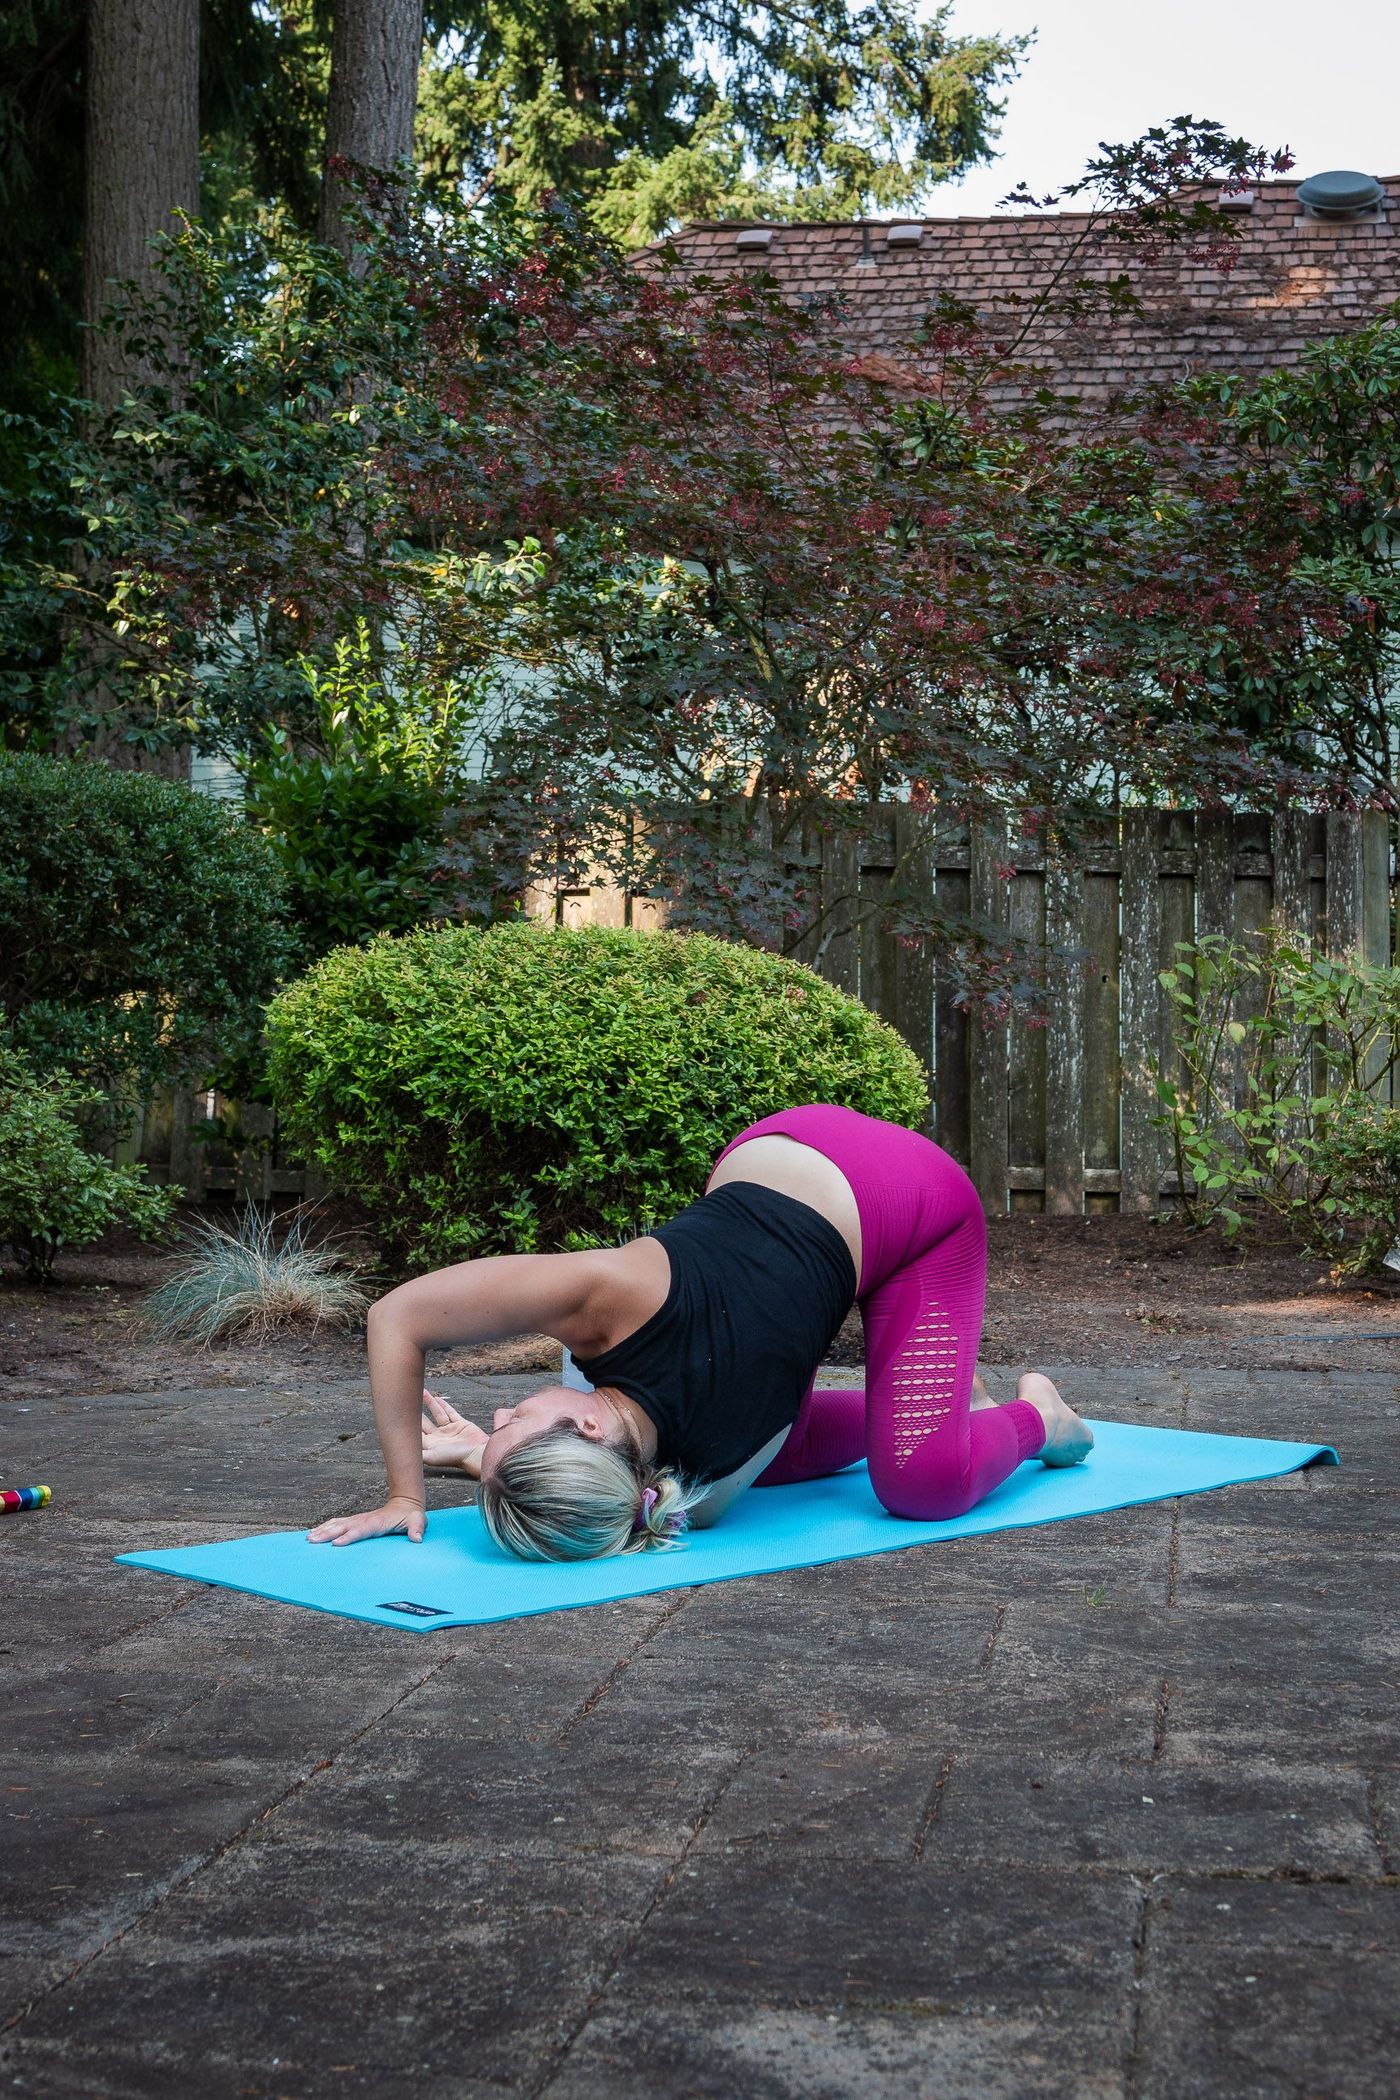
Thread-the-needle is a floor exercise that isolates thoracic rotation — the rotational mobility of the mid-back — without involving the lower back. It's particularly useful because many common rotational stretches (seated twists, for example) produce most of their rotation in the lumbar spine rather than the thoracic spine, which tends to be the more restricted region and the one most directly affected by desk work.
Start on hands and knees with wrists below shoulders and knees below hips. Slide the right arm along the floor under the body, reaching to the left side as if threading it through a needle. Allow the right shoulder to drop toward the floor as the thoracic spine rotates. The right arm slides through until the right shoulder and the right side of the head rest on the floor, with the gaze toward the left.
Hold for 30 to 45 seconds. The stretch is felt as a rotation through the mid-back, between the shoulder blades. The left arm can remain on the floor for support or reach overhead to deepen the stretch.
Return to the starting position and repeat on the other side. The difference between this and a regular thoracic twist is the direction of approach — coming from below rather than from above. This changes the axis of rotation slightly and targets the thoracic costovertebral joints, where the ribs attach to the vertebrae, differently than upright rotation does.
Thread-the-needle is safe for most people, including those with lower back sensitivities, precisely because the lumbar spine is not involved in the movement. The positioning on hands and knees locks the lumbar spine in a neutral position throughout.
Credit: RDNE Stock project / Pexels
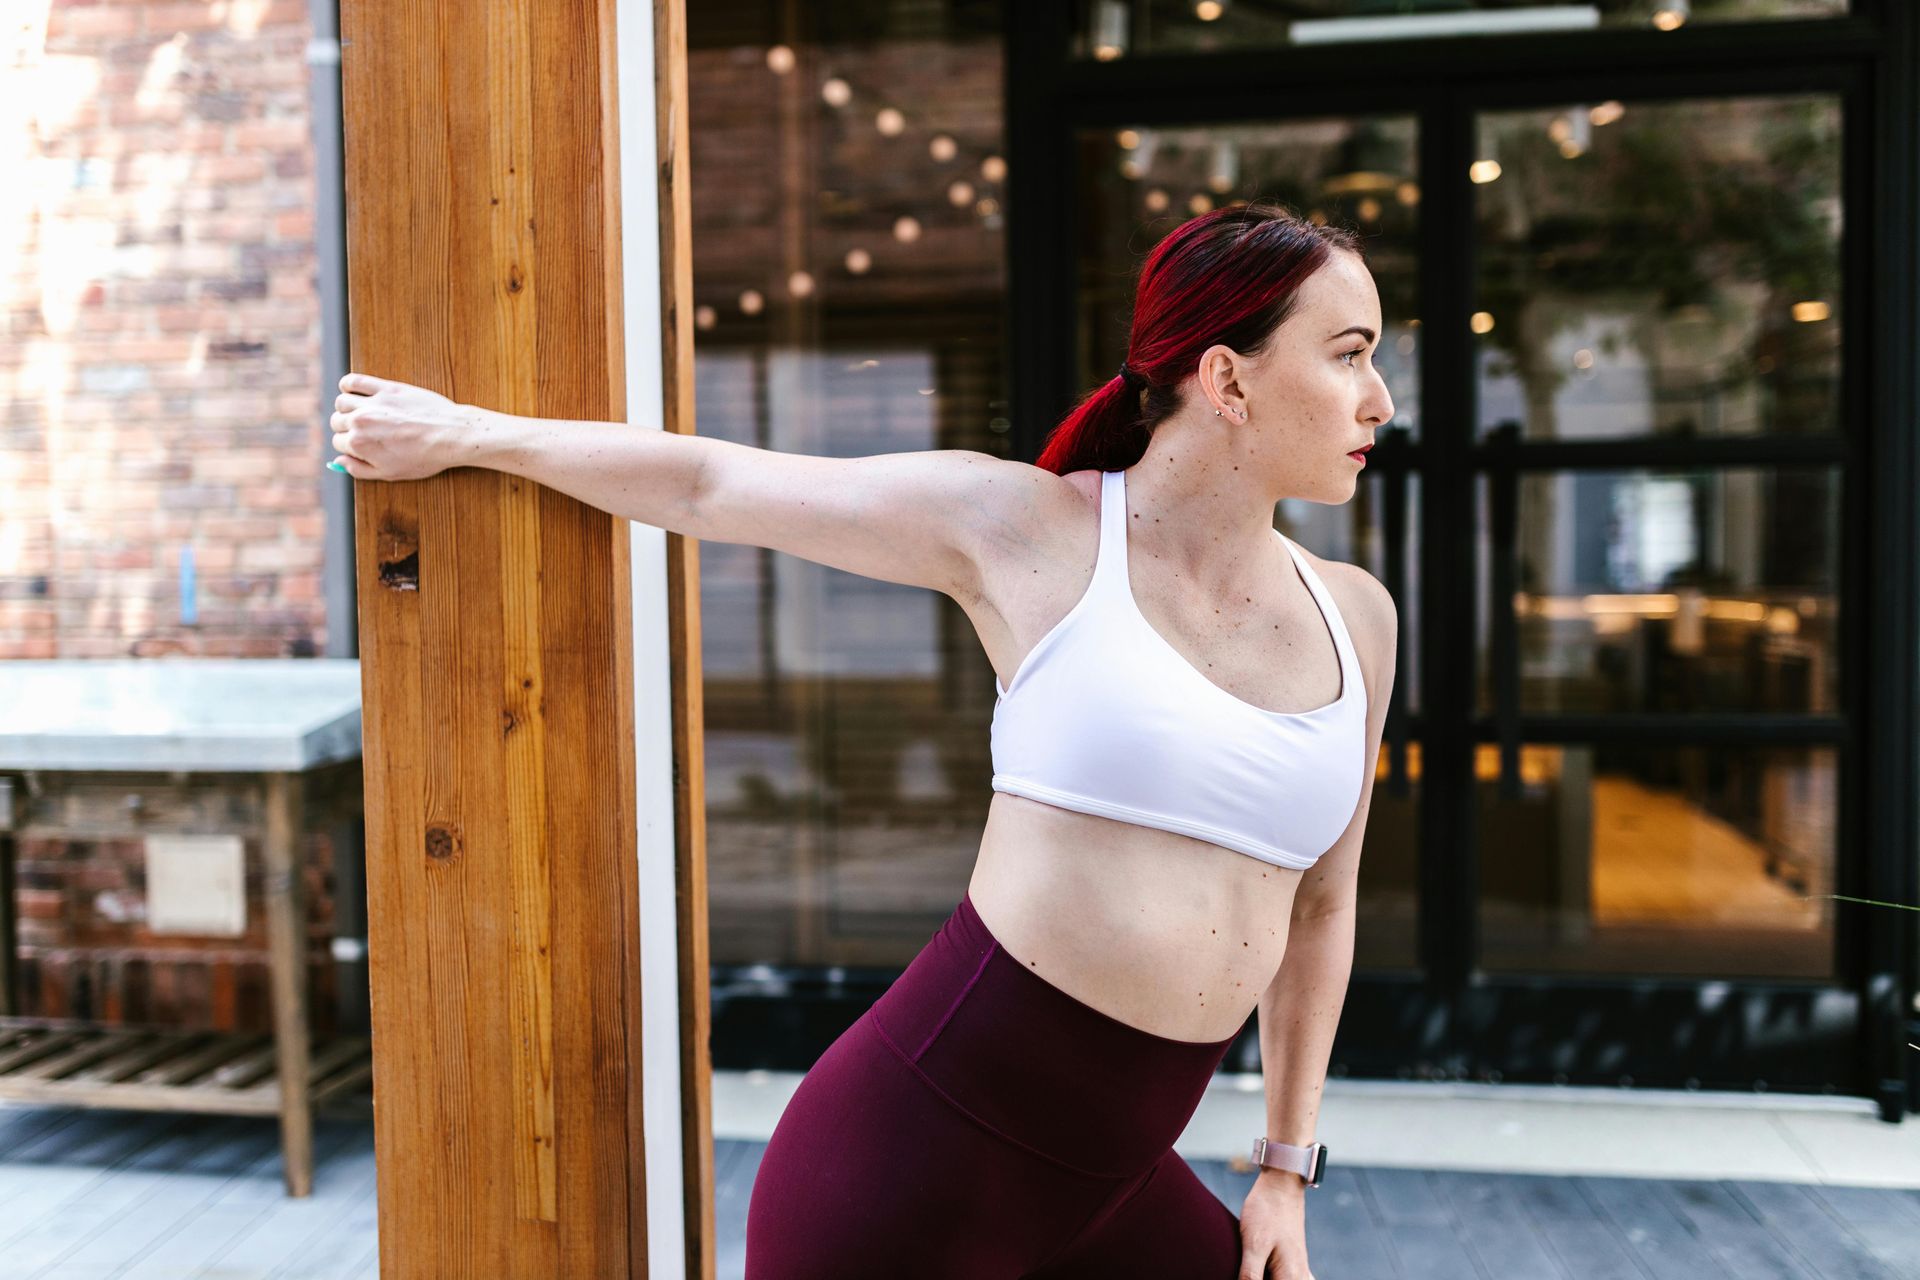
The anterior shoulder — the front of the shoulder capsule and the bicep tendon — is another area that accumulates tension in desk workers. Chronic forward shoulder posture places the anterior capsule in a chronically shortened position, and reaching forward to type keeps the shoulder internally rotated for hours at a time.
Stand beside a doorframe. Place one palm flat against the frame with the arm straight, at roughly shoulder height. With the arm fixed, rotate the entire body away from the arm — turning the torso so the shoulder being stretched is pulled gently behind the body. This creates a stretch through the front of the shoulder and into the pectoral minor, a small but often very tight muscle beneath the pectoralis major.
Hold for 20 to 30 seconds per side. The sensation should be in the front of the shoulder and upper chest, not in the elbow or wrist. If the arm position causes discomfort at the shoulder joint itself rather than in the muscle belly, lower the arm slightly before attempting the rotation.
A variation that adds a bicep stretch: externally rotate the arm before placing it on the frame, so the thumb points downward and the palm faces outward. This pre-rotates the humerus and adds tension to the bicep tendon as the body rotates away.
This stretch complements the doorway chest stretch described earlier, but it targets a different structure — the anterior capsule rather than the pectoral muscle belly — and is worth doing separately, particularly if the front of one shoulder consistently feels tighter or more restricted than the other.
Credit: cottonbro studio / Pexels
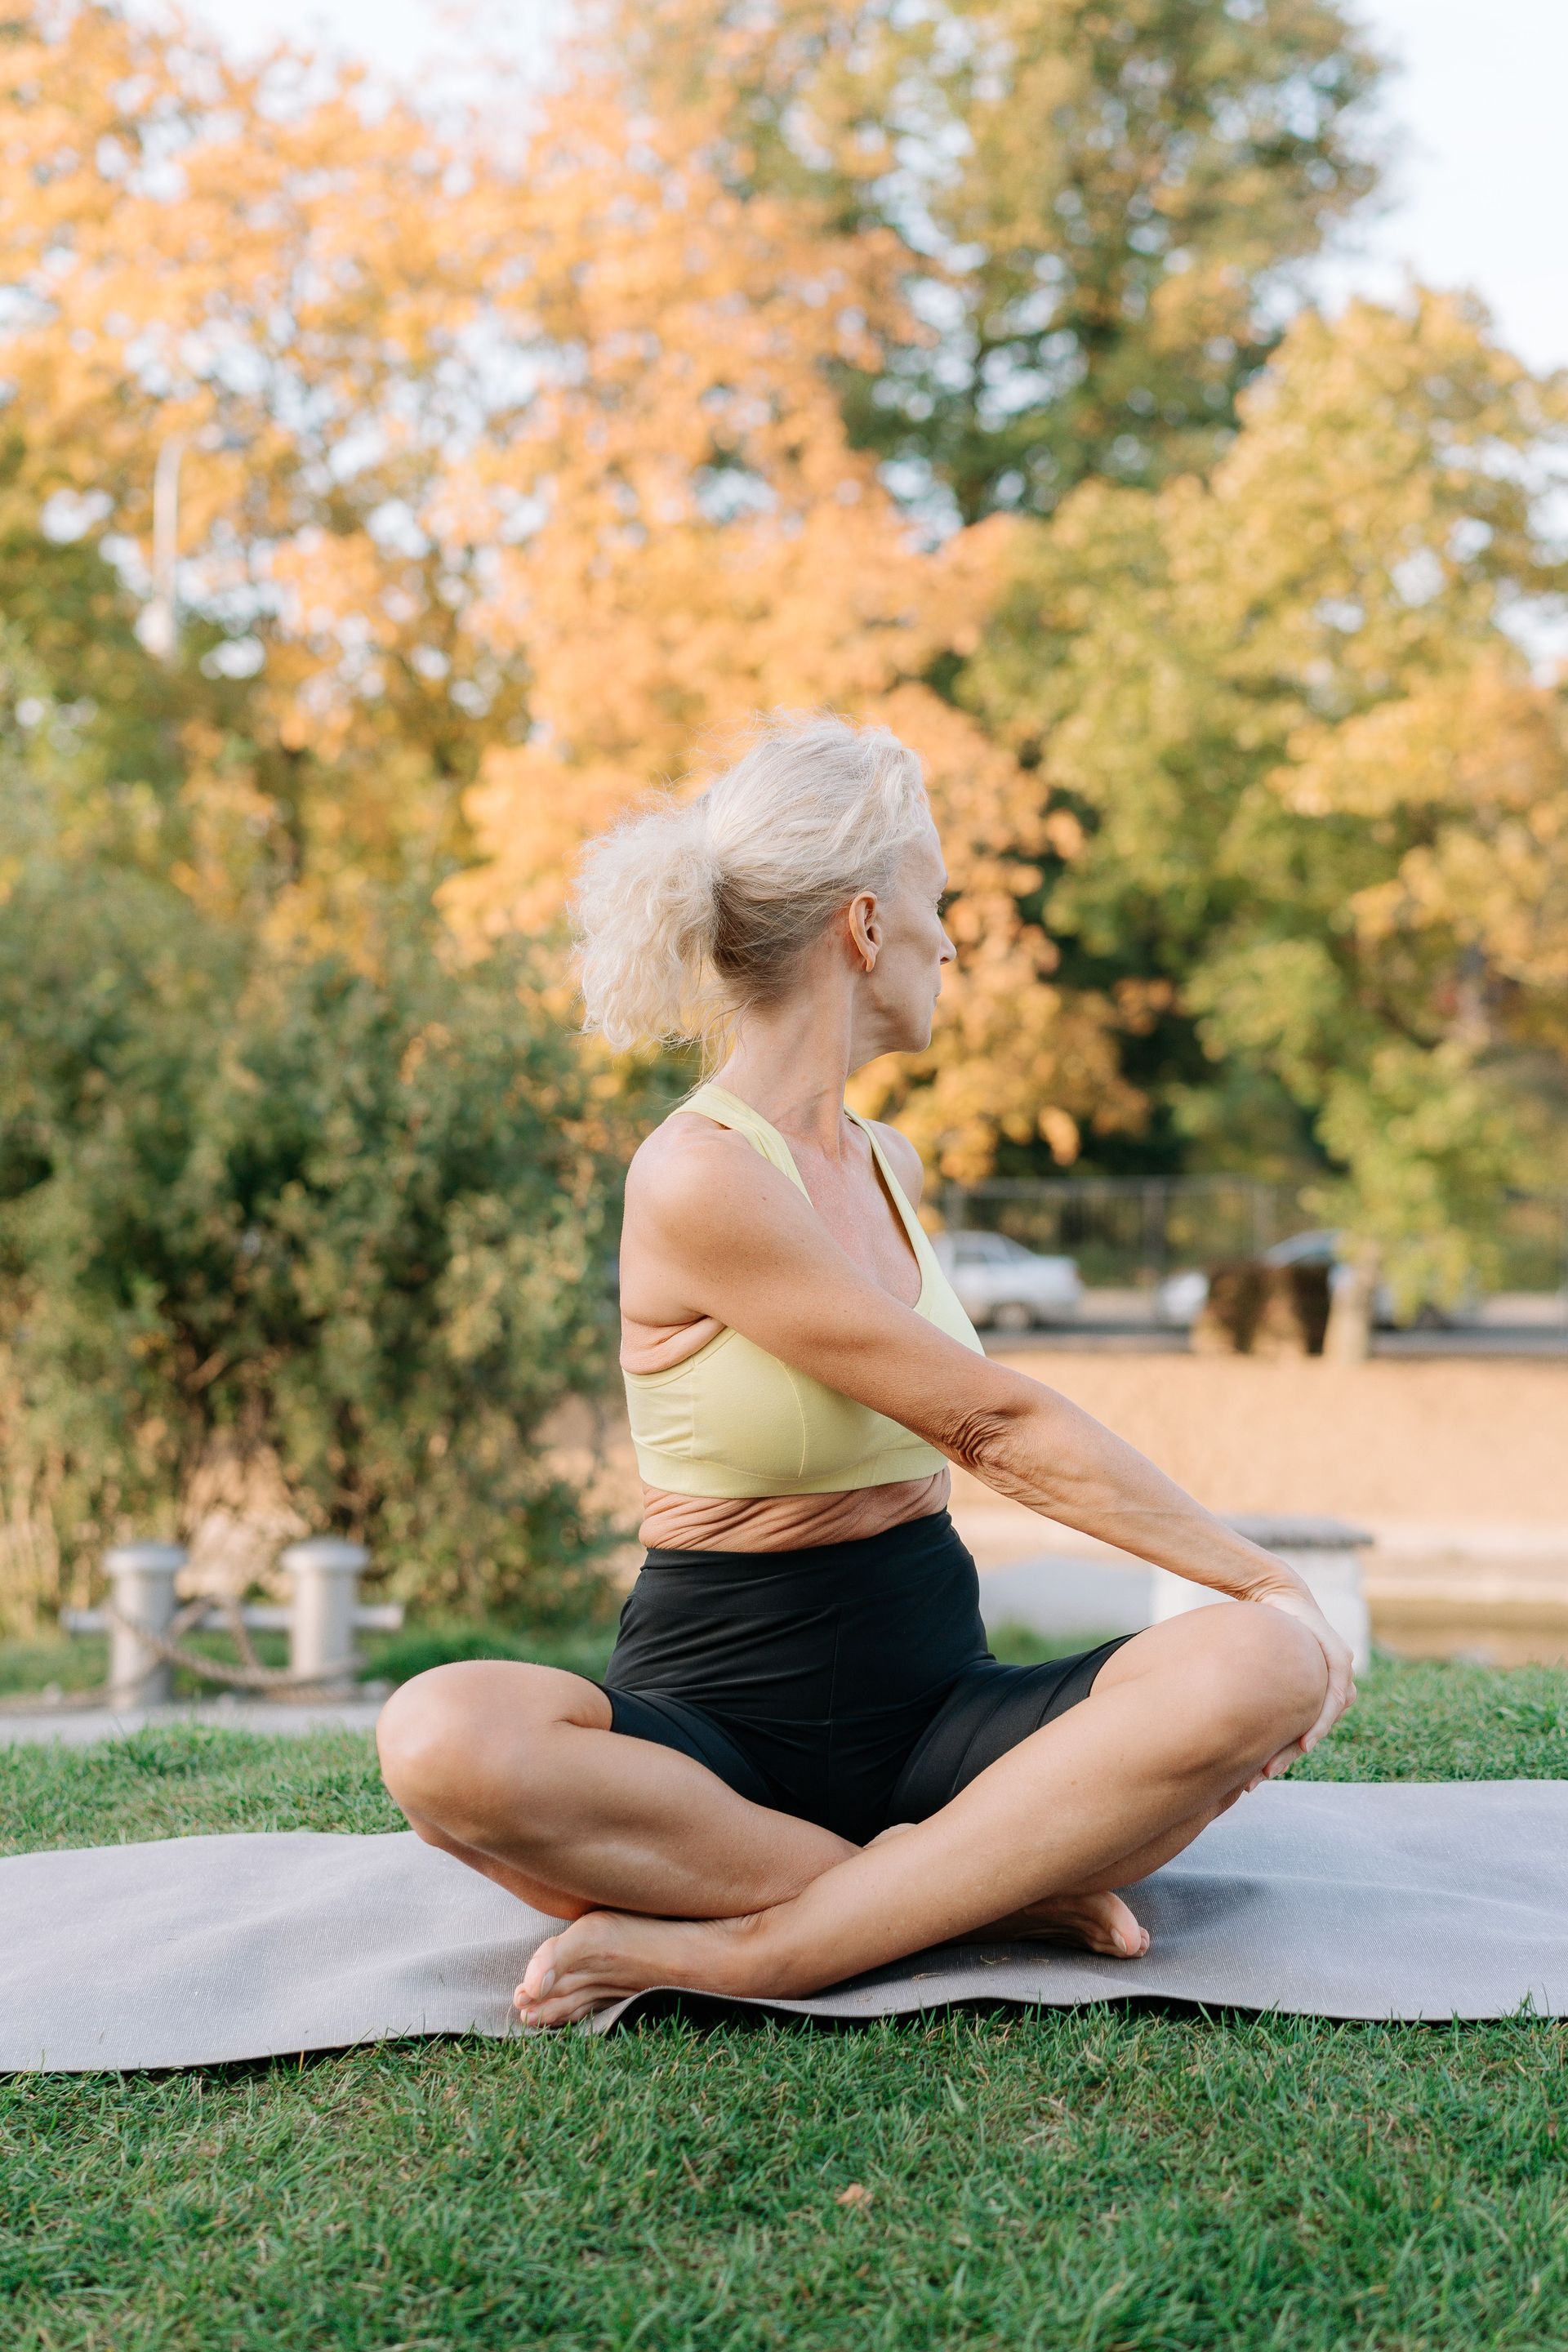
Seated spinal rotation targets the thoracic and lumbar spine simultaneously without requiring any floor space. It's one of the most practical stretches for use at a desk during the day, and its limited range of motion makes it safe for almost everyone.
Sit upright near the front edge of your chair with both feet flat on the floor. Cross the arms over the chest or allow them to rest comfortably. From the hips, rotate the entire torso to the right as far as it comfortably goes. Don't twist only the neck or only the shoulders — initiate the movement from the waist and let the thoracic spine and shoulders follow. Hold the end range for five to 10 seconds, breathing normally.
Return to center and rotate to the left. Perform five to eight repetitions each direction, moving slowly and breathing continuously. The end range of each rotation should feel like a comfortable stopping point, not a forced position.
For a deeper version, sit sideways on a chair so the back of the chair is to your right. Rotate the torso to the right until you can grasp the chair back with both hands, then use the handhold to gently increase the rotation. Hold for 20 to 30 seconds. This version allows a more sustained hold at a greater range of rotation, which is more effective for stiff thoracic spines.
Rotation is the movement pattern most lost in a predominantly sedentary lifestyle, because it requires standing, walking, and reaching across the body — none of which happens while seated. Restoring it through deliberate rotation stretches has a disproportionate impact on how freely and comfortably the body moves in daily life.
Credit: KoolShooters / Pexels
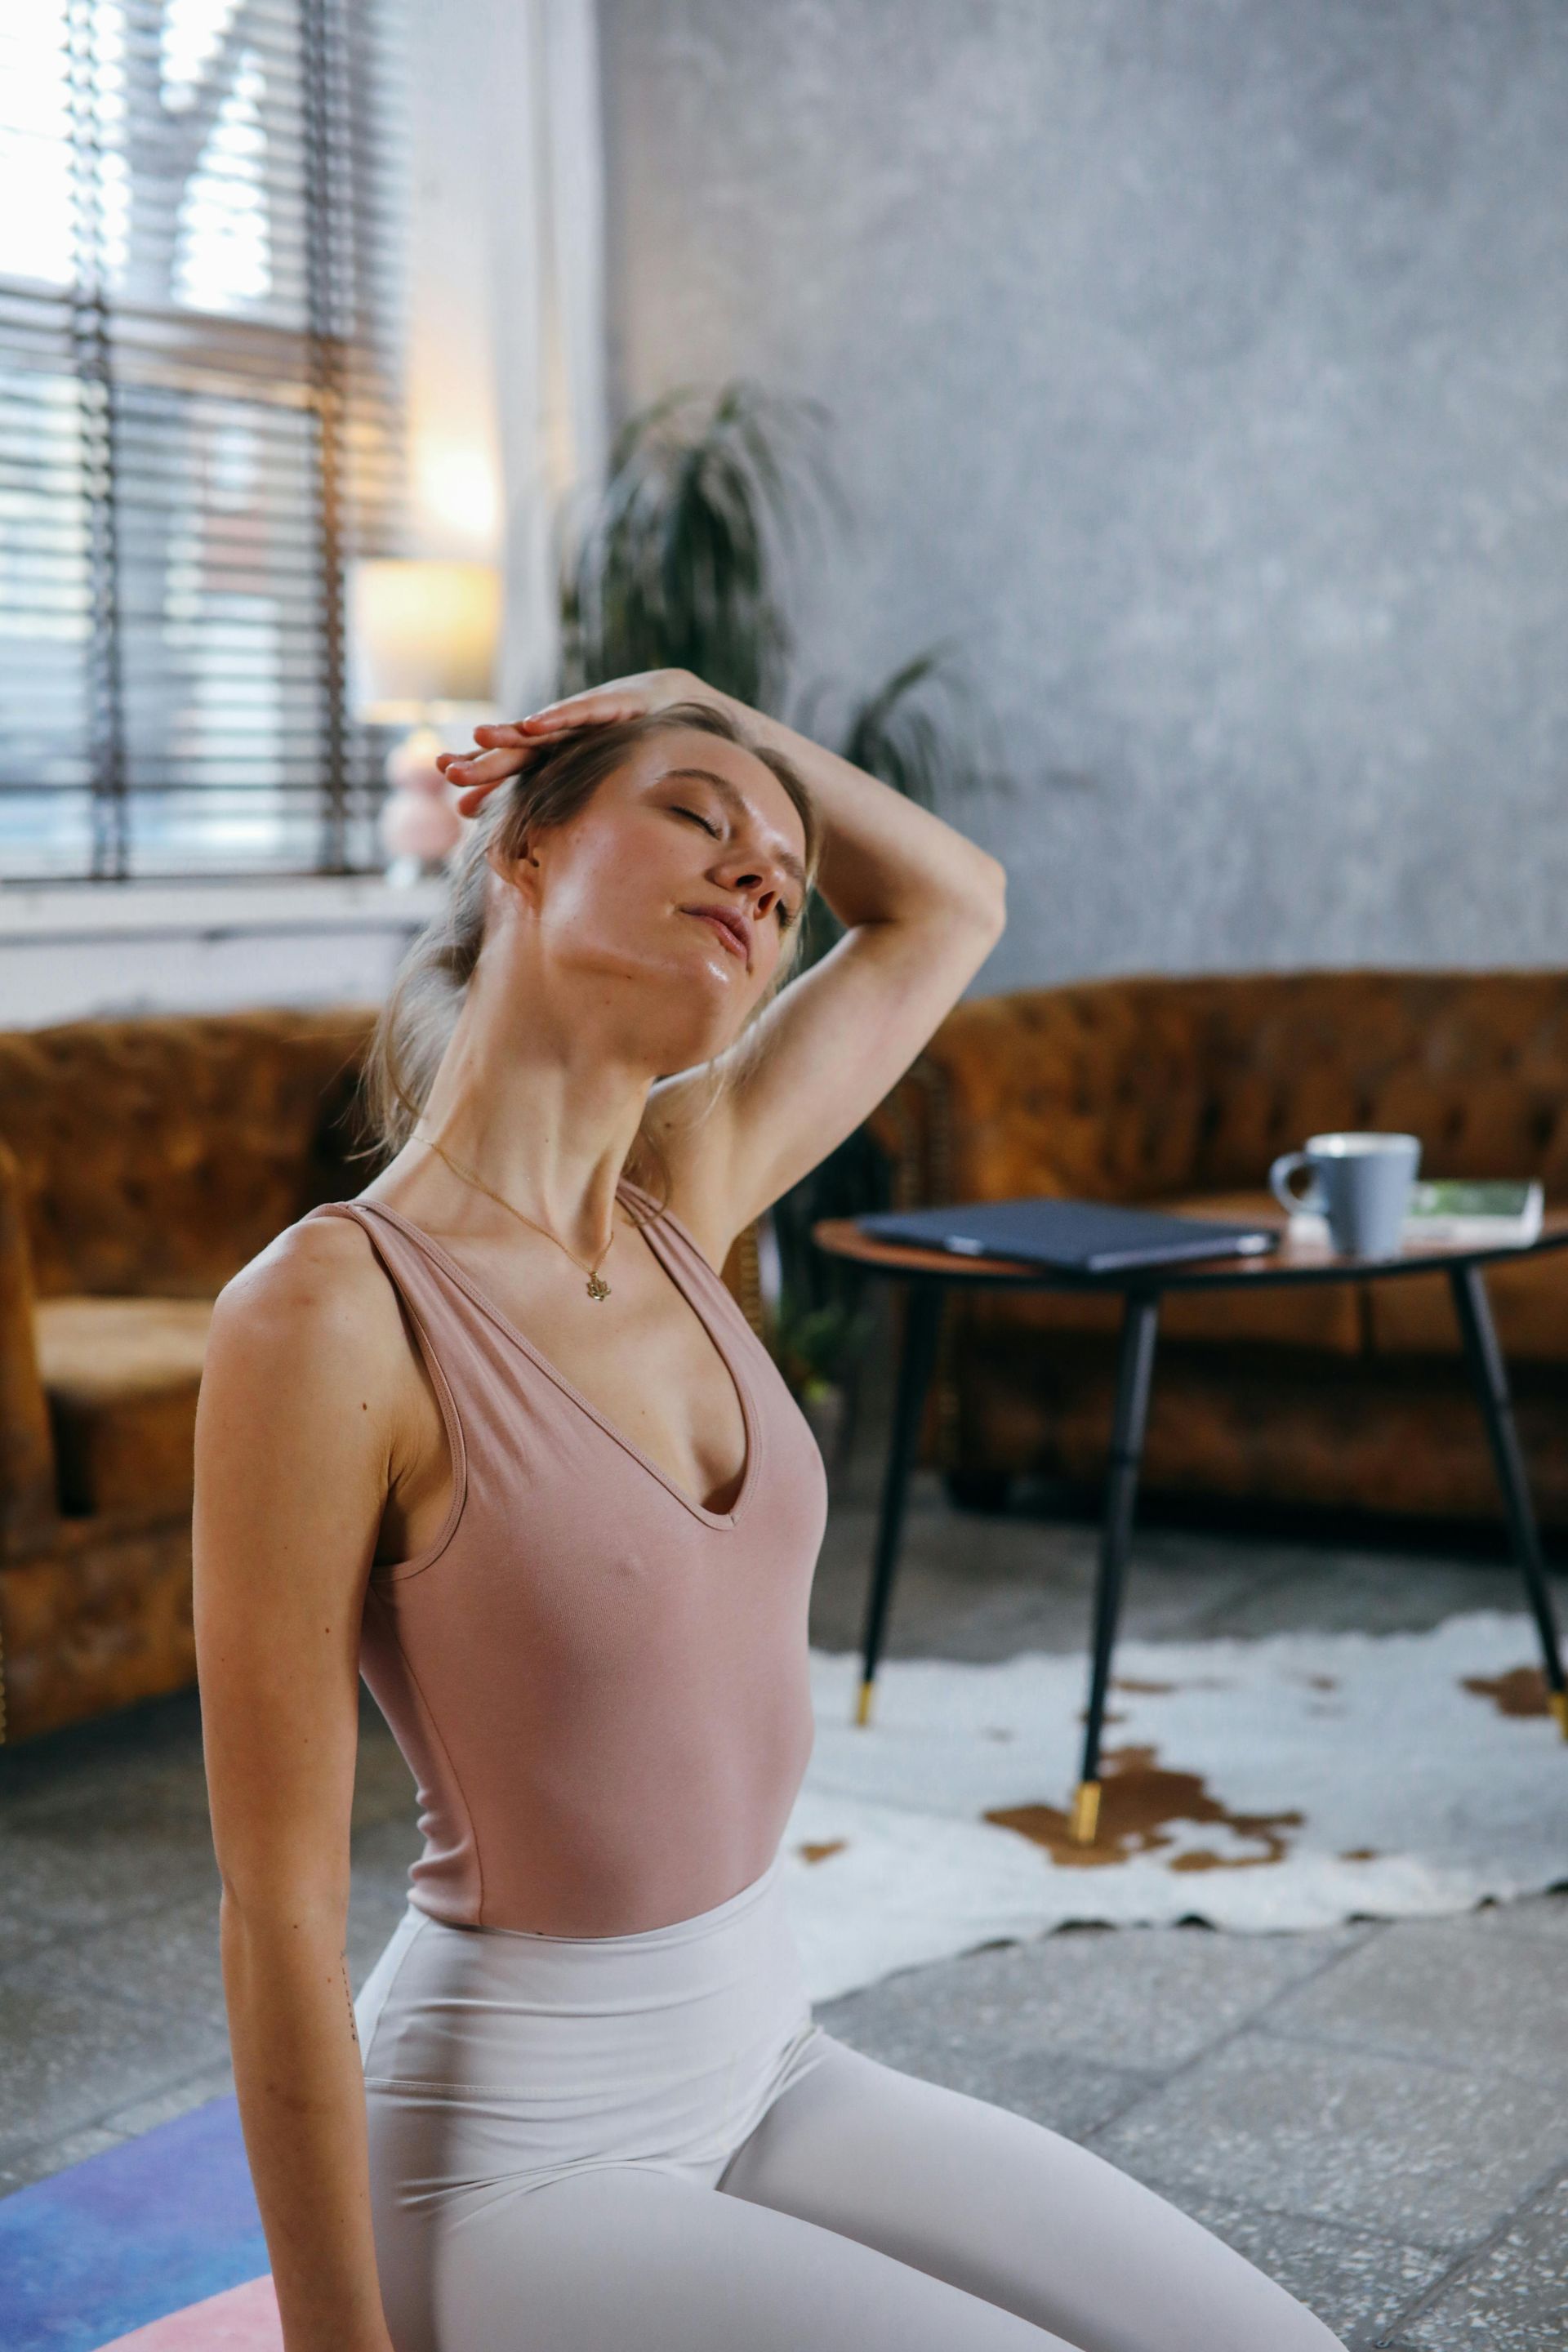
The neck half-circle is a gentle mobility movement — not quite a stretch in the traditional sense, but a deliberate, slow range-of-motion exercise that addresses the multiple muscle groups around the cervical spine simultaneously. It combines flexion, rotation, and lateral bending in a continuous, graduated movement that most targeted stretches don't replicate.
Sit upright. Drop the chin toward the chest. From that position, slowly roll the head to the right, allowing the right ear to move toward the right shoulder. Continue rotating until the face is pointing upward and slightly to the right. Then reverse — return through center and roll to the left. The movement traces a semicircle through the bottom half of the head's range of motion. Do not roll the head backward through a full circle — the cervical extension at the back of the circle compresses the cervical facet joints in a way that is potentially uncomfortable.
Move slowly — three to five seconds per half-circle. Repeat three to five times in each direction. If any position in the movement creates pinching, clicking, or significant discomfort rather than the normal sensation of gentle stretching, stop at that point rather than continuing through it.
The value of this movement over static holds is that it introduces the neck to its full available range across multiple planes sequentially. This activates and gently lengthens the deep cervical rotators, the suboccipital muscles at the base of the skull, and the scalenes — a more comprehensive result than any single static stretch provides.
Credit: Pavel Danilyuk / Pexels
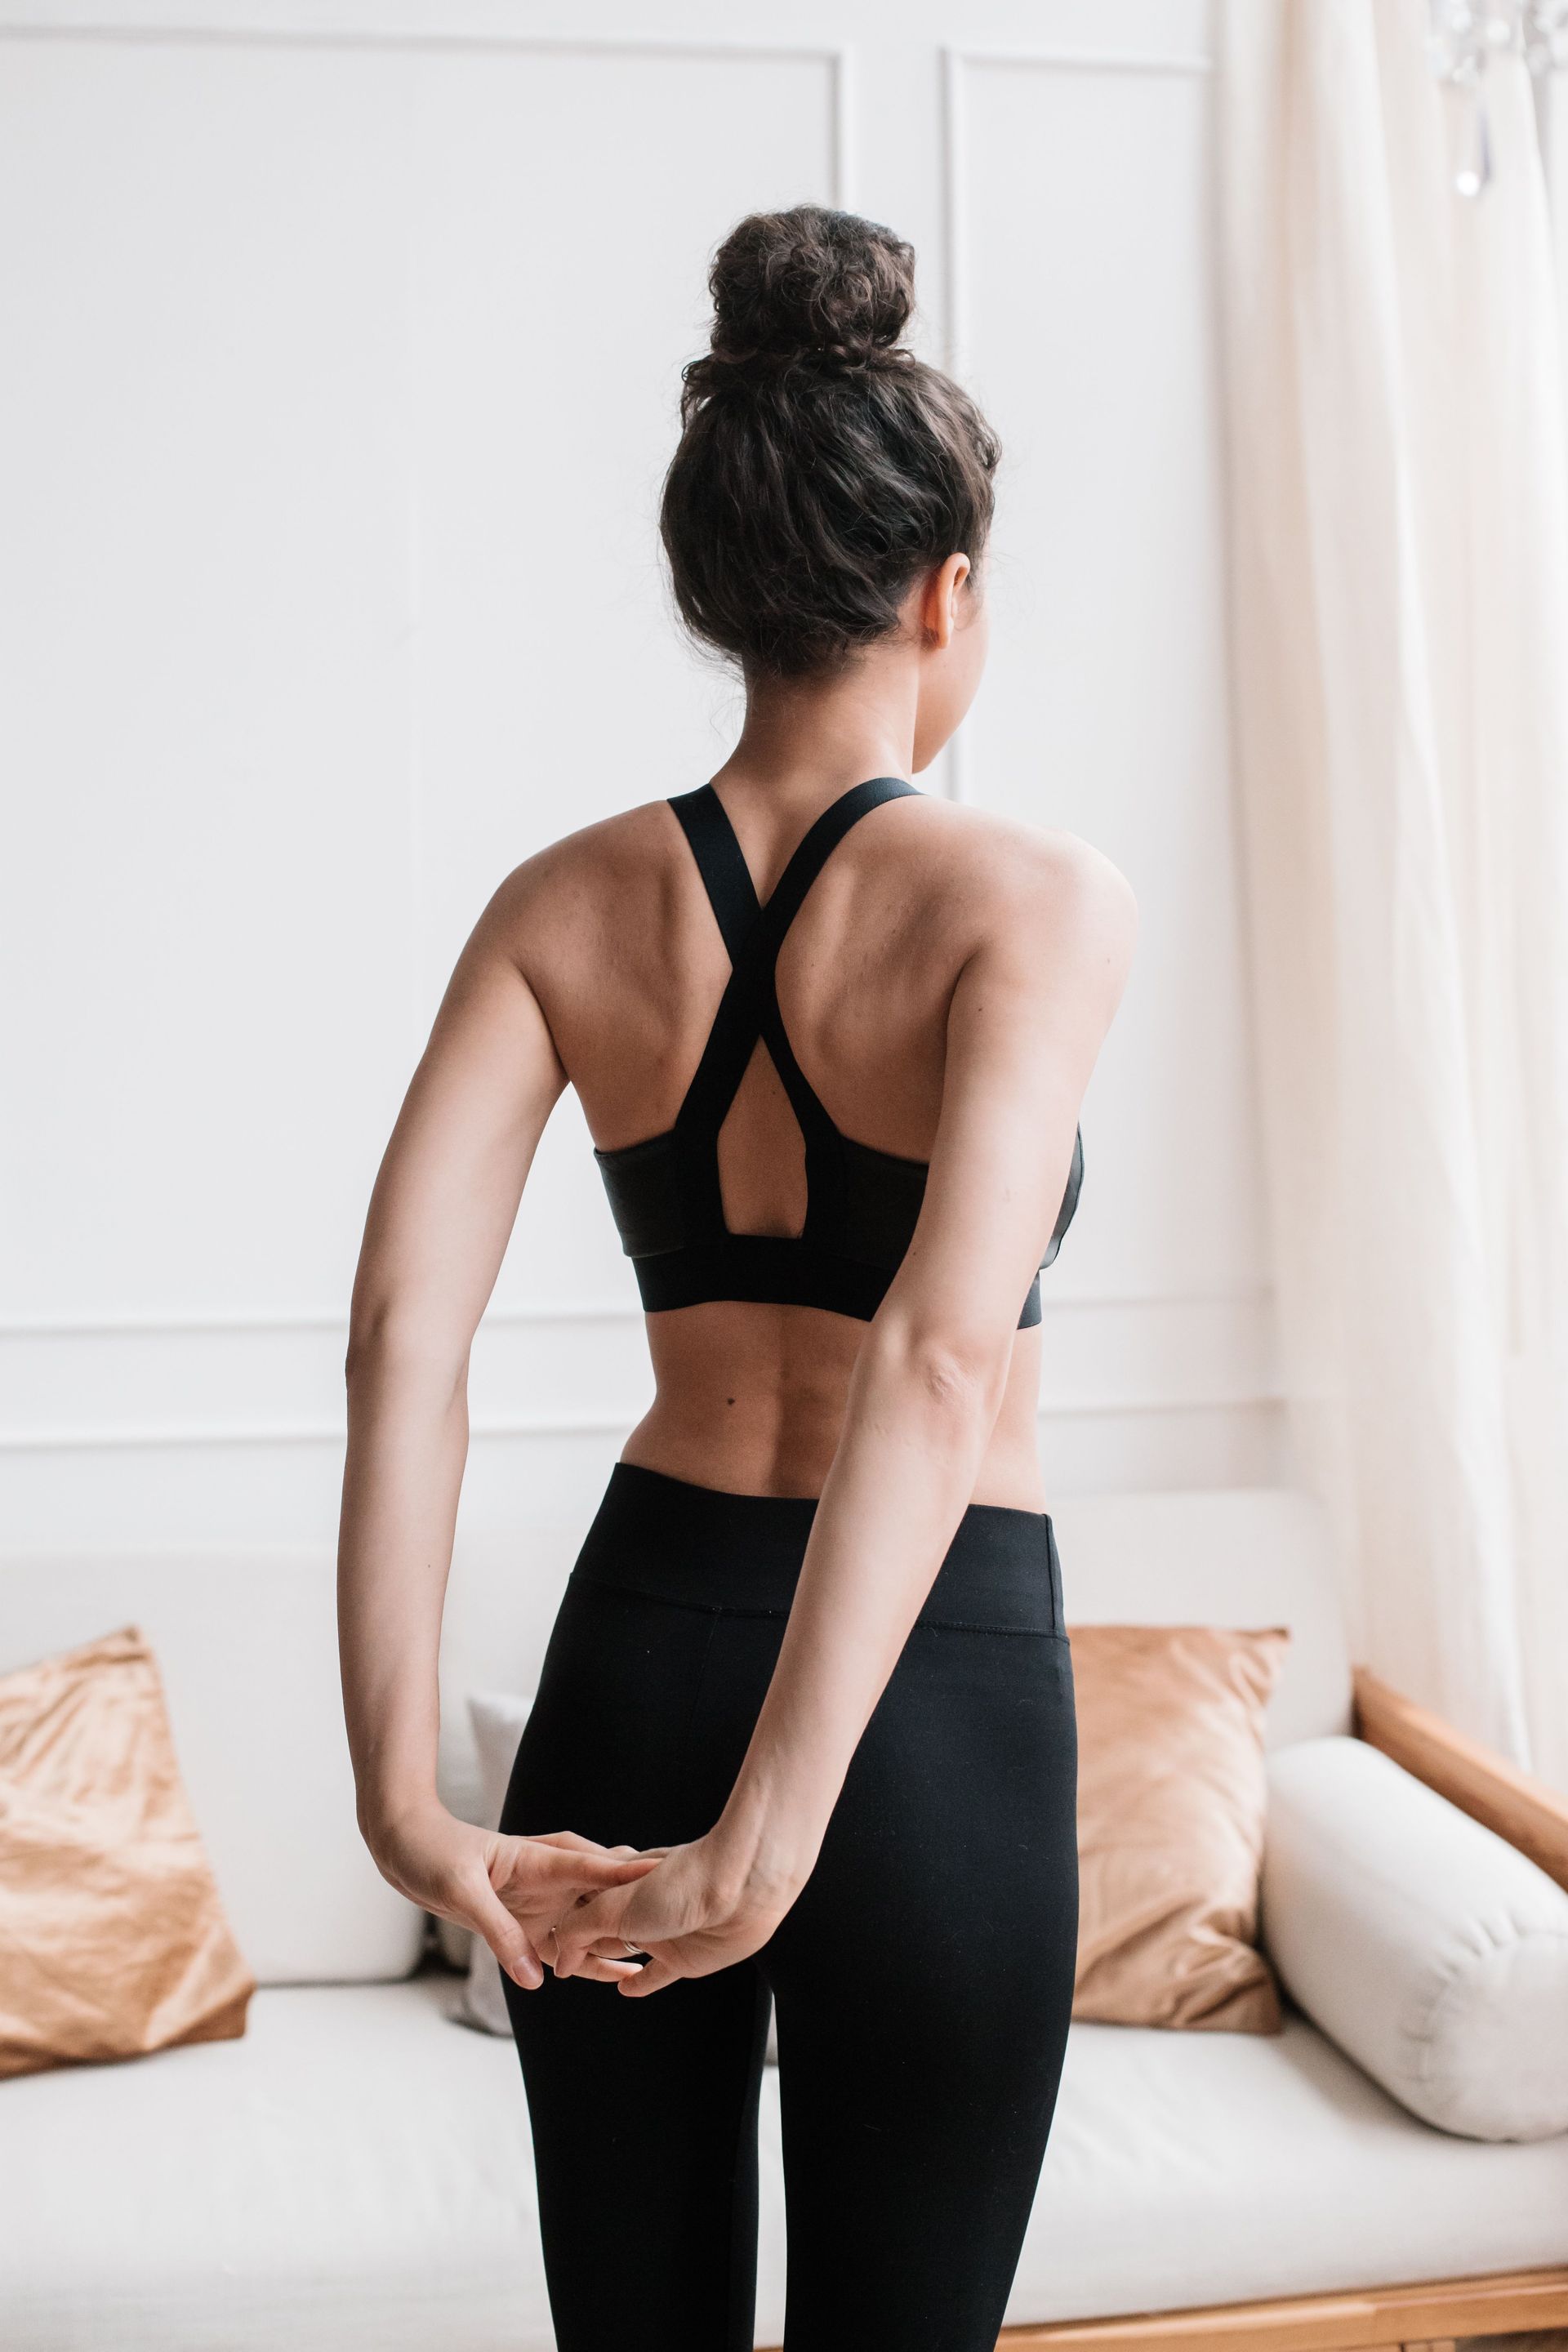
The pectoralis minor is a small, triangular muscle beneath the larger pec major. It runs from the third, fourth, and fifth ribs to the coracoid process — a bony protrusion at the front of the shoulder blade. When it tightens, it pulls the shoulder blade forward and downward, contributing to the rounded-shoulder posture that is nearly ubiquitous in desk workers. Releasing it can produce an almost immediate postural change.
Stand in a corner of a room with both forearms resting on the adjacent walls, elbows at or slightly below shoulder height. Step one foot forward and lean the body gently into the corner. Unlike the doorway chest stretch, this position allows the arms to be stabilized at a wider angle, which places more specific load on the pec minor. The key is keeping the elbows slightly lower than shoulder height — at shoulder height or above, the stretch shifts more to the pec major and anterior deltoid.
Hold for 30 to 45 seconds. The sensation should be beneath the pec major — a deeper, more specific tension than the broad chest stretch. It may be harder to feel than the pec major stretch at first, because the muscle is deeper and more obscured. With practice, the sensation becomes clearer as awareness of this region develops.
Releasing the pec minor is one of the most effective interventions for rounded-shoulder posture because the muscle's attachment to the coracoid process means it directly controls scapular position. Stronger stretching modalities like massage and myofascial release can also be useful for this muscle, but the corner stretch is the most accessible daily version.
Credit: Anil Sharma / Pexels
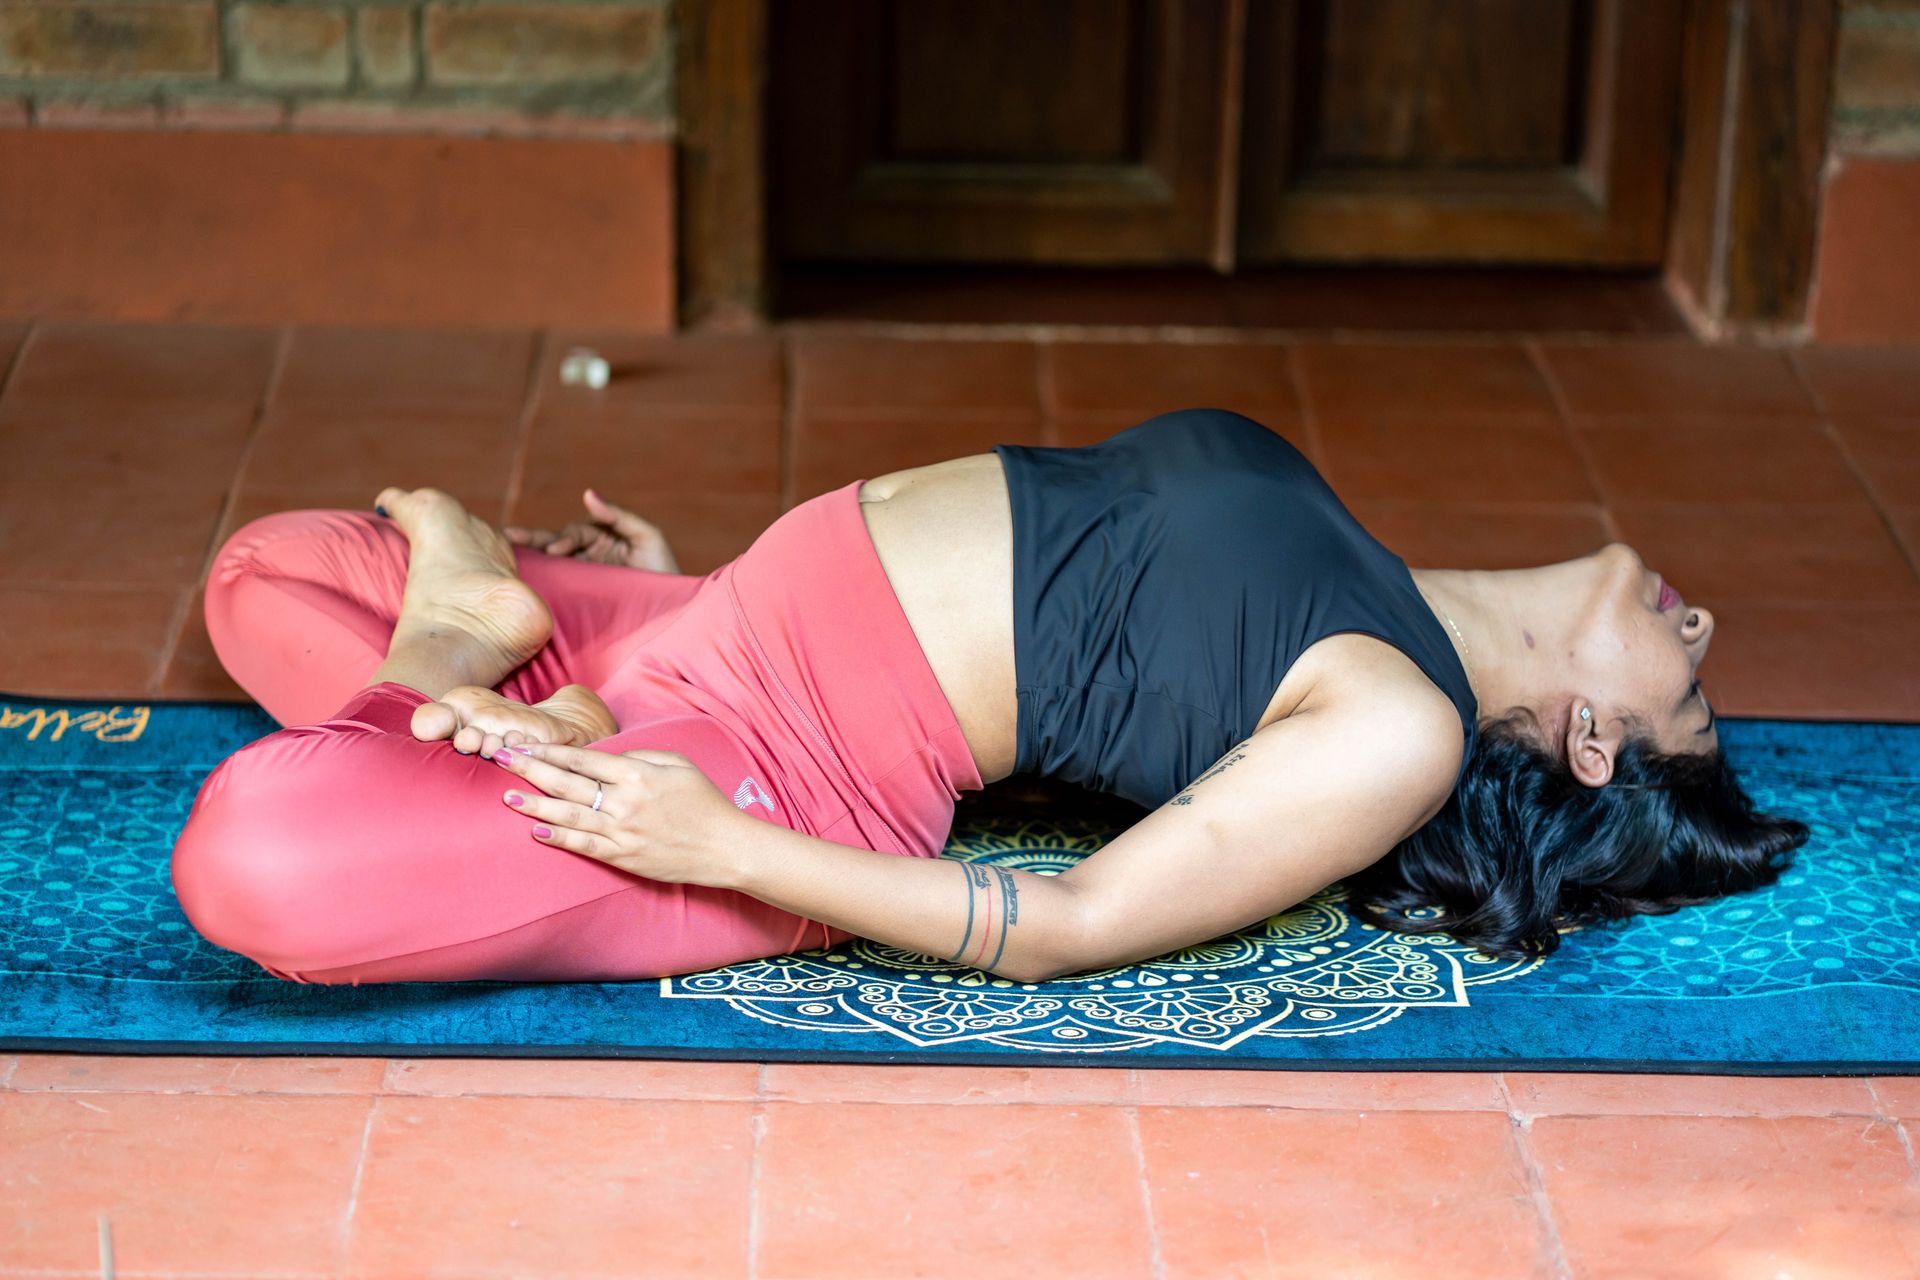
The inner thigh muscles — the adductors — are not typically thought of as desk-work casualties, but they respond to prolonged hip flexion and the postural changes it creates. Many desk workers sit with legs together and feet turned slightly inward, a position that chronically shortens the adductors. In combination with weak hip abductors, this can produce a pattern of knee tracking issues and pelvic instability that becomes apparent when the person exercises or walks for extended distances.
Lie on your back with both knees bent and the soles of the feet together, allowing the knees to drop outward toward the floor. Place the hands on the inner thighs, lightly — not pushing down, just resting. Relax completely and allow gravity to open the hips. Hold for 60 to 90 seconds.
The sensation should be in the inner thighs, from mid-thigh up toward the groin. It should be a dull pulling sensation rather than a sharp one. If the knees hover well above the floor, place folded blankets beneath each knee to support the legs at their current range rather than forcing them down.
For a dynamic variation, slowly lift the knees back toward center and lower them outward again, using the inner thighs to control the descent. Five to eight repetitions of this controlled movement before settling into the static hold adds a strengthening component that helps stabilize the hip in its newly acquired range.
This stretch is underutilized in most desk-worker mobility routines. Addressing the adductors alongside the hip flexors and glutes creates a more complete hip mobility restoration — one that affects posture, walking mechanics, and lower back comfort more than stretching any single muscle group alone.
Credit: olga Volkovitskaia / Pexels
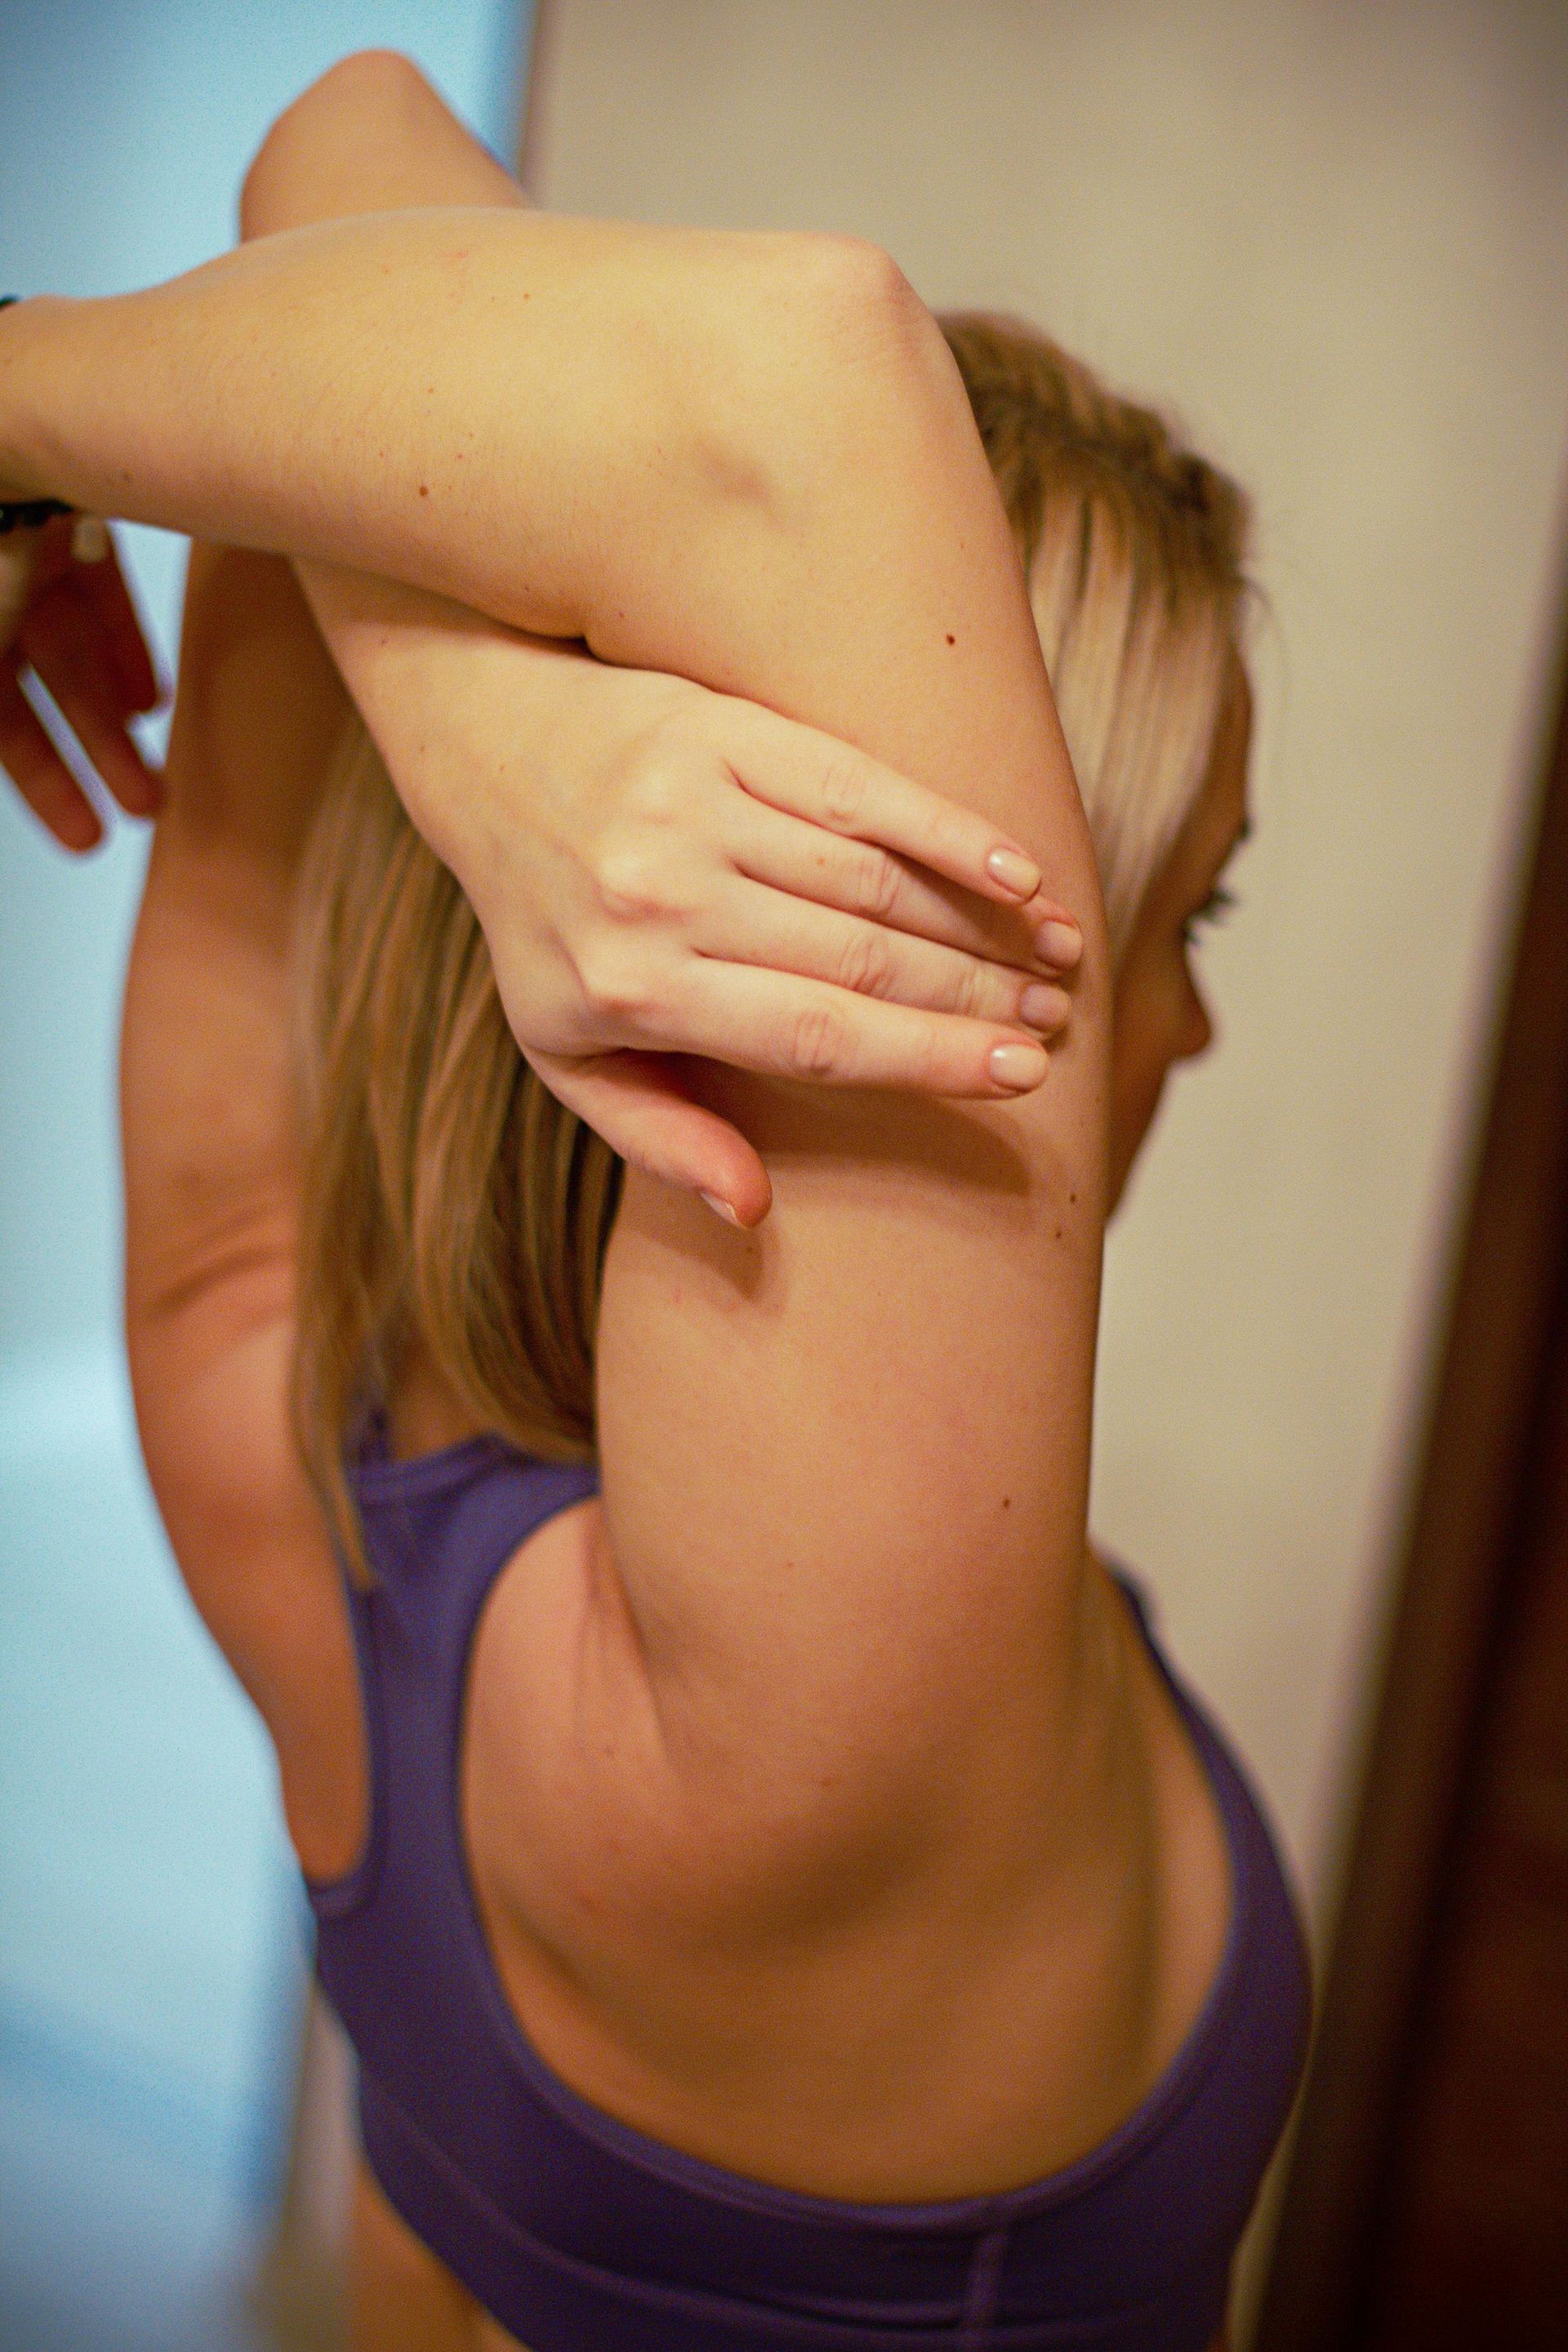
This final stretch combines what is technically a neck side bend with active shoulder depression — a combination that creates a longer and more specific stretch along the levator scapulae, a muscle that connects the upper cervical vertebrae to the top corner of the shoulder blade. In desk workers, the levator scapulae is one of the most commonly overloaded muscles in the body. It elevates the scapula and side-bends the neck, and it works almost continuously when the shoulders are raised or when the neck is held in a lateral tilt — both of which happen constantly at a desk.
Sit upright with good posture. Reach the right arm down and slightly behind the body, pressing the palm toward the floor as if trying to lengthen the arm. This depresses the right scapula. Maintain that depression while tilting the head toward the left, and then adding a slight 30-degree rotation toward the left armpit — the combined direction that most specifically stretches the levator scapulae.
Hold for 30 to 45 seconds. The sensation should run from the base of the skull down through the back of the neck and into the upper, inner shoulder blade region. This is the specific location of the levator scapulae — if that's where you feel it, the stretch is accurate.
Repeat on the other side. Many people find one side far tighter than the other, reflecting the habitual head position they adopt at a screen. If the left side is consistently tighter, it often indicates that the head has a tendency to drift or tilt slightly left when reading.
Ending a stretching session with this stretch is a sensible choice. The levator scapulae accumulates tension over the course of any workday and is a common source of the end-of-day neck-and-shoulder ache that most desk workers know well. Releasing it deliberately brings a meaningful degree of relief — and over time, consistent attention to this muscle reduces the severity of that pattern substantially.
