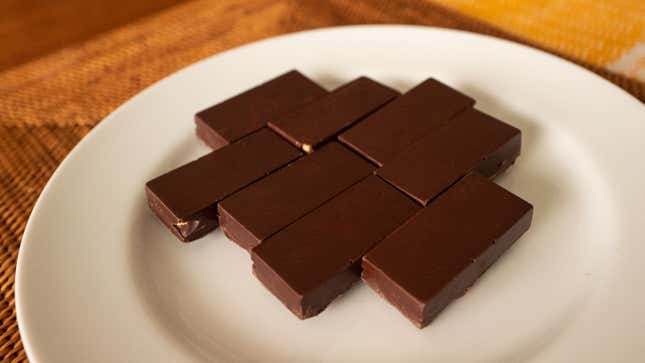
When it comes to candy corn, Halloween conjures a mixed bag. It’s the holiday’s most divisive candy.
According to the National Confectioners Association, the US makes 35 million pounds of the treat, annually, generating $36 million in sales. Candy overall is a $35 billion industry in the US, projected to near $40 billion by 2023. In the US, candy corn is the most favored Halloween treat after chocolate. It’s here to stay. Whether it sickens you, or you eat so much it sickens you, here’s what you can do with your leftovers.
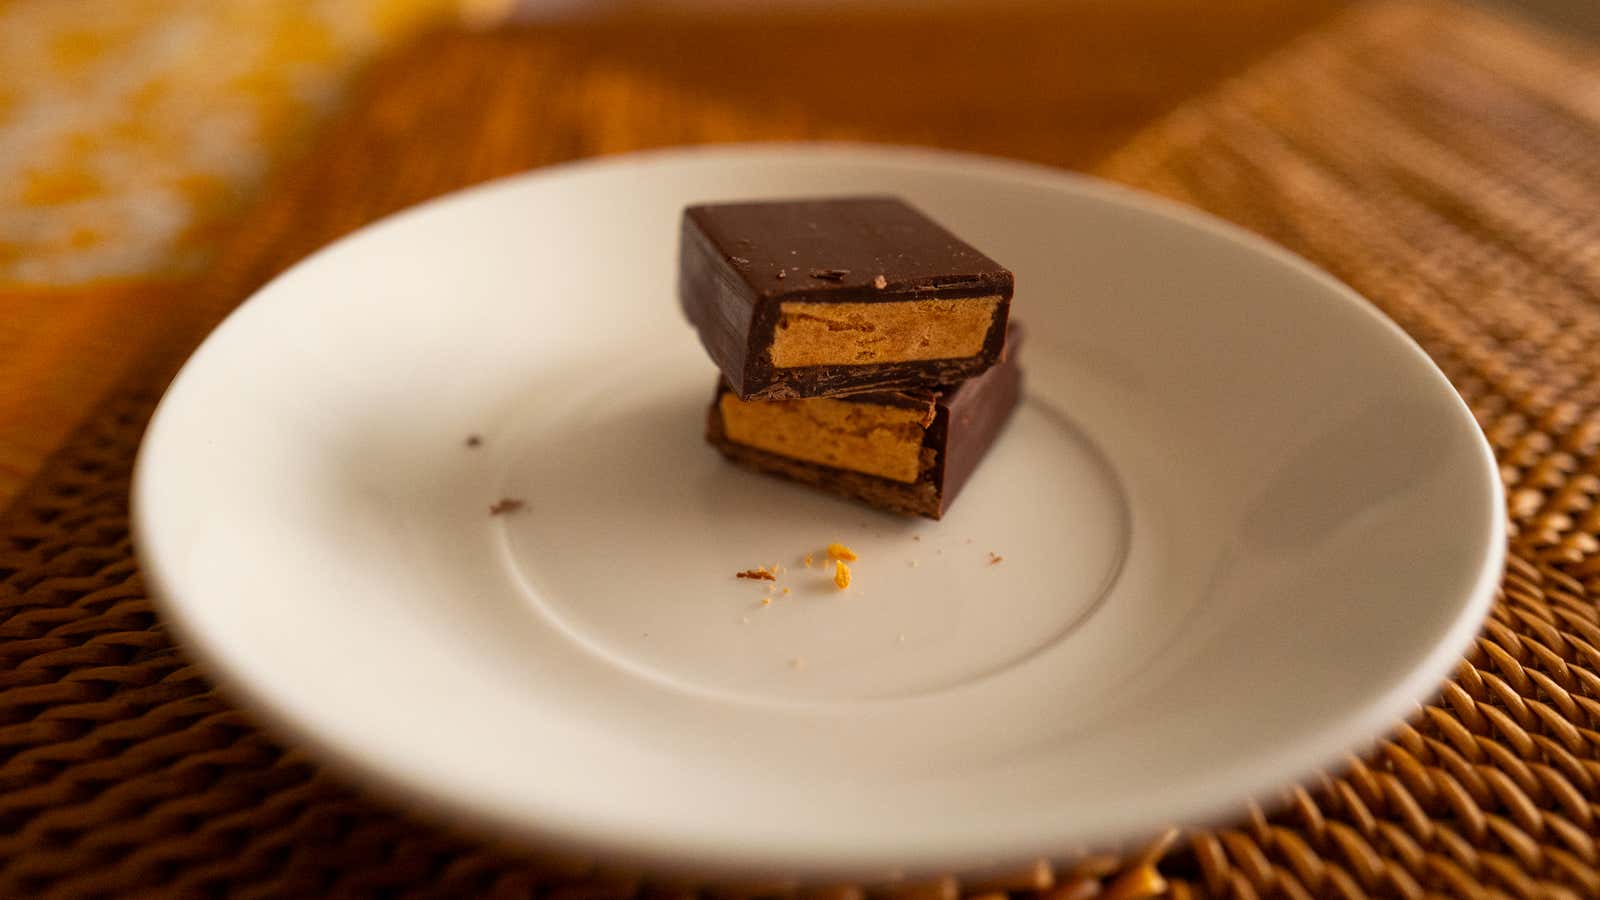
Like an alchemist turning lead into gold, we’re going to melt your candy corn and turn them into another treat: Butterfingers. As a candy-corn fan, I’ve made a tradition of making these candy bars since I learned about the trick online, a decade ago. That said, proceed with caution. The recipe is a challenge. If you spook easily, just try to enjoy the candy corn raw.
Why candy corn?
There’s a lot of sugar in candy corn, but there’s also gelatin, honey, and—most importantly—food coloring. Starting with candy corn is easier than measuring. When we melt the candy corn down, we’ll have the right ingredients without having to nail down precise confectionary ratios.
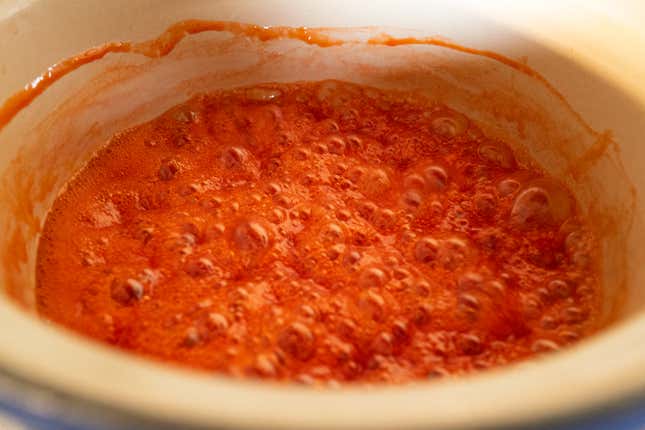
You’ll see that once the kernels turn syrupy and are bubbling in a pan, the colors blend to a bright orange. It’s a good approximation of a Butterfinger’s radiant center.
The gelatin and sugar help provide the proper texture. On its own, cooking sugar can create anything from taffy to hard candy depending on the temperature. The firmness of gelatin, the key ingredient in Jell-o, depends on its water content and sugar content. When combined, these two ingredients inhibit the typical properties of the other, causing the final product to crumble instead of stretching or congealing.
Butterfinger’s hallmark crunch comes from its sweet, flaky, peanut-buttery layers. Gelatin and corn syrup alone doesn’t make the taste. For that, we’ll need peanut butter, some corn flakes, and high-quality chocolate.
Making our Butterfingers
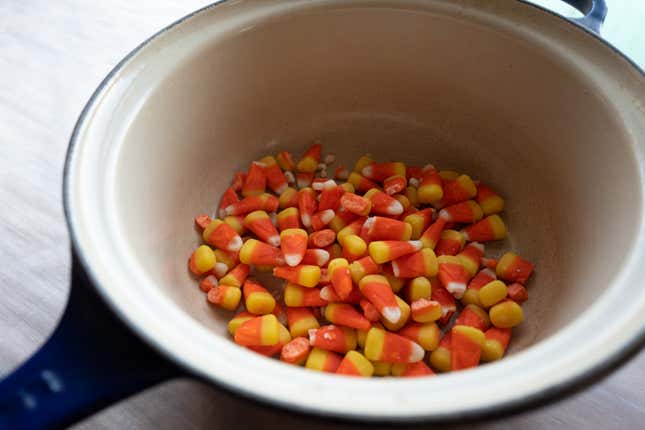
1. Melt the candy corn
This gets sticky. In a pot or, preferably, enameled sauce pan, melt candy corn with water with medium heat. Frequently stir as the candy corn melts, and keep stirring once it starts boiling. We want to heat the sugar as high as we can without it burning. When smaller bubbles have turned to large bubbles, you’re at the right temperature. If you have a food-safe thermometer, 240°F (115°C) will do.
2. Combine with peanut butter and roll out
Remove the sauce pan from heat. Warning: you are about to pour boiling-hot sugar. Wear oven safe gloves and an apron before you do this slowly and carefully. Pour the contents of the sauce pan into a mixing bowl. Using a rubber spatula, combine with the peanut butter. Stir it until the mixture is homogenous.
From here, the mixture is still going to be hot, so—carefully—pour it out onto a baking sheet lined with parchment paper. Using a rolling pin, roll out the filling until it’s flat and even.
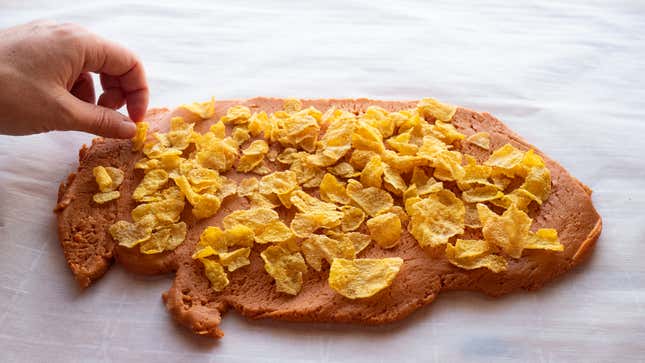
3. Add corn flakes for crunch
Now we’re going to layer corn flakes inside of this filling. Sprinkle your corn flakes out in an even layer on top of your mix. With a spatula, gently fold the filling onto itself four to five times. Take your time and care here: The corn flakes encourage the mixture to rip and tear, and we want neither of that. We want nicely laminated layers of corn flakes to ensure a crunchy filling.
4. Roll out and size
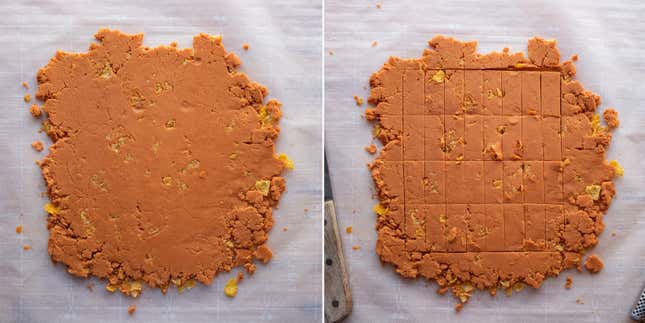
Form a neat square as you build up your filling. With your rolling pin, roll out the mix until it’s your desired thickness. For my mold, I made the filling a quarter of an inch thick.
Ideally you’re setting your bars in silicon molds. Depending on their size, measure out the length and width your filling will need to be to fit neatly within your mold’s cavities. Using a long kitchen knife, score—but do not cut through—the mix to your desired dimensions. If you’re not using a silicon mold, try 3/4 in x 2 in (2 cm x 5 cm) for “fun-sized” bars. There will likely be excess. I save the leftover bits for snacking.
After about five to 10 minutes, once the filling has cooled completely, cut through your marks. This will help keep your bar filling solid, and lowers the risk of them breaking.
5. Temper the chocolate
Tempering chocolate is hard and can be frustrating work. However, taking the time to do so will promote a snappiness to your bar. Untempered chocolate is not only dull in appearance, but also more likely to melt in your hands. But if you want to just melt chocolate and be done with it (or you don’t have a thermometer), so be it.
Depending on whether your chocolate is in wafer, chip, or block form, you’ll need it in small chunks. Roughly chop your chocolate, reserving a tablespoon for later. Breaking up the chocolate into small pieces helps the melting process.
In a double boiler, melt your chocolate and bring it to 131°F (55°C). Make sure you don’t get any water into your melting chocolate. Remove it from the heat and gently stir until it reaches 82°F (28°C). Plop in the chocolate you reserved earlier to help promote the formation of a crystal-like structure. Once you’ve fully incorporated the unmelted bits, put the chocolate back on the heat and bring it to a temperature of 88°F (31°C).
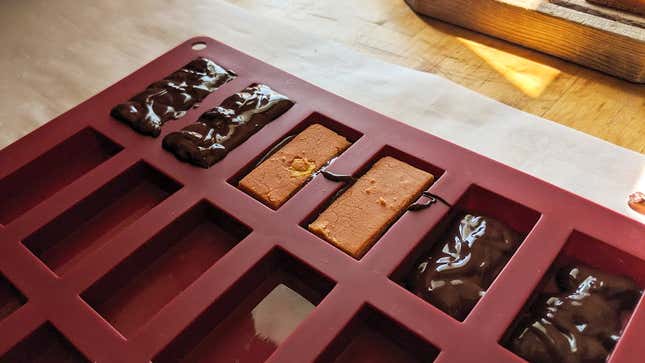
If you’re using a mold
Pour enough chocolate to cover the bottom of each section of the mold. Before the chocolate cools, place a piece of filling in each section. Gently wiggling the filling helps the chocolate reach all corners of the mold. Once they’re set in place, pour more chocolate over top. For a flat bottom to your bars, level out chocolate with an offset spatula.
If you’re not using a mold
Spread out your cut fillings onto a dry and clean countertop lined with parchment paper. Make sure that there’s about two inches between each piece. We don’t want one jumbo-sized Butterfinger. First, coat the bottoms by making a dab of chocolate on the parchment and placing your Butterfinger filling on top. Gently wiggle the piece back and forth until the chocolate’s evenly spread beneath. Don’t lift it up to inspect–you want to give the chocolate time to set. Now, slowly, drizzle the chocolate over the center of filling, moving lengthways from one end to the other. A little goes a long way. You’ll find that gravity will pull the melted chocolate over the edges, draping the filling cleanly.
Let your candy bars cool out of direct sunlight in a cool room. (I failed to do this, and the cocoa butter in my chocolate bloomed.) Cooling in a fridge will cut time if you’re in a rush. But it can introduce moisture that can cause your chocolate to bloom.
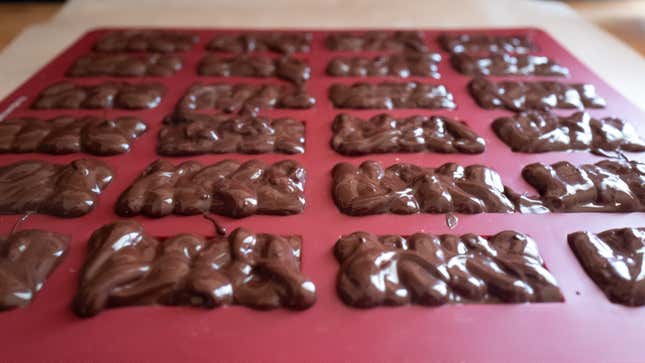
Once they’ve cooled, you can pop them out of their molds. If you didn’t use a mold, then trim your covered pieces with a long, dull kitchen knife and use a spatula to peel them away from the parchment paper.
Plate and set out for your family and friends, or mail them to your colleagues in New York, like I did. Whatever you do, the next time you see candy corn, think of them for their versatility.
